Example: marketing
Universal Serial Bus (USB)
Human interface Data glove 2.1 Scope This document describes the Human Interface Device (HID) class for use with Universal Serial Bus (USB). Concepts from the USB Specification are used but not explained in this document. The HID class consists primarily of devices that are used by humans to control the operation of computer systems.
Tags:
Information
Domain:
Source:
Link to this page:
Documents from same domain
Universal Serial Bus (USB)
www.usb.orgii Universal Serial Bus HID Usage Tables Version 1.12 October 28, 2004 Contributors Brian M. Bates – ELO Touchsystems Robert Dezmelyk – LCS/Telegraphics

Template
www.usb.org2 HID Sensor Usages period. The Chair may designate a substitute for the absent voter and extend the voting period if necessary. Summary

USB 3.0 Link Layer Test Specification
www.usb.orgUniversal Serial Bus 3.1 Link Layer Test Specification Date: January 2, 2018 Revision: 0.94
PRESS RELEASE CONTACTS: Brad Saunders Liz …
www.usb.orgBusiness Division, Renesas Electronics Corporation. "As a USB Promoter Group member for the last 20 years, Renesas believes …

USB Battery Charging 1.2 Compliance Plan rev 1
www.usb.orgUSB Battery Charging 1.2 Compliance Plan Revision 1.0 2 Contributors Mark Lai Allion Test Labs Sammy Mbanta Astec Power Abel Astley Broadcom
USB 3.0* Radio Frequency Interference Impact on …
www.usb.orgDocument: 327216-001 USB 3.0* Radio Frequency Interference Impact on 2.4 GHz Wireless Devices White Paper April 2012

E-Marker Testing Rev1.1 - USB.org
www.usb.orgRequired Testing Practices: This section outlines specific testing practices required of the test engineer. 1. The test engineer shall run the E-Marker tests for all USB Type
USB3 Cables and Connectors Compliance Document
www.usb.orgUniversal Serial Bus 3.0 Connectors and Cable Assemblies Compliance Document Revision 1.0 Draft . October 20, 2010
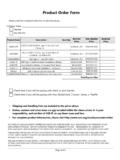
Product Order Form - Universal Serial Bus
www.usb.orgPage 1of 3 Product Order Form Please email the completed order form to admin@usb.org. Company Name: Member Non-Member Product …
USB Power Delivery Specification 1
www.usb.orgUSB Power Delivery – 1.0 Introduction USB-IF Copyright 2012 Summary • Power Delivery specification is available as . Title: PowerPoint Presentation Author: Saunders, Brad
Related documents
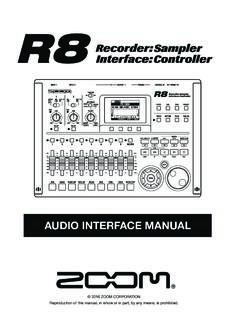
AUDIO INTERFACE MANUAL
zoomcorp.comAudio interface and control surface 2 R8 audio interface system requirements 4 ... 7 Press the “Apply” button. Choose the type of Cubase LE function from the Category pop-up menu. 2 Commands can be assigned using the three columns displayed on the right side of the window.
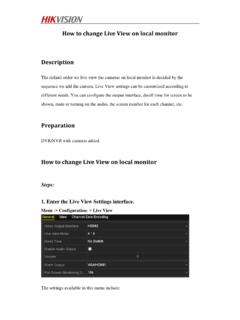
How to change Live View on local monitor Description
www.hikvision.comYou can click button to start live view for all the channels and click to stop all the live view. 3) Click the Apply button to save the setting. You can also click-and-drag the camera to the desired window on the live view interface to set the camera order.
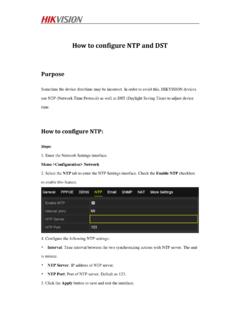
How to configure NTP and DST - Hikvision
www.hikvision.comClick the Apply button to save and exit the interface. 6. Or configure it via web browser in the interface below. Note: The time synchronization interval can be set from1 to 10080min, and the default value is 60min. If the NVR is connected to a public network, you should use a …

Web Interface Quick Start Guide - SnapAV
www.snapav.comWeb Interface Quick Start Guide. 2 Read this page before you go to the job site! ... and that the unit is powered up, then click the Refresh button. Click on the entry for your NVR to view its details. If the NVR is inactive, use the text boxes at the lower right of
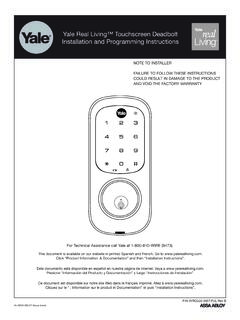
Yale Real Living™ Touchscreen Deadbolt Installation and ...
us.yalehome.comto access the reset button. 2. The reset button (see image at right) is located above the PCB cable connector. 3. Hold down the reset button for a minimum of 3 seconds and then reinstall the batteries; once the batteries are properly installed, release the reset button. 4. Reassemble the lock by reversing the same steps on page 6.
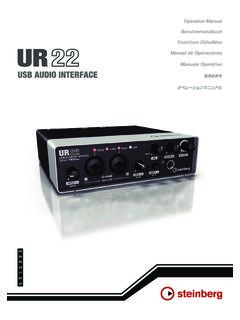
USB AUDIO INTERFACE - download.steinberg.net
download.steinberg.netInterface. The UR22 neatly integrates essential music production functionality into one compact, durable device. Although it is small and portable, the UR22 has been designed to deliver sound quality on a par with high-end models. A major contributor to that outstanding sound is the “D-PRE.” From parts selection to circuit design, every aspect