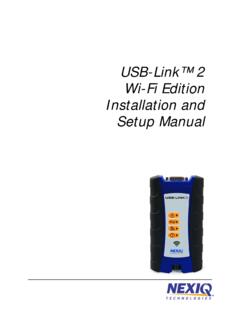
Transcription of USB-Link™ 2 Installation and Setup Manual - NEXIQ
1 USB-Link 2 Installation and Setup Manual USB-Link 2 IDSC Holdings LLC retains all ownership rights to USB-Link 2 and its documentation. The USB-Link 2 source code is a confidential trade secret of IDSC Holdings LLC. You may not decipher or de-compile USB-Link 2, develop source code for USB-Link 2, or knowingly allow others to do so. The USB-Link 2 and its documentation may not be sublicensed or transferred without the prior written consent of IDSC Holdings Manual , as well as the software it describes, is furnished under license and may only be used or copied in accordance with the terms of such license. The content of this Manual is furnished for informational use only, is subject to change without notice, and should not be construed as a commitment by IDSC Holdings LLC. IDSC Holdings LLC assumes no responsibility or liability for any errors or inaccuracies that may appear in this as permitted by such license, no part of this publication may be reproduced, or transmitted, in any form or by any means, electronic, mechanical, or otherwise, without the prior written permission of IDSC Holdings Technologies is a trademark of IDSC Holdings LLC.
2 2014 IDSC Holdings LLC. All rights reserved. All other marks are trademarks or registered trademarks of the respective holders. Pictures for illustration purposes only. Specifications are subject to change without device complies with Part 15 of the FCC Rules. Operation is subject to the following two conditions: (1) this device may not cause harmful interference, and (2) this device must accept any interference received, including interference that may cause undesired operation. This device contains FCC-ID in accordance to R&TTE directive transmitter module marked by CE product label , manufactured by MITSUMI incorporated to OEM No. 964059 Revised 10/20/2014 USB-Link Installation and Setup Manual iii Chapter 1: Introducing the USB-Link 2 ..1 Component Checklist ..2 Product Specifications ..3 System Requirements ..4 Communication Options: Wired vs Wireless ..5 Wired Connection ..5 Wireless Connection.
3 6 Chapter 2: Installation and Bluetooth Configuration ..7 Installation Process Outline ..8 Step 1: Install the Drivers and the Device Tester ..9 Installing the Drivers ..9 Installing the Device Tester ..16 Step 2: Choose Your Connection ..24 Wired Connection ..24 Wireless Connection ..24 Step 3: Install the Bluetooth Drivers ..25 Configure the Bluetooth Environment ..26 Chapter 3: Preparing to Use the USB-Link 2 .. 29 Step 4: Connect the USB-Link 2 to a Vehicle ..30 Making the Connection ..30 Wired Connection Using a USB Cable ..30 Wireless Connection ..31 Step 5: Pair the Device ..32 Step 6: Test the Connection to the Vehicle ..39 USB-Link 2 Installation and Setup Manual 11 Introducing the USB-Link 2 Component Checklist, page 2 Product Specifications, page 3 System Requirements, page 4 Communication Options: Wired vs Wireless, page 5 The USB-Link 2 is a hardware device that enables service bay personal computers ( , PCs and/or laptops) to retrieve vehicle information using either wireless Bluetooth technology or a more traditional cable connection.
4 Once configured, the USB-Link 2 interfaces with your PC, enabling you to use specific PC applications to perform vehicle chapter introduces the USB-Link 2 and provides details regarding the communication modes available to you to interface with your 2 Installation and Setup Manual Chapter 1 Introducing the USB-Link 2 Component ChecklistThe following components are included with your USB-Link 2. Be sure you have all of the following items before using the device: USB-Link 2 Vehicle Communication Interface (VCI) Automotive A to Mini-B USB Cable 6- and 9-pin Y Deutsch Adapter Carrying Case USB-Link 2 Quick Start Guide - Product SpecificationsUSB-Link 2 Installation and Setup Manual 3 Product SpecificationsThe USB-Link 2 is configured with the following specifications:FeatureDataPhysical " x " x " (171 mm x 95 mm x 27 mm)Weight8 oz. ( kg)Power Requirements6 - 32 VDC @ 350 mA maximumOperating Temperature0 to +70 CAPI DriverTMC RP1210A, RP1210B, and RP1210C compliantSAE J2534 compliantVehicle Protocols Supported J1708/J1587 J1939 (250K, 500K, or 1 MB) CAN (125K, 250K, 500K, 1 MB) (3 CAN channels supported) J2284 CAN (125K, 250K, or 500K) ATEC-160 Baud ALDL Pass-through ALDL 8192 ALDL 9600 OBDII ISO 9141 ISO 14230 (KWP2000) ISO 15765 J1850 (PWM, VPM, or Allison) J1939 Auto Baud IESCAN (required for Allison)USB CommunicationUSB Device, version CommunicationBluetooth Class 1 adapter (up to 100 m range)Wired CommunicationAutomotive A to Mini-B USB cable 15 ft.
5 (5 m) maximumVehicle ConnectorDB26 FUSB ConnectorMini jack4 USB-Link 2 Installation and Setup Manual Chapter 1 Introducing the USB-Link 2 System RequirementsBe aware of the following system requirements:ComponentRequirementIBM PC-compatible computer 1 GHz processor or more RAM: 256MB or more (512MB recommended) USB port, version or higherOperating system Windows 7 Windows 8 Note: USB-Link 2 drivers support the Windows 8 operating system. However, not all OEM PC applications work with Windows adapter(sold separately) Bluetooth serial port capability - Communication Options: Wired vs WirelessUSB-Link 2 Installation and Setup Manual 5 Communication Options: Wired vs WirelessPrior to using the USB-Link 2, you need to decide how you want the unit to com-municate with your PC. There are two options: A wired connection to the PC using a USB cable (pg. 5)or A wireless connection to the PC using Buletooth (pg. 6)Wired ConnectionA wired connection provides the advantage of faster data throughput.
6 For that reason, using a USB connection to the PC is highly recommended when diagnos-ing heavily-loaded CAN/J1939 buses. By nature, Bluetooth has less bandwidth than USB, which can result in dropped messages in situations requiring high bandwidth. IMPORTANT: ECU reprogramming typically requires both high throughput and critical timing, and should always use a USB-to-PC wired communication between the USB-Link 2 and your PC requires an auto-motive A to Mini-B USB cable (shipped with the USB-Link 2).Figure Automotive A to Mini-B USB CableNOTE:iFor detailed instructions on making a wired connection, refer to Step 4: Connect the USB-Link 2 to a Vehicle, later in Chapter 3 of this 2 Installation and Setup Manual Chapter 1 Introducing the USB-Link 2 Wireless ConnectionWireless connectivity provides untethered operation, and that s a bonus in a busy service bay. The USB-Link 2 uses Bluetooth wireless technology to provide wireless communication between the USB-Link 2 and your USB-Link 2 is intended for diagnostic use, for example, retrieving trouble codes.
7 By nature, Bluetooth wireless technology has limited bandwidth and latency when compared to wired solutions. This may result in dropped messages in situations requiring high bandwidthNOTE:iThe USB-Link 2 does not support Integrated Bluetooth. If your PC has Integrated Bluetooth, your system has Bluetooth drivers installed and a built-in Bluetooth transceiver. You must uninstall Integrated Bluetooth and its Bluetooth drivers prior to proceeding with the USB-Link 2 instal-lation your PC does not have Integrated Bluetooth, then you are clear to proceed with the USB-Link 2 Installation process as documented in this Manual : Install Bluetooth drivers Install an external Bluetooth adapter Pair the device NOTE:iFor detailed information on installing Bluetooth drivers and configuring a basic Bluetooth environment, refer to Step 3: Install the Bluetooth Drivers in Chapter 2 of this Manual . For instructions on pairing the device, refer to Step 5: Pair the Device, in Chapter 3 of this 2 Installation and Setup Manual 72 Installation and Bluetooth Configuration Installation Process Outline, pg.
8 8 Step 1: Install the Drivers and the Device Tester, pg. 9 Installing the Drivers, pg. 9 Installing the Device Tester, pg. 16 Step 2: Choose Your Connection, pg. 24 Step 3: Install the Bluetooth Drivers, pg. 25 Configure the Bluetooth Environment, pg. 26 This chapter provides instructions for installing NEXIQ drivers and utilities, installing the required Bluetooth drivers, installing a Bluetooth adapter, and configuring a basic Bluetooth environment. 8 USB-Link 2 Installation and Setup Manual Chapter 2 Installation and Bluetooth ConfigurationInstallation Process OutlineStep 1:Install the USB-Link 2 drivers and the Device Tester (pg. 9). Step 2:Choose your connection (wired or wireless) (pg. 24). If you chose a wired connection, move on to complete steps 4 and 6 only. Step 3:Install the drivers for the Bluetooth adapter you are :iDepending on the Bluetooth adapter you have selected, you may also need to configure the Bluetooth environment (see Configure the Blue-tooth Environment on page 26 of this chapter).
9 Step 4:Connect the USB-Link 2 to the :iSteps 4 through 6 are described in Chapter 3 of this 5:Pair the Device:Step 6:Use the NEXIQ Device Tester to test the connection between the USB-Link 2 and the vehicle. NOTE:iIf you have questions about using this product, contact NEXIQ Techni-cal Support at (800) 639-6774, or send us an e-mail at: - Step 1: Install the Drivers and the Device TesterUSB-Link 2 Installation and Setup Manual 9 Step 1: Install the Drivers and the Device TesterPrior to using the USB-Link 2, you have to install the necessary USB-Link 2 drivers and the NEXIQ Device Tester on your laptop or PC. The USB-Link 2 drivers are compatible with both Microsoft Windows 7 and Windows : Remember, you must have Administrator security rights and be logged in as Admin to successfully complete the Installation process outlined in this following procedure assumes that you have Internet the DriversTo install the drivers on your laptop or PC:1On your laptop or PC, navigate to the following NEXIQ Downloads2 From the USB-Link 2 Drivers section, select the latest version of the USB-Link 2 USB-Link 2 Installation and Setup Manual Chapter 2 Installation and Bluetooth Configuration3 Carefully read the End User License down to the bottom of the page and click on on the software title to begin the on Run ( if your browser is Internet Explorer ).
10 NOTE:iDepending on your Internet browser (for example Google Chrome, or Firefox ), you may have to locate the file ( , ) from your Recent Downloads, and then double-click on it to run Welcome to USB-Link 2 Setup screen is Welcome to USB-Link 2 Setup Screen7 Read the information displayed on the screen, and click Next. - Step 1: Install the Drivers and the Device TesterUSB-Link 2 Installation and Setup Manual 11 The License Agreement screen is License Agreement Screen8 Read all the information on this screen, then click I :iIf you do not agree to the terms, click Cancel. A message is displayed prompting you to confirm quitting USB-Link 2 Setup . Click Yes to USB-Link 2 Installation and Setup Manual Chapter 2 Installation and Bluetooth ConfigurationThe Choose Components screen is Choose Components ScreenYou can position your mouse over the component ( , USB-Link 2 Install) to view its Install. - Step 1: Install the Drivers and the Device TesterUSB-Link 2 Installation and Setup Manual 13 The following warning message is Warning Message10 Carefully read the warning message, and disconnect all RP1210 adapters to which to which your laptop or PC might be connected prior to proceeding with the :iYou must also exit the WVL2 Explorer utility if NEXIQ WVL2 drivers have been installed on your laptop or you have complied with the requirements of the warning message, click USB-Link 2 Installation and Setup Manual Chapter 2 Installation and Bluetooth ConfigurationThe following screen is 12 Wait briefly while the USB-Link 2 is installed.