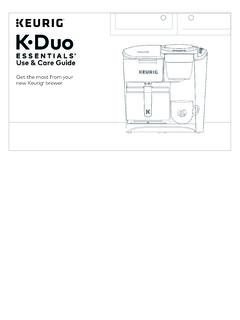
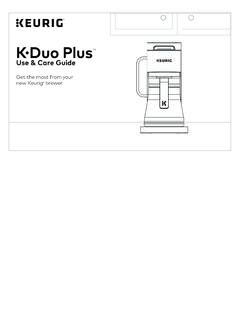
Transcription of Use & Care Guide
1 Get the most from your new Keurig brewerUse & Care GuideLATTECAPPCOLDK Caf Remove packing tape from brewer andremove frother from plastic bag. Plug intoa grounded a large mug (12oz minimum) on the drip the water reservoir lid, then lift the reservoir straight up to remove reservoir with fresh water and fill to theMAX fill line. Replace water reservoir, making sure the lock tab engages with the brewer. Replace : Do not use distilled water. Press power button the power light and AUTO OFF light will brewer will automatically begin heating the water. This will take about 3 minutes. Once the heating sound stops, the brewer is ready. Lift and lower the handle. Do not insert a K-Cup pod. The COFFEE and LATTE & CAPP buttons will blink.
2 Press the 6oz button, then press the blinking brew button to start a cleansing brew (the COFFEE button will illuminate). Pour the hot water into the sink. The one-time setup process is now complete and you are ready to brew!NOTE: Between brew cycles, the brewer may take about a minute to You BrewPlug & PlaceClean the Frother Rinse & FillPower OnCleansing BrewLATTECAPPCOLDDESCALEAUTO OFFADD WATERCOFFEELATTE & CAPPSTRONG1086oz12ozozozSHOTLATTECAPPCOL DSTRONG8OZ6OZ10OZ12 OZSTRONG8OZ6OZ10 OZRemove the lid and whisk from inside the frother. Wash the interior of the frother, lid, and whisk with warm, soapy water. Dry all parts thoroughly using a soft, non-abrasive cloth, and then : Frother and frother lid are top rack dishwasher safe.
3 Whisk should be placed in the utensil basket. If washing by hand, only use non-abrasive cleaning materials to prevent damage to the inner surface of the Your First Latte or CappuccinoFill FrotherTo make a Hot Latte or Hot Cappuccino:Remove lid and add chilled milk to the LATTE or CAPP line marked in the frother. Replace the lid and place frother on the frother base. Press the LATTE or CAPP button on the frother base. The frother will beep once and the button will illuminate while heating approximately 3 minutes. Frothing is complete when the frother beeps twice and the light on the LATTE or CAPP button is no longer : Having trouble frothing? We re here to help. Give us a call at 1-866-901-BREW (2739).NOTE: Do not under or overfill frother.
4 Do not operate before adding milk. CAPP line = minimum fill LATTE line = maximum fillCAUTION: Frother is not microwave make an Iced Latte or Iced Cappuccino:Remove lid and add chilled milk to the LATTE or CAPP line marked in the frother. Replace the lid and place frother onthe frother base. Press the COLD button followed by the LATTE or CAPP button. The frother will beep once and both buttons will illuminate while the milkis frothing approximately 3 is complete when the frother beeps twice and the light on the COLD and LATTE or CAPP buttons are nolonger illuminated. NOTE: Do not under or overfill frother. Do not operate before adding milk. CAPP line = minimum fill LATTE line = maximum fillCAUTION: Frother is not microwave Mug & PodPlace a mug on the drip tray plate.
5 Lift the handle and place any K-Cup pod in the K-Cup pod holder. Lower the handle completely to close the lid. Do not remove the foil lid on the K-Cup make an iced latte or iced cappuccino, fill a 16oz plastic cup half way with ice, then follow instructions : For iced beverages, only use a plastic cup, do not use COFFEE and LATTE & CAPP buttons will blink. Press the LATTE & CAPP button - the SHOT button and STRONG button will illuminate. Press the blinking brew button. The LATTE & CAPP, SHOT, STRONG, and brew button will all remain illuminated while brewing about 1 minute. Brewing is complete when the buttons are no longer illuminated. Lift the handle and dispose of the used K-Cup pod. The brewer will be ready to brew another cup in about a : After 60 seconds, the brew button will be disabled.
6 To re-activate, lift and lower the handle completely. CAUTION: While brewing, there is extremely hot water in the K-Cup pod holder. To avoid injury, do not lift the handle during the brewing the frother from the base. Remove the lid and pour the frothed milk over your shot of coffee. NOTE: Clean frother immediately after use. For cleaning instructions , see Caring for your Brewer section in this a ShotCreate Your CoffeehouseBeverage2 The COFFEE and LATTE & CAPP buttonswill blink. Press the COFFEE button. The4 cup sizes will blink. Select your cup size for bolder coffee, press the STRONG button before selecting your cup size. Press the blinking brew button. The COFFEE, STRONG (if selected), cup size, and brew button will all remain illuminated while brewing about1 minute.
7 Brewing is complete when the buttons are no longer illuminated. Lift the handle and dispose of the used K-Cup pod. The brewer will be ready to brew another cup in about a : After 60 seconds, the brew buttons will be disabled. To re-activate, lift and lower the handle completely. CAUTION: While brewing, there is extremely hot water in the K-Cup pod holder. To avoid injury, do not lift the handle during the brewing & Enjoy!1 Brew Your First CoffeePlace a mug on the drip tray. If usinga travel mug, remove the drip tray and place the mug on the drip tray base. Lift the handle and place a K-Cup pod in the K-Cup pod holder. Lower the handle completely to close the not remove the foil lid on the K-Cup pod.
8 High Altitude Brewing: While holding the brewer handle up, push down slowly on the K-Cup pod in the pod holder until the bottom of the K-Cup podis punctured by the exit Mug & PodBrewer FeaturesFrother froths milk to create your favorite latte or button brews a shot of coffee to make full-flavored, delicious lattes and button for cold frothed milk to create iced lattes and iced Brew increases your coffee strength and intensity. For bolder coffee, press the STRONG Start heats then brews in one simple process. No need to wait for the brewer to heat before selecting cup size. Power on your brewer, place mug, insert a K-Cup pod, and lower the handle. Then, select your cup size and press the brew button.
9 The brewer will heat, then automatically begin Off automatically turns your brewer off 2 hours after the last brew for energy disable the Auto Off feature:1. Power the brewer off while it is plugged Press and hold the STRONG and the 10oz buttons for 3 seconds the Auto Off light will turn Power the brewer on the Auto Off light will no longer be enable the Auto Off feature, repeat steps 1-3. The Auto Off light will illuminate. High Altitude Brewing: To ensure your brewer works properly at higher altitudes (5,000 feet) please follow these brewing instructions and enable the High Altitude Brewing Mode on your instructions - While holding the brewer handle up, push down slowly on the K-Cup pod in the pod holder until the bottom of the K-Cup pod is punctured by the exit enable High Altitude Brewing Mode:1.
10 Power the brewer off while it is plugged Press and hold the STRONG and 8oz buttons for 3 seconds- both lights will blink 3 times to confirm that the High Altitude Brewing Mode has been disable High Altitude Brewing Mode:1. Power the brewer off while it is plugged Press and hold the STRONG and 8oz buttons until the lights are no longer OFFDESCALEADD WATERCOFFEESHOTLATTE & CAPPSTRONG8OZ6OZ10OZ12OZ1 LATTECAPPCOLD2 BREWBUTTONAUTO OFFDESCALEADD WATERCOFFEESHOTLATTE & CAPPSTRONG8OZ6OZ10OZ12OZ4 BREWBUTTON123(OPTIONAL)Caring For Your BrewerK-Cup Pod HolderTo remove the K-Cup pod holder from the brewer, lift the handle and grasp the top of the K-Cup pod holder with one hand while pushing up on the bottom of the K-Cup pod holder from underneath with the other until it releases.