Transcription of USER MANUAL - TicketSource
1 THERMAL TICKET PRINT SERVERUSER MANUAL1. Configuring your thermal ticket printer Dymo labelwriter series printer set up Star TSP series printer set up Citizen CL series printer setup2. Configuring the print server softwareIntroductionThe TicketSource thermal ticket print server is a companion product to the TicketSource easy-to-use software provides functionality for printing thermal tickets booked using the TicketSource website directly to a thermal ticket printer connected to your TicketSource thermal ticket print server is designed to operate on systems running Microsoft Windows 7, Windows 8 or Windows 10 and requires an available Internet connection when in you startBefore installing the TicketSource thermal ticket print server.
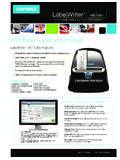
2 You will need to install and configure your thermal ticket printer and its printer driver to be used with the print server, as per the manufacturer s note that due to the nature and wide of variety of thermal ticket printers available, we are unable to provide technical support on individual thermal printer installations. You can test your thermal ticket printer s successful installation by using the Print Test Page option in the Printer dialog of the Windows Control ensure you have installed the DYMO labelwriter printer driver from the CD supplied with the printer and then connected the printer to your computer before following the configuration steps Open Devices and Printers from the Start Menu, Right click the DYMO labelwriter printer icon, On the pop-up menu.
3 Click Printing PreferencesTHERMAL TICKET PRINT SERVERDymo labelwriter series printer set up The DYMO labelwriter series set up instructions cover the labelwriter 300 and 400 series label the thermal card roll 1 With the printer plugged in, press the form-feed button to eject the labels that protected the printer during Open the top cover and remove any packing material inside the label Remove the spool from inside the cover and separate the spool guide from the Hold the spool spindle in your left hand and place the card roll on the spindle so that the cards feed from underneath and the left edge of the card roll is firmly against the side of the Slide the spool guide onto the right side of the spool and press the guide tightly against the side of the card roll.
4 Leaving no gap between the roll and the To ensure proper feeding of cards during printing, the card roll must fit snugly against both sides of the card spool, with no Insert the card spool into the slot in the printer cover with the cards extending from underneath the Align the left edge of the card with the left edge of the card feed slot and insert the card into the slot. The printer automatically feeds the cards, stopping at the beginning of the first card. If the printer does not feed the cards, make sure the first card is fully inserted and then press the form-feed Slide the card guide to the left until the card guide aligns with the right edge of the Carefully lower the top 1 - click the buttonStep 2 - set the paper size option to Continuous.
5 Wide and click OK Configuring the printer2 THERMAL TICKET PRINT SERVERStar TSP series printer set up The Star TSP series set up instructions cover the TSP-700 receipt the receipt roll inside your Star TSP-700 receipt printer and feed a small section of the receiptroll out of the printer. Close the printer ensure you have installed the Star TSP printer driver before following theconfiguration steps Open Devices and Printers from the Start Menu, Right click the Star TSP printer icon, On the pop-up menu, click Printing PreferencesConfiguring the printerStep 1 - click the buttonStep 2 Set Paper Size to 80mm x Receipt , Set Print quality to 203 x 406 dots per inch , Click OK.
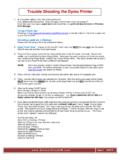
6 Step 3 Open Devices and Printers from the Start Menu, Right click the Star TSP printer icon, On the pop-up menu, click Printer Properties, Click the Device Settings tab, Set Friction to 80mm x Receipt , Set Paper Cut > Page Bottom to Partial Cut , Set Paper Cut > Document Bottom to Full Cut , Set Print Speed to Middle for best quality results, Set Print Density to Standard , Click OK .3 THERMAL TICKET PRINT SERVERC itizen CL series printer set up The Citizen CL series set up instructions cover the CL-P521, CL-S521 and CL-S531 thermal ticket you re having difficulties installing the Windows printer driver for the Citizen CL series printer then the latest driver can be downloaded and installed from: Citizen CL series thermal ticket printers are usually shipped with the feed sensor set to transparent mode.
7 Tickets with a black index mark on the reverse ( most fan-fold tickets) require the feed sensor to operate in reflective mode. The feed sensor can be changed from transparent to reflective mode by using a combination of the buttons on the front of the the feed sensor to reflective mode Enter the feed sensor adjustment mode by turning the power on while holding down the PAUSE, FEED and STOP buttons. Release the buttons when the CONDITION LED lights up. To toggle the feed sensor between 'transparent' and 'reflective' mode, hold down the MODE/REPEAT button and press the STOP button: reflective mode: the buzzer will sound twice and the PRINT LED will flash slowly transparent mode: the buzzer will sound once and the PRINT LED will light up constantly, With the feed sensor set to 'reflective' mode, release the MODE/REPEAT button and press the STOP button to exit the sensor adjustment mode.
8 Adjusting the feed sensorAdjust the position of the feed sensor so that the eye of the sensor is about half way across the black mark on the back of the ticket. Inserting the fan-fold ticketsFeed the fan-fold tickets through the back of the printer - front side upwards, blank index mark on reverse pointing forwards - and position to the left. Move the ticket guide to meet the tickets. Close the print-assembly. Set both adjustment wheels to 6 .Switch on and press the feed button. The printer should feed just one ticket. If the printer feeds several tickets, either the feed sensor is not positioned correctly (missing the black index mark on the back of the ticket) or the feed sensor is not set to reflective mode.
9 Feed sensorticket guide4 Install the Citizen CLP-521, CLS-521 and CLS-531 Windows printer driver before following the configuration steps (Please note: the stock dimensions detailed below relate to unbranded thermal ticket stock supplied by TicketSource . If you are using your own thermal ticket stock, you will need to measure and provide its dimensions accordingly) Open Devices and Printers from the Start Menu, Right click the printer you want to change, On the pop-up menu, click Printing PreferencesTHERMAL TICKET PRINT SERVERC itizen CL series printer set up Step 1: Create a new stock size for the printer by clicking the button in the Stock sectionStep 2 - setting the stock dimensions.
10 Provide a descriptive name for the stock, enter the stock dimensions width x height, exposed liner width left and right , click OK and click Apply Step 3 - setting the stock orientation: Ensure the Orientation is set to Portrait and click Apply (if applicable) Step 4 - setting the ticket cutter: Click the Stock tab and set the Post-Print Action to Cut and the Occurrence option to After Job 5 THERMAL TICKET PRINT SERVERC itizen CL series printer set up Step 5 for Unbranded thermal ticket stock - setting the ticket cutter: Set the Start Offset to and the Stop Offset.