Transcription of USG DUROCK BRAND CEMENT Installation Guide
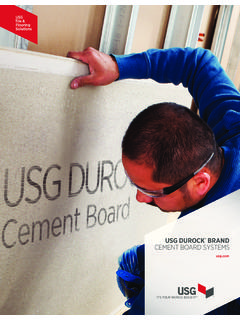
1 USG DUROCK BRAND CEMENT BOARD WITH EDGEGUARD Installation GuideUSG Tile & Flooring SolutionsUSG DUROCK BRAND CEMENT BOARD WITH EDGEGUARD For more than 30 years, USG DUROCK BRAND CEMENT Board has set the standard for proven performance in the backerboard category. The new USG DUROCK BRAND CEMENT Board with EdgeGuard offers enhanced, proprietary edge performance and minimizes spin-out and crumbling. USG DUROCK BRAND CEMENT Board with EdgeGuard installs quickly and easily, while maintaining the BRAND s tradition of quality and reliability. Benefits include: Enhanced edge performance Easy to cut and fasten Water durable and mold resistant Exceptional tile bond Noncombustible Warranted for interior and exterior applicationWater durable and mold resistant, with better tile bond than fiber- CEMENT boards or bare plywood, USG DUROCK BRAND CEMENT Board with EdgeGuard CEMENT board is an outstanding backerboard for a wide variety of reasons.
2 Choose this high-performance alternative to fiber- CEMENT boards or bare plywood surfaces for:Superior Tile Bond Prevents tile pops and grout cracks, up to 40% greater tile bond than fiber- CEMENT Strength of Portland CementWill not swell, soften, rot, warp, delaminate or disintegrate if exposed to water. Noncombustible. Backed by a 30-year limited Mold Resistance Receives rating of 0 for no mold growth as tested per ASTM G21. Scores a 10 out of 10 on ASTM YOU LL NEEDF loors thickness 1/4 in. (6 mm), 1/2 in. ( mm), 5/8 in. (16 mm) Subfloor should be minimum 5/8 in. (16 mm). APA span-rated plywood or OSB with an Exposure 1 classification or 1/4 in.
3 (6 mm), 1/2 in. ( mm), 5/8 in. (16 mm) thickness Minimum 3/4 in. (19 mm). APA span-rated plywood or OSB with an Exposure 1 classification or base with USG DUROCK BRAND Tile Membrane, 15 lb. ( kg) felt or 4-mil polyethylene and attach with 1/4 in. (6 mm) galvanized and Ceilings 1/2 in. ( mm) and 5/8 in. (16 mm) thickness only Maximum stud spacing: 16 in. (406 mm) Maximum allowable deflection, based on stud properties only, L/360. Maximum fastener spacing: 8 in. (203 mm) for wood and steel framing; 6 in. (152 mm) for ceiling If waterproofing is desired, use USG DUROCK BRAND Waterproofing Membrane or USG DUROCK BRAND Liquid Waterproofing Membrane.
4 See USG DUROCK BRAND Waterproofing Membrane submittal sheet (CB595) or USG DUROCK BRAND Liquid Waterproofing Membrane submittal sheet (CB817) for product USG DUROCK BRAND CEMENT Board with EdgeGuard panels should be cut to size with a knife and straightedge. A power saw should be used only if it is equipped with a dust collection device. Always wear a NIOSH/MSHA-approved mask and eye protection when cutting USG DUROCK BRAND panels. Utility knife: Using a straightedge, score panel face with utility knife and cut through glass-fiber reinforcing mesh, then snap and cut backside mesh to break cleanly. Use a rasp to smooth any rough edges.
5 Power saw: Use a low-RPM portable saw with 3-1/2 in. (89 mm) carbide-tipped blade. To make cutouts for pipes and fixtures, use utility knife to cut through mesh on both sides of panel and punch out with a hammer from back side. Or, use an electric drill with a hole-saw : Dust can contain silica. Prolonged breathing can cause lung damage and cancer. See SDS for more : USG DUROCK CEMENT Board with EdgeGuard has a rough side and a smooth side. The smooth side is ideal for mastic applications, as it increases adhesive coverage. The rough side is ideal for mortar applications, as it enhances bonding and reduces tile slip.
6 However, mastic or thin-set mortar can be used on either side of the board without compromising Installation 1/4 in. (6 mm), 1/2 in. ( mm), 5/8 in. (16 mm)POSITIONING Fit ends and edges of panels closely but not forced together, maintaining 1/4 in. (6 mm). space between panels and perimeter walls. Stagger joints a minimum 16 in. (406 mm) so four corners never meet. Offset panel joints a minimum 8 in. (203 mm) from subfloor in. gapcutedgefactory edgesunderlaymentsubfloorLEVELING BED Apply Type 1 organic adhesive with 5/32 in. (5 mm) v-notched trowel, latex-fortified mortar with 1/4 in. (6 mm). square-notched trowel.
7 Comb out adhesive or mortar in straight, parallel rows (as shown below) and immediately cover with panel. Adhere panels to subfloor, one panel at a Secure panels while adhesive is still wet. Space fasteners 8 in. (203 mm) around the perimeter and in the field of the framing and countertops: fasten with 1-1/2 in. (38 mm) 11-gauge hot-dipped galvanized roofing nails, or 1-1/4 in. (32 mm) USG DUROCK BRAND Tile Backer Screws for wood framing or Fill joints with latex-fortified mortar or Type 1 organic adhesive and immediately embed alkali-resistant, fiberglass mesh joint Tile or almost any flooring material.**Not for use with vinyl Installation 1/4 in.
8 (6 mm), 1/2 in. ( mm), 5/8 in. (16 mm)Cover plywood base with USG DUROCK BRAND Tile Membrane, 15 lb. ( kg) felt or 4-mil polyethylene and attach with 1/4 in. (6 mm) galvanized Fit ends and edges of panels closely but not forced together. Stagger panel joints from plywood base Space fasteners 8 in. (203 mm) around the perimeter and in the field of the Fill joints with latex-fortified mortar or Type 1 organic adhesive and immediately embed alkali-resistant, fiberglass mesh joint Install : Because CEMENT board fasteners may protrude through the plywood base when 1/4 in. (6 mm) CEMENT board is used, 1/2 in. ( mm) or 5/8 in.
9 (16 mm) CEMENT board is preferred in this & Ceiling Installation 1/2 in. ( mm) & 5/8 in. (16 mm) onlyFASTENING Fasten to studs spaced 16 in. (406 mm) Space fasteners 8 in. (203 mm) for walls, 6 in. (152 mm) for ceilings. Fit ends and edges of panels closely but not forced together. Wood framing: 1-1/2 in. (38 mm) hot-dipped galvanized roofing nails or 1-1/4 in. (32 mm). USG DUROCK BRAND Tile Backer Screws for wood framing or equivalent. Steel framing: 1-1/4 in. (32 mm) USG DUROCK BRAND Tile Backer Screws for steel framing or Fill joints with latex-fortified mortar or Type 1 organic adhesive and immediately embed alkali-resistant, fiberglass mesh joint Place a 1/4 in.
10 (6 mm) spacer strip or shim around lip of bathtub or shower pan to hold bottom edge of panel off the Install SA932EG for finishing recommendations to nontiled CEMENT Your Tile Installation 1/4 in. (6 mm), 1/2 in. ( mm), 5/8 in. (16 mm) POSITIONING Where tile will not cover entire wall surface, such as above tub and shower surrounds, determine where you want the tile to end and draw a level line at this height. Be sure to allow for height of tile cap, if of tilecapcutcutcutfloor levelOn walls where tile will reach the floor, determine whether floor is level by measuring distance to desired tile height on both sides of area to be tiled.