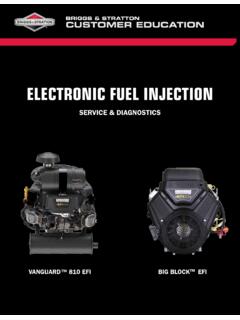
Transcription of VANGUARD™ 810 EFI BIG BLOCKTM EFI - Mud Buddy
1 SERVICE & DIAGNOSTICSBIG BLOCKTM EFIVANGUARD 810 EFIELECTRONIC FUEL INJECTIONBRIGGS & STRATTONCUSTOMER EDUCATIONC ontents ContentsSection 1 General InformationCaution 2 common 3 Wire color Abbreviations .. 4 General Diagnostic 5-8 Mil Blink Diagnostic Trouble Codes .. 6On-Board Diagnostic (OBD) System Check 6 Scanning for Diagnostic Trouble Codes .. 6-8 Tools Needed .. 9 Service Precautions .. 10 General Circuit testing .. 11-12 Troubleshooting with a DVOM .. 12 Troubleshooting with a Test 12 Troubleshooting with a Noid 13-14 Model 490000 Component 16 Model 610000 Component 17 Fuel and Air Metering System Section 2 Fuel Supply Components.
2 2-3 ECM Modes of Operation .. 2 Closed Loop Control .. 2 Fuel Pressure Relief 4 Fuel Rail 5 Fuel Injectors .. 6 Diaphragm Lift Pump Model 490000 .. 7-8 Electric Lift pump for Model 610000 .. 9-10 Fuel Pump 11 Throttle Body Assembly .. 12 Fuel Flow 13-14 Section 3 Diagnostic Trouble CodesECM Connector Pin-Out .. 2-3 EFI System Diagram Model 490000 .. 4-5 Model 490000 Engine to Chassis diagrams 6-7 EFI System Diagram Model 61 8-9 Model 610000 Engine to Chassis diagram 10 Fuse/Relay box component locations .. 11 Diagnostic Trouble Codes List .. 12 Verifying the ECM is Powering Up .. 13 Section 3a Diagnostic Trouble CodesNon-Scan DiagnosticsOxygen Sensor Heater P0031 2-3 Manifold Absolute Pressure Sensor P0107 4-6 Manifold Air Temperature Sensor P0112/P0113 .. 7-9 Engine Head Temperature Sensor P0117 10-12 Throttle Position Sensor 490000 P0122 13-15 Throttle Position Sensor 610000 P0122 16-18 Oxygen Sensor P0131 19-21PE System Lean 22 Fuel Injector A and B P0201 23-24 Fuel Pump Relay 490000 P0230 25-26 Fuel Pump Relay 610000 P0230 27-31 Crank Position Sensor P0336 32-33 Ignition Coil A and B P0351/P0352.
3 34-35 Idle Air Control 36-37 System Voltage P0562 38-39 Malfunction Indicator Lamp 40-41 Section 3b Diagnostic Trouble CodesScan DiagnosticsOxygen Sensor Heater P0031 2-4 Manifold Absolute Pressure Sensor P0107 5-7 Manifold Air Temperature Sensor P0112/P0113 .. 8-10 Engine Head Temperature Sensor P0117 11-13 Throttle Position Sensor 490000 P0122 14-16 Throttle Position Sensor 610000 P0122 17-19 Oxygen Sensor P0131 20-22PE System Lean 23 Fuel Injector A and B P0201 24-25 Fuel Pump Relay 490000 P0230 26-27 Fuel Pump Relay 610000 P0230 28-30 Crank Position Sensor P0336 31-32 Ignition Coil A and B P0351 33-34 Idle Air Control 35-36 System Voltage P0562 37-38 Malfunction Indicator Lamp 39-40 ContentsContentsSection 4 SymptomsIntroduction to Symptoms.
4 2 Engine will NOT 3 Engine Cranks But Will NOT Start .. 4-5 Hard Start Symptoms .. 6-7 Engine Has Low Power 8-9 Engine Hunting and Surging .. 10-11 Possible Symptoms with ECM Connectors 12-13 General Information Section 1 - 1 ContentsSection 1 General InformationCaution 2 common 3 Wire color Abbreviations .. 4 General Diagnostic 5-8 Mil Blink Diagnostic Trouble Codes .. 6On-Board Diagnostic (OBD) System Check 6 Scanning for Diagnostic Trouble Codes .. 6-8 Tools Needed .. 9 Service Precautions .. 10 General Circuit testing .. 11-12 Troubleshooting with a DVOM .. 12 Troubleshooting with a Test 12 Troubleshooting with a Noid 13-14 Model 490000 Component 16 Model 610000 Component 17 Section 1 - 2 General Information CAUTIONTo reduce the chance of personal injury and/or property damage, the following instructions must be carefully service and repair are important to the safety of the service technician and the safe, reli-able operation of all Electronic Fuel Injection (EFI) equipped engines.
5 If part replacement is nec-essary, the part must be replaced with one of the same part number or with an equivalent part. Do not use a replacement part of lesser service procedures recommended and described in this service manual are effective meth-ods of performing service and repair. Some of these procedures require the use of tools specifi-cally designed for the , anyone who intends to use a replacement part, service procedure, or tool which is not recommended by the manufacturer, must first determine that neither his safety nor the safe operation of the unit will be jeopardized by the replacement part, service procedure or tool se-lected. It is important to note that this manual contains various Cautions and Notices that must be care-fully observed in order to reduce the risk of personal injury during service or repair, or the possi-bility that improper service or repair may damage the unit or render it unsafe. It is also important to understand that these Cautions and Notices are not exhaustive, because it is impossible to warn of all the possible hazardous consequences that might result from failure to follow these information, illustrations and specifications contained in this manual are based on the latest product information available at the time of publication approval.
6 The right is reserved to make changes at any time without Information Section 1 - 3 BARO - BAROMETRIC PRESSUREBAT - BATTERY, BATTERY POSITIVE TERMINAL, BATTERY OR SYSTEM VOLTAGEB+ - BATTERY POSITIVECAN - CONTROLLER AREA NETWORKCKT - CIRCUITCONN - CONNECTORCYL - CYLINDERDEG - DEGREESDIAG - DIAGNOSTICDLC - DATA LINK CONNECTORDTC - DIAGNOSTIC TROUBLE CODEDVOM - DIGITAL VOLT OHMMETERECM - ENGINE CONTROL MODULEEHT - ENGINE HEAD TEMPERATURE SENSOREI - ELECTRONIC IGNITIONEFI - ELECTRONIC FUEL INJECTIONEMI - ELECTROMAGNETIC INTER- FERENCEENG - ENGINEEOP - ENGINE OIL PRESSUREEST - ELECTRONIC SPARK TIMINGE-STOP- EMERGENCY STOPFMI - FAILURE MODE INDICATORGND - GROUNDGOV - GOVERNORGPH - GALLONS PER HOURO2 - HEATED OXYGEN SENSORHG - INCHES OF MERCURYIAC - IDLE AIR CONTROLIC - IGNITION CONTROLIGN - IGNITIONINJ - INJECTORI/O - INPUT/OUTPUTkPa - KILOPASCALKV - KILOVOLTSMAP - MANIFOLD ABSOLUTE
7 PRESSUREMAT - MANIFOLD AIR TEMPERATUREMFI - MULTIPORT FUEL INJECTIONMIL - MALFUNCTION INDICATOR LAMPMSEC - MILLISECONDMPR - MAIN POWER RELAYN/C - NORMALLY CLOSEDN/O - NORMALLY OPENOBD - ON-BOARD DIAGNOSTIC OPT - OPTIONALPWM - PULSE WIDTH MODULATIONRAM - RANDOM ACCESS MEMORYREF HI - REFERENCE HIGHREF LO - REFERENCE LOWROM - READ ONLY MEMORYSPN - SUSPECT PARAMETER NUMBERSW - SWITCHTAC - THROTTLE ACTUATOR CONTROLTACH - TACHOMETERTERM - TERMINALTP - THROTTLE POSITIONTPS - THROTTLE POSITION SENSORV - VOLTSVAC - VACUUMWOT - WIDE OPEN THROTTLEC ommon Abbreviations Section 1 - 4 General InformationABBREVIATION MAIN COLOR TRACER COLORBLK - BLACK BLK/WHT - BLACK / WHITEBLU - BLUE BLU/BRN - BLUE / BROWNBLU/YEL - BLUE / YELLOWBRN - BROWN GRN - GREEN GRN/WHT - GREEN / WHITEGRY - GREY GRY/BLK - GREY / - LIGHT BLUE - LIGHT BLUE / - LIGHT BLUE / - LIGHT GREEN ORG - ORANGE ORG/BLK - ORANGE / BLACKORG/WHT - ORANGE / WHITEPNK - PINK PNK/BLK - PINK / BLACKRED - RED RED/WHT - RED / WHITETAN - TAN TAN/BLK - TAN / BLACKVIO - VIOLET VIO/BLK - VIOLET / BLACKVIO/WHT - VIOLET / WHITEWHT - WHITE WHT/GRN - WHITE / GRNWHT/RED - WHITE / REDYEL - YELLOW Wire Color AbbreviationsGeneral Information Section 1 - 5 Engine Control Module (ECM) Self- Diag-nosticsThe Engine Control Module (ECM) performs a continuous self diagnosis on certain control functions.
8 This diagnostic capability is comple-mented by the diagnostic procedures con-tained in this manual. The ECM s language for communicating the source of a malfunction is a system of Diagnostic Trouble Codes (DTC s). When a malfunction is detected by the ECM, a DTC is set and the Malfunction Indicator Lamp (MIL) is Indicator Lamp (MIL)The Malfunction Indicator Lamp (MIL) is de-signed to alert the operator that a problem has occurred and that the equipment should be taken for service as soon as reasonably possible. As a bulb and system check, the light will come ON with the key ON, engine OFF. When the engine is started, the light will turn OFF. If the light remains ON, the self-diagnostic system has detected a prob-lem. If the problem goes away, the light will go out in most cases after 10 seconds, but a DTC will remain stored in the ECM. When the light remains ON while the engine is running, or when a malfunction is suspected due to an operational problem, the On-Board Diagnostic (OBD) System Check must be performed as the first step.
9 These checks will expose mal-functions which may not be detected if other diagnostics are performed Trouble Codes DTC sThe Engine Control Module (ECM) monitors all engine operations against preset calibrated limits. When a component goes outside of its calibrated limits the ECM sets a DTC. The DTC will be stored in the ECM and the Mal-function Indicator Lamp (MIL) will illuminate. If the component goes back into it s normal operation window the MIL will shut off but the DTC will still be stored in the ECM under DTC history until it is cleared. If the MIL stays il-luminated it indicates a current malfunction in the EFI system and should be serviced imme-diately. Reading DTC s using only the MIL blink activate the MIL blink code follow these Verify the battery is above Turn off the key switch for 10 Turn the key ON then OFF, ON then OFF, Then back to the ON position but do not start the engine. Each On then OFF se-quence must be done with less then seconds in between.
10 4. If the steps are followed correctly the MIL will begin to blink or flash a series of times. Each series of flashes represents a number. Count the number of blinks and this will give you the Diagnostic Trouble Code(s) that have been set. The DTC(s) that are in the ECM s memory current and history will : It is a good technique to write the num-bers down after each series has The DTC s are four numbers long. There is a 1 second pause in between each MIL blink series. Four series of flashes will give you the four digit diagnostic trouble code. After the DTC(s) are blinked a two digit 61 will blink to indicate the DTC(s) have all been The code 61 will always be the last code to blink. If code 61 blinks immediately The ECM has not set any DTC s and the EFI system is operating Diagnostic AidsDiagnostic Trouble Code P0251 End Code 61 OOOOOOO=6=1 One second pauseThree second pauseOOOOOOOOOOOOOOOOOO=0=2=5=1 One second pauseExample of how to decipher the MIL blink codes with the end codeOne second pauseOne second pauseFigure 1-1 MIL blink code example.