Transcription of WeatherGuide™ Wireless Indoor/Outdoor Weather Station …
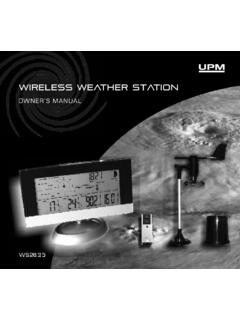
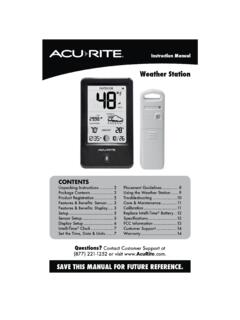
1 WeatherGuide Wireless Indoor/Outdoor Weather Station with hygrometer model 1731 Instruction manual Welcome to the Taylor WeatherGuide System. Simple, reliable, allows you to monitor indoor or outdoor locations from one room. The base unit reads indoor conditions, while the remote sensor wirelessly reports outdoor Weather conditions back to the base unit for an all-in-one Weather display. NOTE: Some units have a static cling label over the digital display. Please remove before use. BATTERY INSTALLATION The base unit operates on 2 AA batteries (not included). The remote sensor operates on 2 AAA batteries (not included). Replace the batteries if readings grow dim or irregular.
2 Always replace both batteries at the same time; do not mix old and new batteries. Do not mix alkaline, standard (carbon-zinc) or rechargeable (ni-cad, ni-mh, etc.) batteries. IMPORTANT: Power the base unit first, and then the remote sensor, otherwise the units transmissions may not properly connect. Place the base unit as close as possible to the remote sensor during set up. TIP: When the temperature falls below freezing point, alkaline batteries used in outdoor units may freeze, lowering their voltage supply and effective range. Use of Lithium batteries is recommended in extremely cold or hot locations. Base Unit Battery Power: The battery compartment is located on the back of the unit.
3 Remove the battery compartment door. Install (2) AA size batteries into the battery compartment according to the polarity markings. Replace the battery compartment door. Remote Sensor The battery compartment is located on the back of the unit. Remove the battery compartment cover. Install (2) AAA size batteries into the battery compartment according to the polarity markings. Replace the battery compartment door. After Powering Up the Units: When the base unit is powered up, it will beep and the LCD screen will light up. The base unit will begin to display indoor temperature and humidity. The outdoor temperature and humidity displays will show dashes (--) . Allow at least 3 minutes for the base unit to connect with the remote sensor and analyze current outdoor temperature conditions.
4 A radio antenna icon moves next to the Outdoor Sensor icon ( ) in the right side of the base unit s screen during this time. When the radio antenna icon is steady, the base unit has connected with the remote and is reporting the current outdoor temperature and humidity readings. If after 3 minutes the radio antenna icon stops moving and dashes remain, press and hold the - button on the back of the base unit to send another signal. For best setup connection, keep the base unit and remote close to each other while trying to connect. Keep away from other electronic equipment that may interfere with the connections, such as mobile phones, appliances, computers, refrigerators, TVs, etc.
5 Indoor temperature and humidity readings update on the base unit approximately every 60 seconds. The remote sensor transmits outdoor temperature and humidity readings to the base unit approximately every 57 seconds. Note: While the base unit is in analyzing mode, some functions (such as Clock Setting) may not be operational, or using the functions will interrupt the transmission reception. Once the analyzing mode is complete, the other functions will become operational. DISPLAYING YOUR WEATHERGUIDE Base unit Place the base unit indoors in a well-ventilated location away from direct sunlight. Remote sensor Table top place the sensor on a flat surface. Wall use the keyhole on the back of the remote to hang on a wall using a nail or screw (not included).
6 The transmission range of the remote sensor is 200 feet. The effective transmission range is vastly affected by obstacles such as walls, sheds, trees, etc. Try various set ups for the best results. Shorten the distance between the base and remote units when necessary. To get the most accurate readings and to prolong the life of your sensor, we recommend that you mount it out of direct sunlight and rain. Direct sunlight will heat the casing and inflate temperatures readings. Place the sensor in a dry, shaded area. Fog and mist will not affect the sensor, but large volumes of soaking rain may. To guard against this, we recommend that you mount it under the eve of your house, your garage or any other suitable place that will keep it out of direct sun and rain.
7 Important: Though the remote unit is Weather resistant, it should be placed away from direct sunlight, rain, snow and should never be submerged in water. TEMPERATURE / HUMIDITY READINGS The base unit displays indoor temperature and humidity readings on the left side of the screen ( ) from its location. The remote sensor transmits outdoor temperature and humidity readings ( screen) from its location back to the base unit. Press the - button on the back of the base unit to switch between Fahrenheit and Celsius temperature displays. CLOCK FEATURE The Clock display is located at the top of the base unit s LCD screen. The clock has alarm and snooze functions. A) Clock Setting 1.
8 Press and hold the SET button on the back of the base unit for 3 seconds to enter Clock Setting Mode. The year digits flash in place of the clock digits. 2. Press the + or - button to change the year. Press SET to confirm. The month digits flash. 3. Press the + or - button to change the month. Press SET to confirm. The date digits flash. 4. Press the + or - button to change the date. Press SET to confirm. The Day/Month ( D M ) or Month/Day ( M D ) selection flashes. 5. Press the + or - button to toggle between Day/Month and Month/Day format. Press SET to confirm. A language selection flashes under the DAY icon to the left of the clock digits. 6. Press the + or - button to toggle between language selections*.
9 Press SET to confirm the displayed language. Time zone offset digits flash in place of the clock. 7. Press the + or - button until the correct time zone offset** appears (-12 to +12). Press SET to confirm the displayed time zone offset. 12 Hr or 24 Hr flashes. 8. Press the + or - button to toggle between 12 and 24 hour clock mode. Press SET to confirm. The hour and minute digits reappear. The hour digits flash. 9. Press the + or - button to change the hours. Press SET to confirm. The minute digits flash. 10. Press the + or - button to change the minutes. Press SET to confirm. The hour and minute digits stop flashing. The clock is set. *Language options: EN = English, RU = Russian, FR = French, IT = Italian, ES = Spanish, NE = Netherlands (Dutch), DA = Danish, GE = German.
10 **The time zone offset is the number of hours between your time zone and Greenwich Mean Time (GMT). US Time zone options are: MST: Mountain Standard Time -7 AST: Atlantic Standard Time -4 PST: Pacific Standard Time -8 EST: Eastern Standard Time -5 AKT: Alaska Standard Time -9 CST: Central Standard Time -6 HAT: Hawaii-Aleutian Standard Time -10 For other time zone offsets, please visit or consult another time zone reference. Notes: If no buttons are pressed within 30 seconds, the unit will automatically exit Clock Setting mode. Until a time has been set, the clock will count up the time since battery installation.


