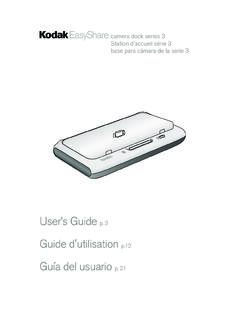
Transcription of Wireless Networking Setup Guide - Kodak
1 Wireless Networking Setup Guide Guide de configuration des r seaux Wi-Fi Gu a de configuraci n de redes inal mbricas Guia de configura o da rede sem fio All-in-One Printers Eastman Kodak Company Rochester, NY 14650 Eastman Kodak Company, 2010. Imprimantes tout-en-un Impresoras multifunci n MC/MR/TM: Kodak , ESP, EasyShare. Printed in China Imprim en Chine Impressoras Multifuncionais Impreso en China Impresso na China 1K7641. Setting up a Wireless connection Before you connect, you need: a Wireless router. to determine whether your Wireless router supports Wi-Fi Protected Setup (WPS).
2 NOTE: If you have specific questions about your router, see your router manufacturer's documentation. Connecting to a Wireless router (non-WPS). Record your network information in the spaces below, using uppercase and lowercase letters. network Name (SSID): _____. Security String (case-sensitive): _____. NOTE: If you already set up your printer, you need to press Home, then press to select network Settings, then Wi-Fi Setup Wizard. Press OK after each selection. 1 Press to select Wireless , then press OK. 2 2 Press to select your network , then press OK.
3 If you don't see your network in the list, select Rescan for Wireless Networks, then press OK. NOTE: If the name of your network is not listed, make sure your Wireless router is turned on and within range. 3. 3 If your network requires a password, use the LCD keyboard to enter your Security String. The Security String is case-sensitive. On the control panel, press , , or to select the letters and numbers, using the correct uppercase and lowercase letters. Press OK after each character. When you are done, select DONE, then press OK.
4 Use the arrow keys to select the letters, numbers, and symbols. Press OK after each selection. 4 When the confirmation message appears, press OK. When the printer is successfully connected, the Wi-Fi status light is on. 4 5 Install the Kodak All-in-One Printer Software on your computer. Follow the on-screen instructions to complete your Setup . If you installed the software before connecting to your network : For WINDOWS OS: Select Start > Programs > Kodak > Kodak Printer network Set-Up Utility and follow the on-screen instructions.
5 For MAC OS: Select System Preferences, then Print & Fax (under Hardware). Click the + sign to add a printer to your Wireless network . Connecting to a WPS Wireless router NOTE: If you already set up your printer, you need to press Home, then press to select network Settings, then Wi-Fi Setup Wizard. Press OK after each selection. 1 Press to select Wireless , then press OK. 5. 2 With WPS Connect selected, press OK. 3 Select one of the following two methods of connecting: IMPORTANT: Before you press OK on the printer, make sure you know where the router's button is, or where to enter the generated PIN.
6 Push Button Configuration Entering a PIN. NOTE: You will have two minutes to press a Press to select Generate WPS. or select the WPS button. It may be PIN, then press OK. a button on the device or a virtual b In your Wireless router's software, button in the device's software. locate the PIN screen. a With Push Button Configuration c Enter the PIN you received from the LCD into the PIN screen. selected, press OK. b Press or select the WPS button for your Wireless router. 6 4 When the confirmation message appears, press OK.
7 When the printer is successfully connected, the Wi-Fi status light is on. 5 Install the Kodak All-in-One Printer Software on your computer. Follow the on-screen instructions to complete your Setup . If you installed the software before connecting to your network : For WINDOWS OS: Select Start > Programs > Kodak > Kodak Printer network Set-Up Utility and follow the on-screen instructions. For MAC OS: Select System Preferences, then Print & Fax (under Hardware). Click the + sign to add a printer to your Wireless network . 7.