Transcription of Workshop - Biosphere 2
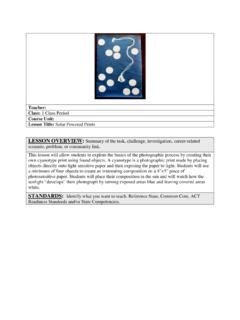
1 This lesson will allow students to explore the basics of the photographic process by creating their own cyanotype print using a found botanical sample. They will also be tasked with identifying their specimen, and introduced to responsible methods for collecting specimens. The goal of this Workshop is to use a hands on activity based in art and design to build an understanding around how light is critical for the production of food in plants, and assists insects in finding the pollen centers of flowers. Students will begin by collecting one sample to create an interesting composition on a small piece of photosensitive paper. They will be encouraged to take different parts of the plant, possibly including leaves, stems, flowers, seeds, and other parts that will assist in identifying the species. Educator will help students identify their plant species, and learn more about it. Students will write the common name and scientific name of the plant on a small transparent sheet, in black permanent marker.
2 This will be placed on the paper, as well as the parts of the plant they collected. Students will place their composition in the sun and will watch how the sunlight develops their photograph by turning exposed areas blue and leaving covered areas white. After the paper has been exposed, washed and dried, a scan of the work will be made for Biosphere 2 s records. Students will be able to take their print home with them, and the scanned image will be used by Biosphere to build an online field guide / archive. A digitized update to the work of Anna Atkins, this archive can serve as a citizen science guide to the plants around Biosphere 2, and an ongoing virtual exhibition of artwork produced by visitors. A cyanotype is a photographic print made by placing objects directly onto light sensitive paper and then exposing the paper to : cyanotype Printing a Botanical Field GuideAn all-age Workshop that introduces a group to the chemistry of early photographic processes and the basics of design and composition.
3 We will use these methods to identify and catalog plants, and understand both how plants photosynthesize, and how pollinators navigate using ultraviolet light. Biosphere 2 ESTEAM Program (Expression/Education/Engagement with Science Technology, Engineering, Art & Math)The arts are becoming a favored medium for conveying science to the public and one of our education and outreach goals at Biosphere 2 is to generate awareness and community engagement. By bringing in student or early career artists whose work is environmentally/science focused and have in interest in arts-based science communication, we hope to better engage visitors, teachers and K-12 student groups and stimulate critical Workshop was developed by Lee Pivnik during his Artist Residency at Biosphere 2 during the Summer of 2017. BACKGROUND: Anna Atkins was a botanist and photographer who lived in the 1800s in the United Kingdon. She is considered to be the first female photographer, as well as one of the few women who made a name for herself in an exclusive scientific community of mainly male peers.
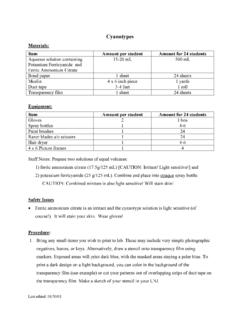
4 Atkins had accumulated an extensive collection of dried algae specimens during her career as a botanist, and found herself dissatisfied with publications that lacked images of the botanicals that they described. She worked with John Herschel, who had just invented the cyanotype process a year before, to create an extensive printed catalog of her algae collection. This way of image making expedited the process of illustrating plants, and allowed Atkins to publish a number of books detailing the biodiversity of British Algae. Atkins understood the power of photography as a quick tool to disseminate images and through her desire to share the types of Algae she was cataloging, she published the first book that incorporated photographs, producing over 10,000 images over the course of a decade. Her practice integrated aspects of art and design into scientific communication, a skill we look to revisit today with this : (1) cyanotype Sensitizer Set This set includes the chemicals needed to make approximately 65, 8 11 prints on paper(3) Measuring cups.
5 (1+) Foam Paint Brush. (1-2) Block of Watercolor paper. Any brand, as long as it s acid-free. (1) Pair of Scissors(1) Sink, to use as a stop-bath for washing away chemicals after exposure to sunlight. (5) Black permanent markers, thin tips. (1) Pack of clear acetate sheets, to be trimmed down and written on to identify plants.(X) Botanical Samples, let students collect these Amazon Shopping List available here for most :Precut watercolor paper to desired size for group. Small sizes work well for this, I would not recom-mend to go much larger than an 8x10 sheet. Make sure there are at least 2 papers available per student, and extras are always encouraged. OBJECTIVES: ART + DESIGN:Students will be able to create a cyanotype print by arranging found objects onto photosensitive paper and exposing that paper to direct sunlight. Students will use the principles of design to create an interesting composition with their chosen found objects. Students will be introduced to other artists who have utilized Cyanotypes.
6 (To spur creative ideas)SCIENCE:Students will gain experience in identifying a species of plant, and become familiarized with common names and scientific names. Students will discuss the effects UV light has on plant and pollinator life, and what role it plays in this photosensitive photography process. Through accompanying powerpoint, light will be discussed as a tool for photography, as well as a resource for plants to produce sugar and sustain themselves. Students will learn about how chemicals can react together in a solution, and how that solution can be activated by :Students will learn about the history of both early methods of photography and alternative ways to create a field guide, through introduction to the work of Anna Atkins. Students will be able to discuss how the cyanotype process worked and how various factors such as exposure time, brightness of the sun, and arrangement of their objects, affected their results. ASSESSMENT/EVALUATION: Students show evidence of proficiency through a variety of assessments.
7 1. Students will be introduced to and apply the principles of design to the formation of their composition. 2. Students will show an understanding of the cyanotype process, and verbalize how different variables will change the outcome of their Students will present their print in a group critique and will discuss how they arranged their found specimen to create an interesting composition. What did they learn about their plant that they didn t know before?ACTIVATING STRATEGY: Motivator/Hook. An Essential Question encourages students to put forth more effort when faced with complex, open-ended, challenging, meaningful, and authentic questions. 1. Show examples of Anna Atkins cyanotypes and explain that they are created by arranging objects on photosensitive paper that is then exposed to sunlight. 2. Explain that photographs are composed using the principles of design: emphasis, balance, contrast, and repetition. 3. Ask students to point to each of these principles in the examples provided.
8 INSTRUCTION: Step-By-Step 1. The teacher will introduce the lesson with a slide talk, discussing Biosphere 2 s UV blocking glass, and the reasons for its construction. The talk will discuss the effects this had on pollinators, and how without pollinators people had to work longer days hand pollinating their food. The talk will go over how plants are dependent on light for the production of sugar through photosynthesis, and how humans see a smaller spectrum of light then pollinators do. 2. The talk will then shift its focus to the work of Anna Atkins, and show some of her cyanotype prints from the 1800s. She will be introduced as a pioneering photographer and botanist, who documented her collection of algae and published the first books to include photographs using cyanotypes. 3. Students will be introduced to the objectives, to each select a plant they would like to identify, and create a cyanotype print of it. By doing this, they will be using UV light to create a photograph, and understand a process that is usually invisible to them.
9 4. Students will be briefly reintroduced to the different parts of a plant they may be looking to collect, for better success at identifying it. They will also record observations of the plant the sample is taken from, including its size, location, and colors. They may take a photograph of the plant and its location, or take detailed notes of this. Before they select any plant, they will be introduced to responsible ways to collect samples from plants. 5. The teacher will begin preparing the 2-part cyanotype solution and coating watercolor paper with it, so that students may see this process and understand the chemistry involved. As the teacher coats the papers, students will be instructed to go outside and collect a specimen to use for printing. The teacher will emphasize the size of the paper they will be using, so they know not to return with too large of a sample. 6. Students will return inside with their samples, and will begin the process of identifying them. B2 educators will assist in and Resources for Plant Identificiation: This website features photographs and descriptions of 467 different southeastern Arizona wildflower and plant species, primarily those of the Sonoran Desert and the areas surrounding the city of Tucson in Pima County.
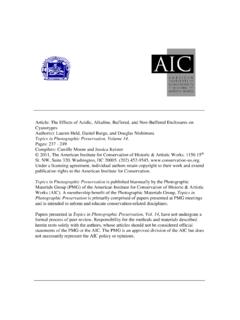
10 Southeastern Flora is an online resource to assist you in identifying native or naturalized wildflowers you may find in the southeastern United States. Wider Search than just Arizona. Botanical SampleNomenclature, written on acetate and placed on paper before exposure to sun. 7. Each student will find the common name and scientific name of their plant, and (time permitting) will learn a bit more about it. What pollinates it? Is it native to the Sonoran Desert, or is it brought in for landscaping? Students will write the scientific name and the common name on a smaller piece of acetate, using a black marker. 8. Students will arrange their specimen on the photosensitive paper inside, making sure to include the acetate identifying card. Once everyone is ready, they can go outside into direct sunlight and place the paper in the sunlight for a total of five minutes. They will not touch the paper during this time, only doing so to replace any objects that have been moved by the wind.