Transcription of Cyanotypes - Truman State University
1 Last edited: 01/30/01 Cyanotypes Materials: Item Amount per student Amount for 24 students Aqueous solution containing Potassium Ferricyanide and Ferric Ammonium Citrate 15-20 mL 500 mL Bond paper 1 sheet 24 sheets Muslin 4 x 6 inch piece 1 yards Duct tape 3-4 feet 1 roll Transparency film 1 sheet 24 sheets Equipment: Item Amount per student Amount for 24 students Gloves 2 1 box Spray bottles 1 4-6 Paint brushes 1 24 Razor blades a/o scissors 1 24 Hair dryer 1 4-6 4 x 6 Picture frames 1 4 Staff Notes: Prepare two solutions of equal volumes: 1) ferric ammonium citrate ( mL) [CAUTION: Irritant!]
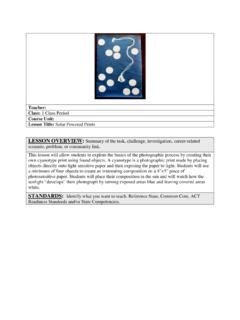
2 Light sensitive!] and 2) potassium ferricyanide (25 g/125 mL). Combine and place into opaque spray bottle. CAUTION: Combined mixture is also light sensitive! Will stain skin! Safety Issues Ferric ammonium citrate is an irritant and the cyanotype solution is light sensitive (of course!). It will stain your skin. Wear gloves! Procedure: 1. Bring any small items you wish to print to lab. These may include very simple photographic negatives, leaves, or keys. Alternatively, draw a stencil onto transparency film using markers. Exposed areas will print dark blue, with the masked areas staying a paler blue.
3 To print a dark design on a light background, you can color in the background of the transparency film (see example) or cut your patterns out of overlapping strips of duct tape on the transparency film. Make a sketch of your stencil in your LNJ. Last edited: 01/30/01 2. Darken the room and put on disposable gloves. Spray one side of your paper with the light sensitive chemicals from the spray bottle, and use the paint brushes to make sure you have an even coating over the whole sheet. Be careful not to make a cyanotype print on your skin! Use the heat gun (hair dryer) to dry the paper.
4 Put your paper, chemical-coated side up, onto the frame backing. Place your stencil (the transparency film) on top of your paper. If you are using photographic negatives or other small objects, place these on top of the transparency film. Next, put the glass cover slip in place, and tighten the frame. Larger objects will need to be placed on top of the frame. 3. Go outside, set the frame on a level surface, and record the color of the exposed areas of the paper and the exposure start time. Expose the frame to direct sunlight until the exposed areas of the paper turn a deep blue.
5 This usually takes from 5 to 20 minutes, depending on the sunlight intensity and time of day. 4. Record the exposure end time, and without disturbing the frame contents, return to the lab. In the DARK room, disassemble the frame, and rinse your printed paper with a slow stream of tap water to remove unreacted chemicals. Use the heat gun to dry your paper, and describe what has happened to the paper in your LNJ. 5. Repeat this process using a piece of cloth as your printing substrate. You can use the same stencil, or wash it off and make a new one. When applying the chemicals to the cloth, wear gloves and spray the cloth.
6 Bunch the cloth up in your hands after spraying to even out the coating. Take extra care to dry the fabric thoroughly, as well: the photosensitive reagents will diffuse through damp areas of the cloth, resulting in blurry edges. CLEAN UP: No special instructions. Remember to wash any objects used for the cyanotyping! Reflections: 1. What does the light provide that this chemical reaction requires to proceed? 2. Write in your LNJ (using your lecture notes) the chemical transformation that is the basis for the formation of the dark blue imprint on the fabric. 3. What adjustments would you make to improve the artistic quality of your cyanotype ?
7