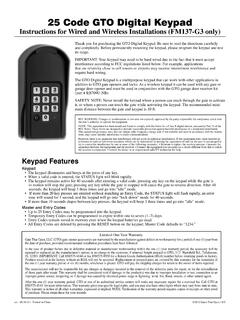
25 Code GTO Digital Keypad - Mighty Mule
• When a valid code is entered, the STATUS light will blink rapidly. • The keypad remains active for 40 seconds after entering a valid code: pressing any key on the keypad while the gate is in motion will stop the gate; pressing any key while the gate is stopped will cause the gate to reverse direction. After 40
Download 25 Code GTO Digital Keypad - Mighty Mule

Information
Domain:
Source:
Link to this page:
Documents from same domain

Installation Manual - Mighty Mule
www.mightymule.comfull responsibility for following and noting the installation and safety instructions. Failure to follow ... You must read the installation manual for detailed

Installation Manual
www.mightymule.comThis equipment meets Underwriters Laboratory Standard 325 (UL 325). However, gate equipment has hazards associated with its use and therefore by installing this product the installer and user accept full responsibility for following and noting the installation and safety instructions. Failure to follow

MM571W MM572W
www.mightymule.comThis equipment meets Underwriters Laboratory Standard 325 (UL 325). However, gate equipment has hazards associated with its use and therefore by installing this product the installer and user accept full responsibility for following and noting the installation and safety instructions. Failure to follow

Wir - Mighty Mule
www.mightymule.comPrior to any assembly of the MMS100, ensure that the Mighty Mule gate operator is turned OFF and disconnected from its power source. If required, punch out the access hole for the Auxiliary Antenna. Align the connectors, then plug in the small …

FM500 Installation Manual - Mighty Mule
www.mightymule.commanual cannot be completely exhaustive in nature. They do, however, provide an overview of the safe design, installation, and use of this product. CAREFULLY READ AND FOLLOW ALL SAFETY PRECAUTIONS, ARNINGS, W AND INSTALLATION INSTRUCTIONS TO ENSURE THE SAFE SYSTEM DESIGN, INSTALLATION, AND USE OF THIS PRODUCT.
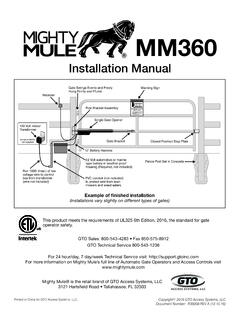
Installation Manual - Mighty Mule Automatic Gate Openers ...
www.mightymule.comii Mighty Mule MM360 Installation Instructions Product Usage The Mighty Mule Gate Operator meets all of the safety requirements of a Class I Residential Vehicular Gate Operator and is intended for use solely with vehicular swing gates in single-family residential applications that meet the Class I category listed

Vehicle Detection Alarm - Mighty Mule
www.mightymule.comTurn dial counter-clockwise to INCREASE audio volume. RECEIVER TOP VIEW. 4 Installing Transmitter Batteries ... This equipment has been tested and found to comply with the limits for a Class B digital device, pursuant to Part 15 of the ... generates, uses and can radiate radio frequency energy and, if not installed and used in accordance with ...

Instructions for Gate Opener Single Button Entry Transmitter
www.mightymule.comInstructions for Gate Opener Single Button Entry Transmitter FCC Regulation: This device complies with Part 15 of the FCC Rules. Operation is subject to the following two conditions: (1) This device may not cause harmful interference, and (2) This device must accept any interference received, including interference that may cause undesired ...

MM371W MM372W
www.mightymule.com12 Volt automotive or marine type battery in weather proof housing (not included). Example of Dual Gate finished installation (Installations vary slightly on different types of gates) MM371W MM372W Single gate installation [MM371W] Dual gate installation [MM372W] This product meets the requirements of UL325, the standard for gate operator safety.

AUTOMATIC GATE LOCK - Mighty Mule
www.mightymule.comRemember to check the alignment and mark positions before drilling holes in fence post . Illustration F Clevis Pin Receiver Locking Cap GTO Automatic Gate Lock Carriage bolts, washers, and nuts (not provided; size of fasteners depends on the gate) Remember to check the alignment and mark positions before drilling holes in fence post and gate ...
Related documents
Introduction to Arduino
introtoarduino.com10. Open the LED blink example sketch: File > Examples > 1.Basics > Blink 11. Select Arduino Uno under the Tools > Board menu. 12. Selectyourserial port(if youdon’tknowwhichone,disconnecttheUNO and the entry that disappears is the right one.) 13. Click the Upload button. 14. After the message “Done uploading” appears, you should see the ...
Blink: The Power of Thinking Without Thinking
www.lequydonhanoi.edu.vnBlink: The Power of Thinking Without Thinking Malcolm Gladwell Introduction - The Statue That Didn’t Look Right In September of 1983, an art dealer by the name of Gianfranco Becchina approached the J. Paul Getty Museum in California. He had in his possession, he …
Understanding Internal Controls
www-bfs.ucsd.eduestablish and effectively communicate written policies and procedures, a code of ethics, and standards of conduct. Moreover, a governing board and management enhance the control environment when they behave in an ethical manner -creating a positive "tone at the top" --and

BMW Code DeFaut - e38.org BMW 7-series information and …
www.e38.orgThe CHECK ENGINE light will blink out the FAULT CODES starting with the lowest number first. These FAULT CODES consist of 4 digits each separated by a short pause (ie. blink pause blink blink pause blink pause blink translates as 1 2 1 1). CODE MALFUNCTIONING SYSTEM EXPLANATION 1211 DME Control Unit This code is stored when the DME self test fails.
SHAW DIRECT IRC600/ URC600 Remote Control …
assets.aws.shawdirect.cablink twice. 3. To view the code for the first digit, press 1 once. Wait 3 seconds and count the number of times the Red Light blinks (e.g., 3 blinks =3) and write down the number in the left most TV Code box (at end of this section). NOTE: If a code digit is “0”, the red light will not blink. 4. …

Troubleshooting - Heartland Owners Forum
manuals.heartlandowners.orgFor example, Fault Code No. 36 appears as: blink-blink-blink—pause—blink-blink-blink-blink-blink-blink— long pause—repeat • Four blinks indicates that cranking exceeded 30 seconds without the engine starting. •Note: Fault Code Nos. 3 and 4 are first level faults. Avoid interpreting them as second-level Fault Code Nos. 33 and 44 ...

TOTAL CONTROL - remotecodelist.com
www.remotecodelist.comBlink out the Current Code If you have set up your TOTAL CONTROL via the Search Method, you can blink back your code for future reference. Example: To blink out your television code: 1 Press the TVkey on your TOTAL CONTROL. 2 Press and hold down the SETkey until the red light blinks twice. 3 Press 9 9 0, the red light will blink twice.
Verizon FiOS TV P265v1 Remote CH + Control Manual
www.verizon.comPlease Note, the Code Search Method could take up to 8 minutes, as it must go through over 500 codes. The most common codes are tried first, but you may need to press and hold for a while to locate the correct code. 4. The RED LED light will blink twice, and remain on. 5. Press . 6. The RED LED will blink 3 times and then turn off. 7.
Operating Instructions For Button Functions *Note : Set-up ...
d15yx0mnc9teae.cloudfront.netcode number from the brand list. STEP4 Store the three-digit code by pressing the same [DEVICE] button once again. The device LED will blink twice to confirm that the code has been stored. C. Auto Search Method If none of the three digit code numbers assigned to your brand of equipment works, or the code table does not list your brand, you can

CircuitPython Essentials - Adafruit Industries
cdn-learn.adafruit.comDec 12, 2021 · Instead of the two lines of code above, you simply provide the singleton as the I2C object. So if you were using the TSL2591 and its CircuitPython library, the two above lines of code would be replaced with: tsl2591 = adafruit_tsl2591.TSL2591(board.I2C()) This eliminates the need for the busio module, and simplifies the code. Behind the