APPENDIX B: MATERIAL SETTINGS - Epilog Laser
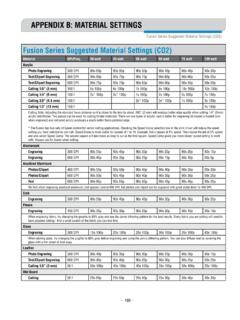
Cutting 3/8” (9.5 mm) 100 f 2s* 100p 3s* 100p 1s 100p 3s 100p Cutting 1/2” (13 mm) 100 f 1s 100p Cutting Note: Adjusting the standard focus distance so it is closer to the lens by about .080” (2 mm) will produce better edge quality when cutting 1/4” (3mm) acrylic and thicker. Two passes can be used for cutting thicker materials.
Download APPENDIX B: MATERIAL SETTINGS - Epilog Laser

Information
Domain:
Source:
Link to this page:
Documents from same domain
Settings for Success: Techniques for most popular ...
www.epiloglaser.comDepending on the wattage of your laser, the best approach is to set the laser power at 100 percent and adjust the speed to obtain the desired depth. Wood is a very easy material to work with and you can produce very nice detail with as little as 300 DPI engraving. 600 DPI engraving into wood produces even better results.
MINI 18/24 & HELIX - Epilog Laser
www.epiloglaser.comthat turn the laser off if the door is opened during operation, and no special precautions are necessary to operate the high-power laser safely. However, the visible output beam of the Laser Diode Pointer (Red Dot Pointer) is accessible to the operator.

ZING 16 / 24 - Epilog Laser
www.epiloglaser.comThe laser cabinet has safety interlocks that turn the laser off if any access door is opened during operation, and no special precautions are necessary to operate the high-power laser safely. However, the visible output beam of the Laser Diode Pointer (Red Dot Pointer) is …

APPENDIX B: MATERIAL SETTINGS - Epilog Laser
www.epiloglaser.comyour settings by engraving a small square or cutting a small circle. You can fine tune your settings in these areas. • Similar materials use similar settings: When you are working with a material you aren’t familiar with, think about a similar material and what settings you would use with that product.
Section 5: Connecting the Laser to Your Computer
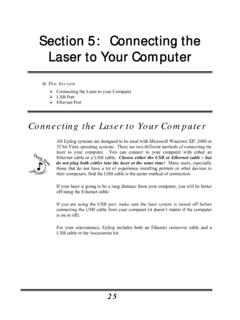
www.epiloglaser.comSection 5: Connecting the Laser to Your Computer 26 The data port connections are on the back of the machine, towards the bottom right. The drawing below shows the location of the data ports on the laser system. USB Port A USB cable is included in the accessory kit. The USB port is located on the right side of the machine, near the rear.
SECTION 3: DRIVER INSTALLATION - Epilog Laser
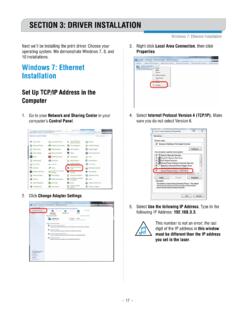
www.epiloglaser.comWindows 8 and 10: Ethernet Installation SECTION 3: DRIVER INSTALLATION 4. Select Create a new port, then Standard TCP/IP Port. Click Next. 5. Enter the IP Address to match the IP Address you set at the laser in “Setting the IP Address” on page …

Windows 7: Ethernet Installation - Epilog Laser
www.epiloglaser.comWindows 7: Ethernet Installation SECTION 3: DRIVER INSTALLATION 13. Click Next. 14. Click Replace the current driver if requested, then click Next. 15. You can rename your printer here. We have not changed it for this document, but many users like to associate the driver name with the IP Address they are using, for example Epilog Helix 192.168.3.4.
Related documents

Laser Welding Fundamentals - AMADA WELD TECH
amadaweldtech.comlaser cutting, laser micromachining, and hot bar bonding. Based in Southern California, the company provides products to a wide range of markets including the medical device, battery, electric vehicle, and solar industries, as well as the global electronics, automotive, and general industrial markets.

Laser Power Speed Settings - JDS Industries
shop.jdsindustries.comLaser Brass Marbleized Laser Brass Corian Or Avonite Delrin Seals Glass Laserable Plastic Leather Marble Mat board Melamine Stainless Steel With Cerdec Coating 300 DPI RASTER ENGRAVING SPEED/POWER 55/100 100/60 100/50 100/60 55/1 oo 00/60 65/100 100/40 100/70 100/100 100/60 65/100 N/A 400 DPI RASTER ENGRAVING SPEED/POWER 65/100 100/50 …

ULS User Guide - Worcester Polytechnic Institute
users.wpi.edulaser engraving/cutting. Link to Table of Contents User Guide 17 Glossary of Terms Belt – A toothed belt with high-strength, stretch-free Kevlar construction, driven by a motion system motor. Belts in-cluded: X belt for left-right movement of the lens carriage; two Y belts that move the Arm forward and backward; and a Z

Preparing Files for the Laser Cutter - University of Delaware
www.art.udel.eduPreparing Files for the Laser Cutter The UD/Art Laser Cutter (see a brief description here) is a tool that can be used to cut, mark and/or engrave into various materials. The laser cutter can accept vector (line art) and/or bitmap (1-bit raster images), but knowing which to use is a combination of artistic vision and technical knowledge.
MINI 18/24 & HELIX - Epilog Laser
www.epiloglaser.comlaser – even materials that may be very familiar to the user. Always monitor the machine when it is operating. • Clean the laser. A buildup of cutting and engraving residue and debris is dangerous and can create a fire hazard in its own right. Keep your laser system clean and free of debris. Regularly remove the Vector Cutting Table to clean

Modern Diamond Cutting and Polishing
www.gia.edumond-cutting industry worldwide has been revolutionized by sophisticated instruments for marking, laser sawing machines, laser kerfing machines, auto-matic bruting machines and laser bruting systems, automatic centering systems, and automatic polishing machines. o many, a rough diamond looks like any transpar-ent crystal or even a piece of ...

CNC LASER MACHINE - Used AMADA
www.used-amada.comprocedures for the laser machine. To increase the cutting efficiency of the laser machine, read the manual carefully before creating programs. (For operating the laser machine, refer to the separate Operator’s Manual.) Printed in Japan Programming …