ELECTRIC RANGE USER INSTRUCTIONS - Maytag
Press TEMP/TIME “+” or “-” keypads to set a temperature other than 350°F (175°C) in 5° increments between 170°F and 525°F (75°C and 275°C). 3. Press START. 4. To change the temperature, repeat Step 2. Press START or wait 5 seconds for the change to take effect. 5. Press CANCEL when finished. BROIL Broiling 1.
Download ELECTRIC RANGE USER INSTRUCTIONS - Maytag

Information
Domain:
Source:
Link to this page:
Documents from same domain
Maytag Dryer Specifications
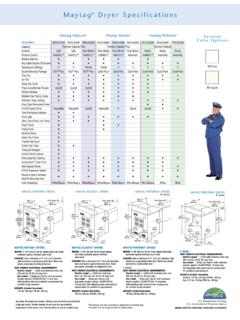
www.maytag.comMaytag® Dryer Specifications MAYTAG PERFORMA® DRYERS MOTOR: 1/4 HP, 120 volt, 60 Hz, single-phase, thermally protected against overload, auto-reset. EXHAUST: Use a minimum of 4" (10.2 cm) diameter rigid aluminum or galvanized steel duct.
Use & Care Guide - Maytag
www.maytag.comCYCLE GUIDE For best fabric care, choose the cycle that best fits the load being washed. Recommended settings for best performance are shown in Bold. Not all settings and options are available on each cycle. NOTE: If you are using fabric softener, be sure to select the Fabric Softener-On option.

Use & Care Guide - Maytag
www.maytag.comUse the Sensor Cycles to provide the most energy savings and enhanced fabric care from the dryer. During Sensor Cycles, drying air temperature and moisture level are sensed in the load.

FRONT LOAD WASHER OWNER'S MANUAL MANUEL DE …
www.maytag.comeach load. Also, this will use just the right amount of detergent required for a particular load/cycle. NOTE: Do not add single-dose laundry packets, Oxi-type boosters, color-safe bleach, or fabric softener crystals to dispensers. They will not dispense correctly. Adding HE detergent to Load & Go™ dispenser (on some models):
TOP LOAD WASHER OWNER’S MANUAL MANUEL DE …
www.maytag.comSystème de vidange. 15 Spécifications électriques 16 Installation 16 Déballage 16 Raccordement du tuyau de vidange. 17 Raccordement des tuyaux d’alimentation. 18 Établissement de l'aplomb de la laveuse. 19 Liste de vérification pour l’achèvement de l’installation. 20 Table des matières W11354659-SP
WASHER INSTALLATION & CARE INSTRUCTION MANUAL …
www.maytag.comWASHER INSTALLATION & CARE INSTRUCTION MANUAL MANUEL D’INSTRUCTION D’INSTALLATION ET D’ENTRETIEN DE LA LAVEUSE MANUAL DE INSTRUCCIONES PARA LA INSTALACIÓN Y EL CUIDADO DE LA LAVADORA ... INSTRUCCIONES DE INSTALACIÓN ..... 26 Conecte la manguera de desagote ..... 27 Conexión de las mangueras de entrada .....
Warranty - Maytag
www.maytag.comONE YEAR LIMITED WARRANTY WHAT IS COVERED WHAT IS NOT COVERED For one year from the date of purchase, when this major appliance is installed, operated and maintained according to instructions attached to or furnished with the product, Maytag brand of Whirlpool Corporation or Whirlpool Canada LP (hereafter “Maytag”) will pay for Factory

BRAVOS XL TOP-LOADING LAVEUSE HAUTE HIGH EFFICIENCY ...
www.maytag.comDESSUS GUIDE D’UTILISATION ET D’ENTRETIEN Para una version en espanol, visite www.maytag.com Certified to Sanitize Homologué pour assainir. 2 WASHER SAFETY. 3 Load garments in loose heaps evenly around the washplate. Do not load garments directly over the center of the washplate;
TOP LOAD WASHER OWNER’S MANUAL MANUEL DE …
www.maytag.comsponge to wipe away any spills. Use an affresh® Machine Cleaning Wipe or only mild soaps or cleaners when cleaning external washer surfaces. Nonuse and Vacation Care Operate your washer only when you are home. If moving, or not using your washer for a period of time, follow these steps: 1. Unplug or disconnect power to washer. 2.
LAVADORA DE CARGA SUPERIOR DE ALTO RENDIMIENTO …
www.maytag.comMensaje para el usuario Agradecemos la compra de un electrodoméstico Maytag®. Porque su vida es cada vez más activa y con mayores ocupaciones, las lavadoras Maytag® son fáciles de usar, ahorran tiempo y le dan funcionalidad al hogar. Para asegurar que la lavadora funcione por muchos años sin problemas,
Related documents
PC1616/PC1832/PC1864 User Manual
cms.dsc.comAll the keypads have an audible indicator and command entry keys. The LED keypads have a group of zone and system status lights. The LCD keypad has an alphanumeric liquid crystal display (LCD). The keypad is used to send commands to the system and to display the current system status. The
Control4 System Quick Start Guide
www.control4.comprogrammed keypads to control lighting, sound, video, and more However, even something as basic as a light switch can be programmed to do multiple things and run automated tasks Ask your installer to show you how to use your system You can customize Control4 lighting and keypads for countless scenarios and
Pico Scene Keypads - Lutron Electronics Company Inc
www.lutron.comPico Scene Keypads The Pico wireless keypad is a flexible and easy to use device that allows the user to adjust multiple lights and shades to different levels at the touch of a button. This battery-operated keypad requires no external power or communication wiring. Features • Provides easy access to scene control in the following Lutron systems:

Lutron Keypad Brochure
www.lutron.comLutron keypads complete the experience, delivering an aesthetic, inviting, and intuitive control to ensure the perfect light for everything you do. Lutron offers a wide variety of colours, styles, finishes, and functions to help you create an environment that reflects your unique sense of design. Browse
BUILT-IN ELECTRIC SINGLE AND DOUBLE OVEN USER …
www.whirlpool.comPress the number keypads to set the desired temperature. If the temperature entered is not in the range of the temperatures allowed, the minimum or maximum allowed temperature will be displayed. Enter a temperature in the allowable range. 3. (Lower oven, single rack baking only) Press START. Rapid preheat will begin.

BUILT-IN ELECTRIC OVEN USER INSTRUCTIONS
www.whirlpool.comPress the number keypads to set the time of day. 3. Press START/ . LIGHT Oven cavity light While the oven door(s) are closed, press LIGHT to turn the light(s) on and off. The oven light(s) will come on when an oven door is opened. TIMER ON/OFF Oven timer The Timer can be set in hours or minutes up to 9 hours and 59 minutes. 1. Press TIMER ON ...