Fusion Material Settings - Epilog Laser
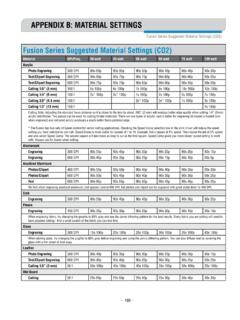
- 191 - APPENDIX B: MATERIAL SETTINGS Fusion Series Suggested Material Settings (CO2) • These are only suggestions: Every type of material will react differently with the laser, even from one plastic to the next. Use these settings as your starting point then adjust one variable at a time until you achieve the result you desire.
Download Fusion Material Settings - Epilog Laser

Information
Domain:
Source:
Link to this page:
Documents from same domain
Settings for Success: Techniques for most popular ...
www.epiloglaser.comDepending on the wattage of your laser, the best approach is to set the laser power at 100 percent and adjust the speed to obtain the desired depth. Wood is a very easy material to work with and you can produce very nice detail with as little as 300 DPI engraving. 600 DPI engraving into wood produces even better results.
MINI 18/24 & HELIX - Epilog Laser
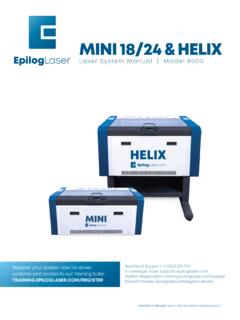
www.epiloglaser.comthat turn the laser off if the door is opened during operation, and no special precautions are necessary to operate the high-power laser safely. However, the visible output beam of the Laser Diode Pointer (Red Dot Pointer) is accessible to the operator.

ZING 16 / 24 - Epilog Laser
www.epiloglaser.comThe laser cabinet has safety interlocks that turn the laser off if any access door is opened during operation, and no special precautions are necessary to operate the high-power laser safely. However, the visible output beam of the Laser Diode Pointer (Red Dot Pointer) is …

APPENDIX B: MATERIAL SETTINGS - Epilog Laser
www.epiloglaser.comyour settings by engraving a small square or cutting a small circle. You can fine tune your settings in these areas. • Similar materials use similar settings: When you are working with a material you aren’t familiar with, think about a similar material and what settings you would use with that product.
Section 5: Connecting the Laser to Your Computer
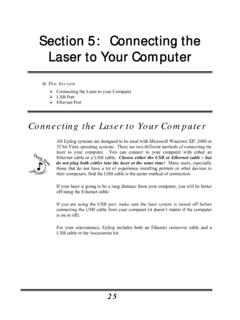
www.epiloglaser.comSection 5: Connecting the Laser to Your Computer 26 The data port connections are on the back of the machine, towards the bottom right. The drawing below shows the location of the data ports on the laser system. USB Port A USB cable is included in the accessory kit. The USB port is located on the right side of the machine, near the rear.
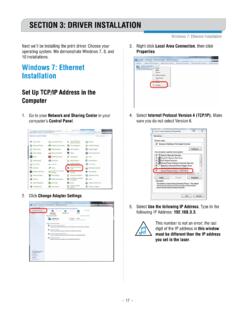
SECTION 3: DRIVER INSTALLATION - Epilog Laser
www.epiloglaser.comWindows 8 and 10: Ethernet Installation SECTION 3: DRIVER INSTALLATION 4. Select Create a new port, then Standard TCP/IP Port. Click Next. 5. Enter the IP Address to match the IP Address you set at the laser in “Setting the IP Address” on page …

Windows 7: Ethernet Installation - Epilog Laser
www.epiloglaser.comWindows 7: Ethernet Installation SECTION 3: DRIVER INSTALLATION 13. Click Next. 14. Click Replace the current driver if requested, then click Next. 15. You can rename your printer here. We have not changed it for this document, but many users like to associate the driver name with the IP Address they are using, for example Epilog Helix 192.168.3.4.
Related documents
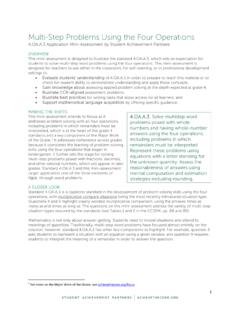
Multi-Step Problems Using the Four Operations
achievethecore.orgsettings to: • Evaluate students’ understanding of 4.OA.A.3 in order to prepare to teach this material or to check for student ability to demonstrate understanding and apply these concepts; • Gain knowledge about assessing applied problem solving at the depth expected at grade 4; ...

HEAT FUSION JOINING PROCEDURES - Hdpe Supply
hdpesupply.comHEAT FUSION ... material that will degrade due to extended contact with the heater. Recommended heating tool temperatures are specified for each procedure. This temperature is indicative of the surface temperature, not the heating …

Backflow Prevention - Watts
media.wattswater.comBefore installing standard material product, consult your local water authority, building and plumbing codes. Industry Terms Backpressure: Pressure, higher than the supply pressure, caused by a pump, elevated tank, boiler, or other means that can cause backflow. Backsiphonage: Backflow caused by negative or reduced pressure in the supply piping.
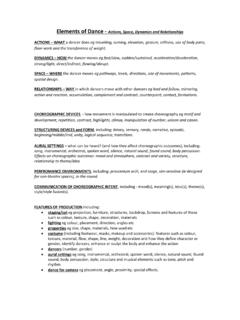
Elements of Dance - Actions, Space, Dynamics and Relationships
www.turton.uk.comtexture, material, flow, shape, line, weight, decoration and how they define character or gender, identify dancers, enhance or sculpt the body and enhance the action • dancers (number, gender) • aural settings eg song, instrumental, orchestral, spoken word, silence, natural sound, found

Autodesk Fusion 360 Training: The Future of Making Things ...
cdn.instructables.comAutodesk Fusion 360 Training: The Future of Making Things . Attendee Guide . Abstract. After completing this workshop, you will have a basic understanding of editing 3D models using Autodesk ® Fusion 360. TM. to quickly produce a desk lamp, using a range of tools. You will also be able to output documentation from the model and add dimensions.

Autodesk Fusion 360 Book (2nd Edition)
forums.autodesk.comPhysical Material 6-20 Appearance 6-21 Manage Materials 6-22 Delete 6-23. viii Autodesk Fusion 360 Black Book ... Scene Settings 10-2 Environment Library Tab 10-5 Texture Map Control 10-6 ... Autodesk Fusion 360 Black Book xi Crease 12-34 UnCrease 12-35 Bevel Edge 12-36 Slide Edge 12-37 ...

F410 USER MANUAL - Fusion3
www.fusion3design.comOct 28, 2020 · material being printed; higher temperature materials require more power. Please use the included power cord to connect your F410 to a 3-prong outlet. Due to the high-power draw, please be mindful that you do not overload any power strips/surge protectors you use.

FUSION IQ - Hotronix
www.hotronix.comFUSION IQ ™ Operating Instructions Displays the selected preset. Touch and hold to see application settings. NOTE: Holding down material name will display targeted application settings. Screen displays current temperature, pressure, and time. Status bar provides helpful information regarding heat press. Displays multiple heat application ...

IColor™ Standard 2 Step™ Textile Transfer Paper Instructions
www.icolorprint.comtaken when pressing onto some types of synthetic material such as nylon or polyester. S pandex or Lycra ... Printer Settings: In the RIP software settings, choose the paper type according to the printer being used. ... All instructions are based on using a Hotronix Fusion press (recommended). Clam shell and other types of