
ICE MAKER INSTALLATION INSTRUCTIONS ... - KitchenAid
drainage from all drains. The ideal installation has a standpipe with a 1¹⁄ 2" (3.81 cm) to 2" (5.08 cm) PVC drain reducer installed directly below the outlet of the drain tube as shown. You must maintain a 1" (2.54 cm) air gap between the drain hose and the standpipe. Do not connect the outlet end of the drain tube to a closed
Download ICE MAKER INSTALLATION INSTRUCTIONS ... - KitchenAid

Information
Domain:
Source:
Link to this page:
Documents from same domain

Use & Care Guide - kitchenaid.com
www.kitchenaid.com3 INSTALLATION INSTRUCTIONS Installer: Leave Use and Care Guide with the homeowner. Homeowner: Keep Use and Care Guide for future reference and for local electrical inspector’s use, if required. Unpacking IMPORTANT: Do not grasp console to move compactor. Begin in the room where the compactor will be located. 1. Remove compactor from shipping carton.

KSMSFTA - kitchenaid.com
www.kitchenaid.comPrecise Heat Mixing Bowl, Ice Cream Maker, or the Pouring Shield. The Sifter+Scale attachment can be used in multiple ways: to weigh and sift ingredients while ... WARRANTY AND SERVICE KITCHENAID SIFTER+SCALE ATTACHMENT WARRANTY FOR THE 50 UNITED STATES, THE DISTRICT OF COLUMBIA, PUERTO RICO, AND CANADA

KITCHENAID ICE MAKER WARRANTY
www.kitchenaid.com19 KITCHENAID® ICE MAKER WARRANTY THREE YEAR LIMITED WARRANTY (PARTS AND LABOR) For three years from the date of purchase, when this major applia nce is installed, operated and maintained according to instructions

KITCHENAID DISHWASHER WARRANTY
www.kitchenaid.com21 KITCHENAID® DISHWASHER WARRANTY TWO YEAR LIMITED WARRANTY For two years from the date of purchase, when this major appliance is operated and maintained according to instructions attache d to or

BOWL LIFT STAND MIXER
www.kitchenaid.comreplacement stand mixer, use the carton and packing materials to pack up your “failed” stand mixer. In the carton, include your name and address on a sheet of paper along with a copy of the proof of purchase (register receipt, credit card charge slip, etc.). For a detailed explanation of warranty terms and conditions, including how to ...

STAND MIXER - KitchenAid
www.kitchenaid.comreplacement stand mixer, use the carton and packing materials to pack-up your “failed” stand mixer. In the carton, include your name and address on a sheet of paper along with a copy of the proof of purchase (register receipt, credit card charge slip, etc.). For a detailed explanation of warranty terms and conditions, including how to ...

Use & Care Guide
www.kitchenaid.comWhen using electrical appliances, basic safety precautions should always be followed, including the following: 1. Read all instructions. Misuse of appliance may result in personal injury. 2. To protect against risk of electrical shock, do not put Stand Mixer in water or other liquid. 3. This appliance can be used by children aged from 8 years

Owners Manual - KitchenAid
www.kitchenaid.comDrying - Rinse aid is essential. You must use a drying agent such as a rinse aid for good drying performance (sample included). Rinse aid along with the Heat Dry or ProDry™ option will provide best drying and avoid excessive moisture in the dishwasher interior. For best drying, use the Heat Dry or ProDry™ option. Dispensers vary by model

INSTALLATION INSTRUCTIONS 27 (68.6 CM) AND 30 (76.2 CM ...
www.kitchenaid.com4 Cabinet Dimensions - Double Ovens, Flush Installations A 253/ 8" (64.4 cm) minimum cutout depth is required. These dimensions will result in a 1/4" (6 mm) reveal on the top, a 1/4" (6 mm) reveal on the sides, and a 1/8" (3 mm) reveal on
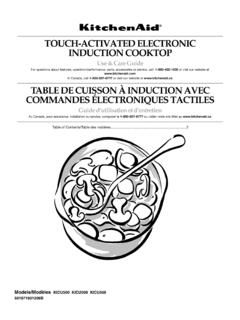
TOUCH-ACTIVATED ELECTRONIC INDUCTION COOKTOP
www.kitchenaid.comThe touch-activated electronic controls offer a variety of heat settings for optimal cooking results. When melting foods such as chocolate or butter, the surface cooking area can be set to the Melt function for minimal cooking power. For maximum surface cooking power, all cooktop touch-activated electronic controls can be set to Performance Boost
Related documents
Chapter 3 Pre-Installation, Foundations and Piers - Oregon
www.oregon.govNew home installations must be anchored according the manufacturer’s installation instructions. Secondary installations may be anchored according to the manufacturer’s installation instructions, or according to Section 3-2.6 of this code. Certain earthquake resistant bracing systems may comply with this requirement. Flood Hazard Areas

Reported by Committee 302 - American Concrete Institute
www.concrete.orgslabs-on-ground, ACI 223R for shrinkage-compensating concrete floors, and ACI 421.1R and 421.2R for suspended floors. 5.2—Slabs-on-ground 5.2.1 Required design elements—Following are the minimum items that should be addressed in the construction documents prepared by the designer (ACI 360R): a) Slab-on-ground design criteria

DESIGN AND INSTALLATION GUIDE - Cemintel
www.cemintel.com.auflat, off the ground, properly supported on a level platform and protected from the weather. Care should be taken to avoid damage to edges, ends and surfaces. If sheets become wet, allow to dry thoroughly before fixing. Product Description Size Quantity Product Code Makita Plunge Saw Kit (1300W) includes 1400mm guide rail and bonus 165mm fibre ...

INSTALLATION GUIDE for corrugated roofing panel …
www.cranecomposites.comPanels may we washed with either mild detergent-type cleaners or by steam and high-pressure spray systems. Apply cleaners with sponge ... temperatures not below 60°F. installation guide for corrugated roofing panel installation ... level ground with good drainage, sunny area away from large trees, and close access to water and electric 2 ...

Troubleshooting and Maintenance Guide for Residential ...
www.rainbird.comfor easy access in below ground situations. Once this valve is installed and tested, the valve at the meter may be left open for water usage inside the house. In freezing climates, your next step will be to install a manual drain valve so that the water can be drained from the pipes between the zone valves and the shut-off valve.
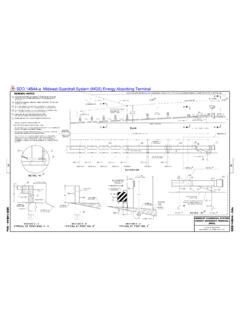
GENERAL NOTES HINGE POINT LINE - Wisconsin Department …
wisconsindot.govJul 13, 2018 · dimensions and installation instructions. the center of the upper 3 1 2" diameter hole on post number 3 through post 9 is to be flush with the ground line up to a maximum of 2" above ground line. wood blocks on posts numbered 3 through 9 may be adjusted up to 3" above the top of post. 9 f 6 6 sdd sdd 14b44 - 04a 14b44 - 04a
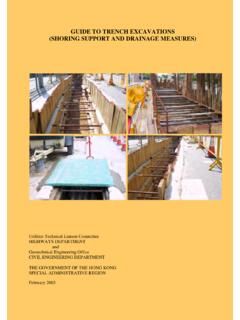
Guide to Trench Excavations (Shoring Support and Drainage ...
www.cedd.gov.hkfactors in the case of trench-related slope failures was found to be inadequate drainage provisions. In view of the above, this Guide emphasizes the deficiencies identified by the GEO/CED study, i.e. the need for adequate shoring support and drainage measures, and the need to comply strictly with site supervision requirements and site safety

DECKING INSTALLATION INSTRUCTIONS
images.thdstatic.comSleeper installation: Minimum joist height is 1.5 in. (38.1 mm), installed level, in the direction of water runoff and directly to a solid sub- structure. Create adequate cross-ventilation for the deck by widening side-to-side spacing between boards to 1/4 in. (6.4 mm) with a