INSTALLATION AND OPERATING INSTRUCTIONS
3. Locate and remove a knockout (ko) in the bottom of the load center (Figure 2). Use a 3/4" ko for 6-circuit models, and a 1" ko for 10-circuit models. 4. Insert the wires extending from the end of the flexible conduit through the ko. Attach the conduit connector securely with the …
Download INSTALLATION AND OPERATING INSTRUCTIONS

Information
Domain:
Source:
Link to this page:
Documents from same domain

NEW! Panel/Link X Series - Reliance Controls …
www.reliancecontrols.comTECHNICAL SPCIFICATIONS BULLETIN selection of watt meters, for balancing powering the 120V circuits and damaging NEW! Panel/Link ® X Series Three-pole Manual Transfer Panels with

POWER INLET BOX INSTALLATION INSTRUCTIONS
www.reliancecontrols.comPOWER INLET BOX CAT. NO. PB30 30 Amps., 120/240 VAC INSTALLATION INSTRUCTIONS IMPORTANT: Installation of this power inlet box and related wiring must be done by a qualified electrician in

For Reliance Controls Emergency Power Transfer …
www.reliancecontrols.comKEY COMPONENTS OF THE RELIANCE CONTROLS TRANSFER SWITCH KIT These UL489 branch circuit breakers . Circuit Breakers provide over …

STANDBY POWER FURNACE SWITCH Easy/Tran …
www.reliancecontrols.com1. Connector INSTALLATION INSTRUCTIONS Even with the main power switch turned off, the wires on the utility side of the main breaker are still live and

INSTRUCTIONS FOR THE RELIANCE Panel/Link - …
www.reliancecontrols.comINSTRUCTIONS FOR THE RELIANCE Panel/Link® - TW Series Generator-ready Main Breaker Panel (Horizontal On/Off) with Feed -Thru Lugs THE RELIANCE PANEL/LINK® TRANSFER PANEL IS NOT FOR “DO-IT-YOURSELF” INSTALLATION.

INSTRUCTIONS FOR THE RELIANCE Panel/Link - TR Series
www.reliancecontrols.comwill now register when the wires carry sufficient current from the generator. 10. Connect the neutral wire from the generator to the neutral bar in the transfer panel and the

Reliance Installation and Operating Instructions
www.reliancecontrols.comReliance Installation and Operating Instructions Key Components of the Reliance Transfer Switch 2 Handle tie Circuit breakers. Each transfer switch circuit has a 1-in interchangeable circuit breaker

I N S T A L L A T I O N A N D I N S T R U C T I O N S
www.reliancecontrols.com2. Wire Stripper and Cutter (10 to 14 gauge) 3. Insulated Screwdrivers (#2 Phillips, 1/4" Flat Tip or #2 Square Tip depending on your load center) 4. Hammer 5. Marking Pencil 6. Tape Measure 7. Seven Wall Anchors with at Least a 3/8” Flange 8. Enough 10-3 with Ground Building Wire to reach from where you install your Outdoor Power Inlet Box ...
Related documents

Telephone Paging Amplifier - Bogen
www.bogen.comSynthetic washer 1/8” x 5/16” (3 x 8 mm) TYP 4 PCS Both items supplied Figure 2: Wall Mounting the Amplifier Installation Screw #8 x 5/8” (M4 x 16mm) with Synthetic washer 1/8” x 5/16” (3 x 8mm) TYP 4 PCS. Both items are supplied. Rack Mounting Screws are not supplied. Rack Mounting the TPU35B, TPU60B, and TPU100B Ventilation
Mobile Connector Owners Manual - Tesla, Inc.
www.tesla.comApr 30, 2019 · • Model 3: On the car status on the touchscreen, touch the charging icon. • Model 3: On the "Cards" area on the touchscreen, touch the charging icon, then press OPEN CHARGE PORT. 4. Plug the Mobile Connector handle into your vehicle's charge port. 5. When you plug the Mobile Connector into your vehicle, the charge port indicator light pulses

Bose Videobar VB1 all-in-one USB conferencing device
assets.bose.com2-pin Euroblock connector Quick start guide, table-mount setup guide, wall-mount setup guide, safety instructions Optional Accessories Display mounting kit Right-angle USB 3.1 cable, 2.0 m (6.5 ft) Mud ring PRODUCT CODES 842415-1110 Videobar VB1 120V US 842415-2110 Videobar VB1 230V EU 842415-3110 Videobar VB1 100V JP 842415-4110 Videobar VB1 ...

ThinkVision P24h-20 User Guide - CNET Content
cdn.cnetcontent.comother end to the DP output connector (for daisy chain) on the monitor. Note 1: Monitors sold in NA include an DP cable. Note 2: For other regions Lenovo recommends that customers who require to use the Display Port input on their monitor purchase the "Lenovo Display Port to Display Port cable 0A36537".
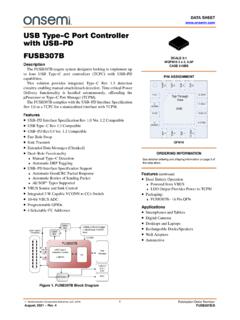
FUSB307B - USB Type-C Port Controller with USB-PD
www.onsemi.comFigure 3. FUSB307B Block Diagram USB PD PHY BMC Driver BMC Rcvr CC Switch/ Sense Clock Gen. VDD INT_N SDA1/SCL2 SCL1/SDA2 CC1 CC2 VCONN VBUS Prog Pull− Up Current Type−C Control CDR CRC32 Tx CRC32 Rx 4B5B BMC Enc. BMC Dec. FUSB307B ADDR/ ORIENT USB PD FSM Discharge Bleed Discharge Discharge GPIO Control PWR MGMT SRC …

Dell U4320Q User’s Guide
downloads.dell.comUSB 3.1 upstream port, Power Delivery PD up to 90 W) • 1 x Analog 2.0 audio line out (3.5 mm jack) • 2 x USB-A, USB 3.1 Gen 1 (5 Gbps) Quick Access (Side view) • 1 x USB 3.1 with BC1.2 charging capability at 2 A (max) • 1 x USB Type-C Downstream (15 W), USB3.1 Gen 1 (5 Gbps) Border width (edge of monitor to active area) 13.0 mm (Top)