
Installation and Operation Guide ... - Consumer Products
1. Press and hold the Setting button on the doorbell for three seconds. The halo light will circle. 2. Press the push button. 3. Within 12 seconds of pressing the push button, press the Music button to select the ring for that push button. 4. Within 12 seconds of pressing the push button, press the Sunlight button to select a halo light color
Download Installation and Operation Guide ... - Consumer Products

Information
Domain:
Source:
Link to this page:
Documents from same domain

Honeywell Temperature & Humidity Sensor with …
www.honeywellstore.com3 3 INTRODUCTION Thank you for selecting the Honeywell Temperature and Humidity Sensor with Probe. This device registers, display and transmits the

Portable Air Conditioner OWNER’S MANUAL
www.honeywellstore.com3 USER TIPS To ensure optimal efficiency of the product, keep doors and windows closed when it is used as an air conditioner or dehumidifier. If the product is being used with the fan function only, an open window could improve

IMPORTANT SAFETY INSTRUCTIONS - Honeywell Store
www.honeywellstore.comWATER TANK AND WATER TRAY ARE TOP RACK DISHWASHER SAFE. Please note we recommend washing in the TOP RACK a residential dishwashers operating at temperatures below 70°C/158°F. It is recommended that you run the dishwasher on the light duty or normal cycle. Do not wash humidifier parts with soiled articles/dishes. DO NOT place tank cap in ...

Portable Air Conditioner User Manual - Honeywell Store
www.honeywellstore.comThe air conditioner includes a window venting kit. No permanent installation is needed. The unit is easy to move from room to room and offers a truly ... DO NOT operate the unit with a damaged plug or loose wall outlet. If the power cord is damaged, it must be replaced by the manufacturer or an authorized service agent.

Honeywell Wind Turbine System - Fans
www.honeywellstore.comThe Honeywell Wind Turbine is a gearless wind turbine that measures just 6 feet (1.8 m) in diameter, weighs 185 lbs (84kgs) and produces up to 1500 kWh per year depending on height and location. The Honeywell Wind Turbine’s BTPS perimeter power system and unique design of multi-stage blades allows the system to react

Honeywell HWM705 Series Humidifiers Manual
www.honeywellstore.comHWM705 SERIES ACCESSORIES 1. Remove Water Tank by grasping the Top Tank Handle and pulling up. Remove Tank Cap located on bottom of Water Tank by turning counter clockwise. 2. Fill Water Tank with cool water. Do not fill with warm or hot water. 3. Replace Tank Cap by turning clockwise to lock back in place. Do not over tighten.

7-day Solar Programmable Wall Switch - Honeywell Store
www.honeywellstore.comQuick Start-up 3. Set the time and date before using the timer for the first time. ... (GPS) device. The accuracy of the sunset and sunrise times depends on the accuracy of the coordinates you enter for your city. NOTE: Enter a negative value for a south latitude or a west longitude.
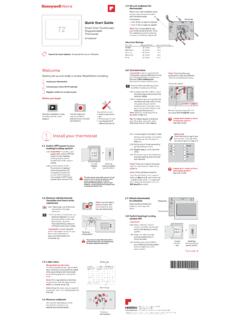
Quick Start Guide 72
www.honeywellstore.comThis thermostat works with common 24 volt systems such as forced air, hydronic, heat pump, oil, gas, and electric. It will not work with millivolt systems, such as a gas fireplace, or with 120/240 volt systems such as baseboard electric heat. MERCURY NOTICE: Do not place your old thermostat in the trash if it contains mercury in a sealed tube.

33-00421EF-01 - T9 THERMOSTAT - Honeywell Store
www.honeywellstore.comThis guide will help you determine if you have a C-Wire or will need to use the included C-Wire Adapter (Step 10). ... If this product is replacing a control that contains mercury in a sealed tube, do not place the old control ... With up to a 200-foot* range, 20 sensors with temperature, humidity, and occupancy detection can connect to your ...

69-2631ES 03 - HE360 Humidifier and Installation Kit
www.honeywellstore.com• Select a location for the humidistat on the return plenum or on the wall in the living space. — Mounting on the return plenum is the easiest installation for the control wiring circuit. For return duct mounting, the humidistat should be mounted upstream from the
Related documents

How to reduce paper consumption in your office - Panda
awsassets.panda.orgcoatings, plastic windows, bright colours including goldenrod, laser printer inks, adhesive products. 6) Use less paper by effectively using computers and other technology Today’s information and communication technologies provide many opportunities for businesses to function with far less paper. Electronic mail, Intranets, Internet and document

INSTRUCTION MANUAL
02d3287.netsolhost.com2. Turn on the camera and press the Wi-Fi button on the side of the device. The Wi-Fi logo will appear on the screen. 3. Using your smart device’s Wi-Fi settings, locate the camera’s Wi-Fi connection. It will appear as SPORTS DV followed by the camera’s serial number. The default password is 12345678. When you have successfully connected ...
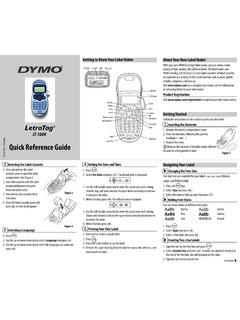
Quick Reference Guide - DYMO
download.dymo.com1. Press . 2. Select Style and press . 3. Select a font style and press . Creating Two-Line Labels 1. Type the text for the first line and press . 2. Select Second Line and press . A multi-line symbol is inserted at the end of the first line, but will not print on the label. 3. Type the text for the second line. Selecting a Language 1. Press . 2.

User's Guide - L3210
files.support.epson.com• If you have trouble loading a stack of envelopes, press each envelope flat before loading it or load one envelope at a time. • Do not load envelopes that are curled, folded, or too thin, or that have plastic windows or exposed adhesive flaps. • Check the paper package for any additional loading instructions.

Cut and Press Settings for Products at Adhesive Vinyl
www.143vinyl.comSep 24, 2020 · Cut and Press Settings for Products at Heat Transfer Vinyl (HTV) Continued **These settings were tested on each machine by 143VINYL. Please keep in mind that each machine cuts differently based on sharpness of blade, state of mat, and other factors. Adjust cut and pressing settings and do test cuts as needed.** Last update: 9/24/20

Garmin Dash Cam™ Mini 2 Owner’s Manual
www8.garmin.com2 Remove the protective film from the mount adhesive. 3 Position the mount over the mounting location. TIP: The adhesive is extremely sticky. Avoid touching the adhesive to the windshield until the mount is properly positioned and aligned. 4 Press the mount firmly onto the windshield, and maintain pressure for 30 seconds.

GARMINOwner’s Manual DASH CAM MINI
www8.garmin.com2 Remove the protective film from the mount adhesive. 3 Position the mount over the mounting location. TIP: The adhesive is extremely sticky. Avoid touching the adhesive to the windshield until the mount is properly positioned and aligned. 4 Press the mount firmly onto the windshield, and maintain pressure for 30 seconds.