
Installation and User Guide
Install strike on the door frame. Hold the latch in front of the door hole, with the latch ... R P Q N F ST C G D H chiseled or not chiseled or or 1 Prepare the door and check dimensions ... Reference Guide Exterior Back panel Program button Status LED Switches Turnpiece shaft
Download Installation and User Guide

Information
Domain:
Source:
Link to this page:
Documents from same domain

Programming and Troubleshooting Guide 1 Mastercode 2
kwiksetprodstorage.blob.core.windows.netTroubleshooting: Touchscreen Screen activation To activate the screen, use one of the three options below: 1. Touch screen with palm or back of hand until digits illuminate. 2. Touch lower left area of screen (where Checkmark is located) until digits illuminate. 3. Touch screen with three or more fingers until digits illuminate. One-second pause
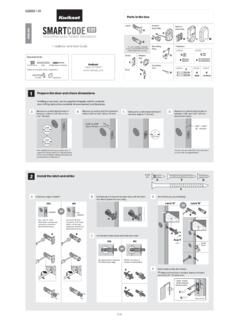
Interior A Assembly ENGLISH F W B Installation and User Guide
kwiksetprodstorage.blob.core.windows.netCAUTION: Prevent unauthorized entry. Since anyone with access to the back panel can change the user codes, you must restrict access to the back panel and routinely check the user codes to ensure they have not been altered without your knowledge. The use of a mastercode can help protect your system’s settings.
Troubleshooting Guide 1 Door Preparation 2
kwiksetprodstorage.blob.core.windows.netHanding, or latch calibration, is the way that the smart lock learns the orientation of your door (left- or right-handed). A1: The first time the battery is inserted, the lock will perform automatic calibration, or “handing.” You will know the handing is taking place when the latch bolt retracts and extends on its own.

Programming and Troubleshooting Guide 1 Mastercode 2
kwiksetprodstorage.blob.core.windows.net1. Keep door open. Press and HOLD the Program button until the keypad flashes green (about 5 seconds). 2. Enter new Mastercode. 3. Press Lock button once. 4. Re-enter Mastercode. 5. Press Lock button once. If programming is successful, the keypad will flash green once with one beep. If programming is unsuccessful, the keypad will flash red ...

Rev 03 Parts List - .NET Framework
kwiksetprodstorage.blob.core.windows.net4 Install exterior assembly A Route the cable below the latch. Insert the torque blade through the horizontal slot in the latch. D G Secure the mounting plate with the supplied screws. IMPORTANT: Hold the exterior assembly on the outside firmly (or have a second

264 Contemporary ENGLISH Electronic Deadbolt
kwiksetprodstorage.blob.core.windows.netIMPORTANT: Make sure the latch bolt is fully retracted (in the unlocked position). A2 Optional: Remove square corner face and replace with round corner face (if needed). Ensure A2 snaps into place. A2 A Install latch in door with supplied screws. 1 / 4 ENGLISH 66882 Rev 02 Installation and User Guide Kwikset Technical Support 1-800-327-5625 www ...

A B C - .NET Framework
kwiksetprodstorage.blob.core.windows.netwant to operate the lock. For new purchases, the current key is the one that was supplied in the box with the purchased lockset. The new key must be the same key type (KW1) as the current key. Consult your local hardware store for more information. Before performing this procedure, make sure the lock is installed on the door. Re-key the lock while
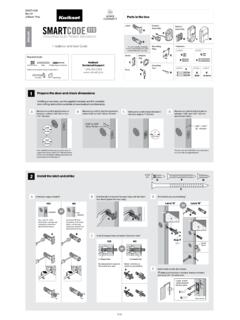
Interior A Assembly F ENGLISH W K L M B Installation and ...
kwiksetprodstorage.blob.core.windows.netand Troubleshooting Guide on the SmartCode 910 page at www.kwikset.com. 2x One green flash with one beep* Three red flashes with three beeps* Two beeps* or or Programming time out. Make sure not to pause for more than 5 seconds during programming. Tip: You can press the Lock button before entering your user code to light up the keypad at night.
Related documents

SHAFTLINER FOR SHAFTWALL/STAIRWELL SYSTEMS
www.buildgp.comInstall the next 1” (25.4 mm) DensGlass Shaftliner panel inside the J track and within the tabs of the C-T, C-H or I stud. Note that the edges of the panel are beveled to help guide the panel into the slotted and tabbed section of the stud.
insTallaTiOn GuidE - Nvidia
www.nvidia.comPanel User Guide, and Driver Quick Start Guide fast and easy steps to install the geforce graphics card(s). 02. 4 unPacking 02 4-to6 Pin Adapter use the 4-to-6 pin adapter to convert two 4-pin power supply connectors to one 6-pin connector). WElCOME Registration Card

Gujarati Indic Input 2 - User Guide
www.microsoft.comTo Install Gujarati Indic Input 2 Installation of the Gujarati Indic Input 2 is a very easy process that takes less than two minute to complete. Run or double click Gujarati Indic Input 2 Setup. The setup wizard will guide you through the installation process. Once