Transcription of Rev 03 Parts List - .NET Framework
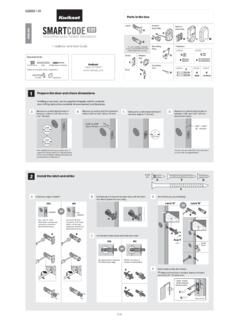
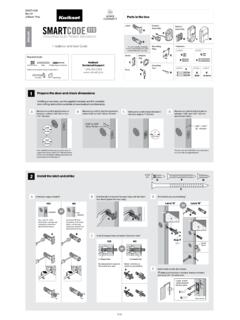
1 Door frame Make sure hole in door frame is drilled a minimum of 1 (25 mm) toolsRuler4 AA BatteriesHammerWood blockPliersPhillips screwdriverAdditional Tools (depending on application)If drilling a new door, use the supplied template and the complete door drilling instructions available at : Additional door preparation may be required for doors with 1-1/2" (38 mm) holes. Consult the deadbolt drilling instructions at to confirm that the hole in the door is either 2-1/8" (54 mm) or 1-1/2" (38 mm).Measure to confirm that the backset is either 2-3/8" or 2-3/4" (60 or 70 mm).2-3/8" or 2-3/4"60 or 70 mm1-3/8" or 1-3/4"35 mm or 44 mmMeasure to confirm that the hole in the door edge is 1" (25 mm).Measure to confirm that the door is either 1-3/8" or 1-3/4" (35 mm or 44 mm) "54 mm1-1/2"38 mm1"25 mm1 Prepare the door and check dimensions2 Install the latch and strikeLatchExterior AssemblyInterior CoverStrikeSmartKey ToolAEJLMFGHBCDP arts ListDrive-In CollarKeysLatch and Strike ScrewsMounting PlateInterior Assembly ScrewsInterior AssemblyMounting Plate ScrewsAlign tabs with holes in (x2)K (x2)P (x2)B180 Is the door edge chiseled?
2 Is the slotted hole centered in the door hole?Hold the latch in front of the door hole, with the latch face flush against the door latch in door with supplied adjustment is required. Proceed to next hole is centeredslotted hole is NOT centeredRotate latch face as shown to extend latch in door with wood block and strike on the door chiseledMake sure slotted hole is at bottom of sure slotted hole is at bottom of collar snaps into collar to test for tight / 466895 Rev 03 Installation and User GuideKwikset Technical a flathead screwdriver to lift tabs on collar of rectangular face to remove it from latch. Install drive-in collar. I M P O R TA N T: Make sure the latch bolt is fully retracted (in the unlocked position).4 Install exterior assemblyRoute the cable below the the torque blade through the horizontal slot in the the mounting plate with the supplied M P O R TA N T: Hold the exterior assembly on the outside firmly (or have a second pair of hands) for the next the key and test the latch for smooth the torque blade through the center hole in the mounting plate and send the cable through the bottom M P O R TA N T: Make sure the latch is fully retracted (in the unlocked position).
3 BI M P O R TA N T: Make sure the torque blade is in the horizontal side of doorunlockedhorizontalhorizontal slotRemove the key and make sure the latch bolt is still in the unlocked latch does not operate smoothly, adjust parallel to door (x2)torque blade in center holecable in bottom holeinterior side of doorGunlocked2 / 4 Diameter is 2-1/8" (54 mm)Diameter is 1-1/2" (38 mm)2-1/8"54 mm1-1/2"38 mmNo adjustment is required. Proceed to step is the diameter of the hole in the door?ABRemove adapter ring from exterior assembly:Use pliers to remove two tabs from mounting plate:tabs1. Remove Remove adapter ring from exterior Reinstall gasket, ensuring tight keypad and mounting plate (only for doors with smaller holes)3 / 4567 Install interior assemblySet locking and unlocking directionOptional: Re-key the lockRemove the battery the colored edges of the connectors and ensure a tight cable the turnpiece for smooth the interior assembly with the supplied battery cover and make sure the latch is still in the unlocked sure the torque blade is still in the horizontal position and install the interior 4 AA batteries into the interior assembly.
4 For best results, use new, non-rechargeable Alkaline batteries and hold the Reset button on the interior assembly for 5 seconds, until you hear 3 long correct polarity. If turnpiece doesn t rotate, repeat steps 5E and 5F, making sure to rotate the turnpiece AWAY from the door edge. horizontaldooredgeNote: Turnpiece may move on its HHL (x3)JJPress the Lock button. The latch bolt will extend to latch bolt will extend and retract. The lock will beep and the keypad will turn green or the door is OPEN and UNLOCKED, enter the following code to teach the lock the orientation of the door:If needed, re-key the lock to work with your existing key. See the supplied SmartKey Re-Key instructions for more the default User Code (1-2-3-4), then press the Lock button.
5 The door will normal operation, press the Lock button to lock the door. = Lock buttonDEnter User : 1-2-3-4 Press .I M P O R TA N T: It is recommended that you replace the default Mastercode and default User Code with codes of your own. See page normal operation, press after entering your user code to unlock the is your default : Each button on the keypad represents two numbers. You only need to push the button once to get either (with 2 beeps): The door has successfully learned the orientation of the door. Continue to step 6C. Red (with 3 beeps): Make sure the door is unlocked and that you are using a fresh set of batteries. Repeat step 6A. DI M P O R TA N T: Rotate the turnpiece AWAY from the door edge and make sure the latch is fully retracted (in the unlocked position).
6 1. Press 0-0-0-0. 2. Press . You will hear one Press Press .unlocked4 / 4 AlertReasonSolutionKeypad flashes red 3 times with 3 jammed while attempting to re-lock door. If needed, reposition handing code has not been door handing User Code programmed, or User Codes are at least one User Code, or re-enable User programming procedure User Code User flashes red 5 times with 5 incorrect User Codes entered within one User Code after 45-second keypad flashes red 10 times with 10 batteries. 2018 Spectrum Brands, Setup and UseHow to add User CodesA total of 6 User Codes (and a temporary one-time User Code) may be programmed. Do not program a User Code that is the same as your Mastercode. CAUTION: A User Code is used to unlock the door while a Mastercode is a password for making changes to the lock Make sure the lock is unlocked and the door is Enter your Mastercode - for new install, default is Press.
7 You will hear one Press Press . You will hear one Enter a new User Code. It must be 4-10 Press . You will hear two beeps if successful. If you hear three beeps, it was unsuccessful. Repeat from step 1 Test the code: While your door is open, lock it. Enter your new User Code, then press . The door should to delete all User Codes CAUTION: A User Code is used to unlock the door while a Mastercode is a password for making changes to the lock Make sure the lock is unlocked and the door is Enter your existing Mastercode - for new install, default is Press . You will hear one Press Press . You will hear two beeps if successful. If you hear three beeps, it was unsuccessful. Repeat from step 1 a new installation, this will delete the default User Code 1-2-3-4.
8 For subsequent instances, this will delete all User Codes in the the lock can only be operated by the key and turnpiece until a new User Code is added in step to change your MastercodeThe Mastercode will not unlock your door. It is an added security feature that is used to set up all functions. The default Mastercode is 0-0-0-0. It is recommended that you change it to a code of your Make sure the lock is unlocked and the door is open. 2. Enter your Mastercode - for new install, default is Press . You will hear one Press Press . You will hear one Enter a new Mastercode. It must be between 4 and 10 Press . You will hear two beeps if successful. If you hear three beeps, it was unsuccessful. Repeat from step 1 swiftly during programming.
9 If no digit is pressed for 10 seconds, the system will time out and you will need to restart the procedure will delete all User Codes associated with the lock, and the default Mastercode (0-0-0-0) and User Code (1-2-3-4) will be restored. 1. Make sure the door is open and and hold the Reset button for 5 seconds, until you hear 3 long Enter the default Mastercode (O-O-O-0).3. Press . You will hear one beep. 4. Press Press . The latch bolt will extend and retract to learn the orientation of the door. If successful, the keypad will flash green and you will hear 2 beeps. If unsuccessful, the keypad will flash red and you will hear 3 beeps (make sure the door is open and unlocked and that you are using a fresh set of batteries).6. Test the lock: With the door open and unlocked, press.
10 Make sure it locks the door. 7. Test the default User Code: Enter the default User Code (1-2-3-4), then press . Make sure it unlocks the door. The default Mastercode is 0-0-0-0. It is recommended that you change it to a code of your own. The lock is pre-programmed with a default User Code of 1-2-3-4. It is recommended that you delete this to restore default settingsSystem AlertsRegulatory ComplianceImportant SafeguardsTroubleshootingThe lock cannot be locked or unlocked by the sure the lock is programmed with at least one User Code and that the User Codes are not disabled. If needed, restore the lock s default keypad doesn t respond when touched (no lights are visible and no beeping is heard).Make sure the cables are properly connected, and make sure the batteries are new and installed correctly.