
INSTALLATION GUIDE for corrugated roofing panel …
Panels may we washed with either mild detergent-type cleaners or by steam and high-pressure spray systems. Apply cleaners with sponge ... temperatures not below 60°F. installation guide for corrugated roofing panel installation ... level ground with good drainage, sunny area away from large trees, and close access to water and electric 2 ...
Download INSTALLATION GUIDE for corrugated roofing panel …

Information
Domain:
Source:
Link to this page:
Documents from same domain
INSTALLATION GUIDE - Crane Composites
www.cranecomposites.comLOW TEMPERATURE CONDITIONS Acclimate panels in the operating temperature conditions. Carefully follow the guidelines in this installation guide for expansion/contraction

ONE-PIECE MOLDINGS, TWO-PIECE MOLDINGS & …
www.cranecomposites.com6220 KEMLITE ® MOLDINGS ONE-PIECE MOLDINGS, TWO-PIECE MOLDINGS & RIVETS technical data When installing outside and inside angles to FRP panels, use Crane Advanced Polymer Panel Adhesive.

Flat and Coilable Fiberglass Reinforced Plastic …
www.cranecomposites.comFlat and Coilable Fiberglass Reinforced Plastic (FRP) Panels Safety Data Sheet According To Federal Register / Vol. 77, No. 58 / Monday, March 26, 2012 / …

Frequently Asked Questions - Crane Composites
www.cranecomposites.comFrequently Asked Questions Updated 11/11/14 Are FRP doors available? FRP panels may be used in this application; however we do not manufacture FRP doors.

7091 - Crane Composites
www.cranecomposites.com7091 GLASBORD ® SMOOTH WALL PANEL CLASS C FIRE RATING PER ASTM E-84 PRODUCT CODE: PSIF technical data Additional lengths, widths and colors available by quotation. 12,000 sq. ft. per product, weight and colors required to manufacture.

FIRE RATING INFORMATION SHEET - Crane …
www.cranecomposites.comFIRE RATING INFORMATION SHEET FACTORY MUTUAL APPROVAL Fire-X Glasbord (FXE and FSFM) is the only fiberglass reinforced interior wall and ceiling panel that is accepted under Factory

INSTALLATION GUIDE for walls, ceilings, and laminated panels
www.cranecomposites.comFollow the architect or owner’s specifications or check your local building codes for specific . requirements. * Panels should be limited to 4’ x 8’ FOAM INSULATION An approved thermal barrier system (e.g., gypsum board) must be used between the FRP panels and any foam insulation (Figure 2). Check your local building codes for specific ...
Related documents
Chapter 3 Pre-Installation, Foundations and Piers - Oregon
www.oregon.govNew home installations must be anchored according the manufacturer’s installation instructions. Secondary installations may be anchored according to the manufacturer’s installation instructions, or according to Section 3-2.6 of this code. Certain earthquake resistant bracing systems may comply with this requirement. Flood Hazard Areas

Reported by Committee 302 - American Concrete Institute
www.concrete.orgslabs-on-ground, ACI 223R for shrinkage-compensating concrete floors, and ACI 421.1R and 421.2R for suspended floors. 5.2—Slabs-on-ground 5.2.1 Required design elements—Following are the minimum items that should be addressed in the construction documents prepared by the designer (ACI 360R): a) Slab-on-ground design criteria

DESIGN AND INSTALLATION GUIDE - Cemintel
www.cemintel.com.auflat, off the ground, properly supported on a level platform and protected from the weather. Care should be taken to avoid damage to edges, ends and surfaces. If sheets become wet, allow to dry thoroughly before fixing. Product Description Size Quantity Product Code Makita Plunge Saw Kit (1300W) includes 1400mm guide rail and bonus 165mm fibre ...

ICE MAKER INSTALLATION INSTRUCTIONS ... - KitchenAid
www.kitchenaid.comdrainage from all drains. The ideal installation has a standpipe with a 1¹⁄ 2" (3.81 cm) to 2" (5.08 cm) PVC drain reducer installed directly below the outlet of the drain tube as shown. You must maintain a 1" (2.54 cm) air gap between the drain hose and the standpipe. Do not connect the outlet end of the drain tube to a closed

Troubleshooting and Maintenance Guide for Residential ...
www.rainbird.comfor easy access in below ground situations. Once this valve is installed and tested, the valve at the meter may be left open for water usage inside the house. In freezing climates, your next step will be to install a manual drain valve so that the water can be drained from the pipes between the zone valves and the shut-off valve.
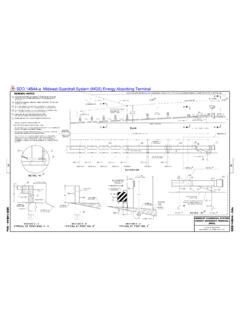
GENERAL NOTES HINGE POINT LINE - Wisconsin Department …
wisconsindot.govJul 13, 2018 · dimensions and installation instructions. the center of the upper 3 1 2" diameter hole on post number 3 through post 9 is to be flush with the ground line up to a maximum of 2" above ground line. wood blocks on posts numbered 3 through 9 may be adjusted up to 3" above the top of post. 9 f 6 6 sdd sdd 14b44 - 04a 14b44 - 04a
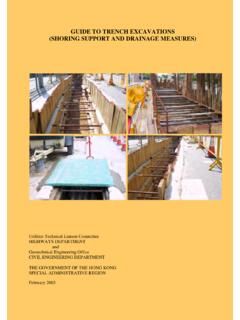
Guide to Trench Excavations (Shoring Support and Drainage ...
www.cedd.gov.hkfactors in the case of trench-related slope failures was found to be inadequate drainage provisions. In view of the above, this Guide emphasizes the deficiencies identified by the GEO/CED study, i.e. the need for adequate shoring support and drainage measures, and the need to comply strictly with site supervision requirements and site safety

DECKING INSTALLATION INSTRUCTIONS
images.thdstatic.comSleeper installation: Minimum joist height is 1.5 in. (38.1 mm), installed level, in the direction of water runoff and directly to a solid sub- structure. Create adequate cross-ventilation for the deck by widening side-to-side spacing between boards to 1/4 in. (6.4 mm) with a