
Installation Instructions - KitchenAid
Proper installation is your responsibility. Have a qualified technician install this oven. Oven location should be away from strong draft areas, such as windows, doors and strong heating vents. Cabinet opening dimensions that are shown must be used. Given dimensions provide minimum clearance. Recessed installation area must provide
Download Installation Instructions - KitchenAid

Information
Domain:
Source:
Link to this page:
Documents from same domain
Use & Care Guide - kitchenaid.com
www.kitchenaid.com3 INSTALLATION INSTRUCTIONS Installer: Leave Use and Care Guide with the homeowner. Homeowner: Keep Use and Care Guide for future reference and for local electrical inspector’s use, if required. Unpacking IMPORTANT: Do not grasp console to move compactor. Begin in the room where the compactor will be located. 1. Remove compactor from shipping carton.

KSMSFTA - kitchenaid.com
www.kitchenaid.comPrecise Heat Mixing Bowl, Ice Cream Maker, or the Pouring Shield. The Sifter+Scale attachment can be used in multiple ways: to weigh and sift ingredients while ... WARRANTY AND SERVICE KITCHENAID SIFTER+SCALE ATTACHMENT WARRANTY FOR THE 50 UNITED STATES, THE DISTRICT OF COLUMBIA, PUERTO RICO, AND CANADA

KITCHENAID ICE MAKER WARRANTY
www.kitchenaid.com19 KITCHENAID® ICE MAKER WARRANTY THREE YEAR LIMITED WARRANTY (PARTS AND LABOR) For three years from the date of purchase, when this major applia nce is installed, operated and maintained according to instructions

KITCHENAID DISHWASHER WARRANTY
www.kitchenaid.com21 KITCHENAID® DISHWASHER WARRANTY TWO YEAR LIMITED WARRANTY For two years from the date of purchase, when this major appliance is operated and maintained according to instructions attache d to or

BOWL LIFT STAND MIXER
www.kitchenaid.comreplacement stand mixer, use the carton and packing materials to pack up your “failed” stand mixer. In the carton, include your name and address on a sheet of paper along with a copy of the proof of purchase (register receipt, credit card charge slip, etc.). For a detailed explanation of warranty terms and conditions, including how to ...

STAND MIXER - KitchenAid
www.kitchenaid.comreplacement stand mixer, use the carton and packing materials to pack-up your “failed” stand mixer. In the carton, include your name and address on a sheet of paper along with a copy of the proof of purchase (register receipt, credit card charge slip, etc.). For a detailed explanation of warranty terms and conditions, including how to ...

Use & Care Guide
www.kitchenaid.comWhen using electrical appliances, basic safety precautions should always be followed, including the following: 1. Read all instructions. Misuse of appliance may result in personal injury. 2. To protect against risk of electrical shock, do not put Stand Mixer in water or other liquid. 3. This appliance can be used by children aged from 8 years

Owners Manual - KitchenAid
www.kitchenaid.comDrying - Rinse aid is essential. You must use a drying agent such as a rinse aid for good drying performance (sample included). Rinse aid along with the Heat Dry or ProDry™ option will provide best drying and avoid excessive moisture in the dishwasher interior. For best drying, use the Heat Dry or ProDry™ option. Dispensers vary by model

INSTALLATION INSTRUCTIONS 27 (68.6 CM) AND 30 (76.2 CM ...
www.kitchenaid.com4 Cabinet Dimensions - Double Ovens, Flush Installations A 253/ 8" (64.4 cm) minimum cutout depth is required. These dimensions will result in a 1/4" (6 mm) reveal on the top, a 1/4" (6 mm) reveal on the sides, and a 1/8" (3 mm) reveal on
TOUCH-ACTIVATED ELECTRONIC INDUCTION COOKTOP
www.kitchenaid.comThe touch-activated electronic controls offer a variety of heat settings for optimal cooking results. When melting foods such as chocolate or butter, the surface cooking area can be set to the Melt function for minimal cooking power. For maximum surface cooking power, all cooktop touch-activated electronic controls can be set to Performance Boost
Related documents
ELECTRIC DRYER INSTALLATION INSTRUCTIONS
www.whirlpool.comInstallation Clearances For each arrangement, consider allowing more space for ease of installation and servicing, spacing for companion appliances, and clearances for walls, doors, and floor moldings. Space must be large enough to allow door to fully open. Add spacing on all sides of dryer to reduce noise transfer. If a closet door
INSTALLATION INSTRUCTIONS - Garage Doors
www.doorson-line.comINSTALLATION INSTRUCTIONS Amarr Residential Steel Garage Doors Entrematic manufactures & distributes garage doors under several brand names and trademarks, such as: Amarr®, Heritage™, Classica®, Stratford®, Oak Summit® and other consumer brands and product names. ©AGD Rev A 6/7/14 FORM #99295090 PRINTED IN USA

INSTALLATION INSTRUCTIONS AND OWNER’S MANUAL
www.whirlpool.comINSTALLATION INSTRUCTIONS AND OWNER’S MANUAL Side by Side Refrigerator Do Not Throw Away - Additional important safety information included. Para las instrucciones en español, visite nuestro sitio de internet. ... Remove doors from your old refrigerator.
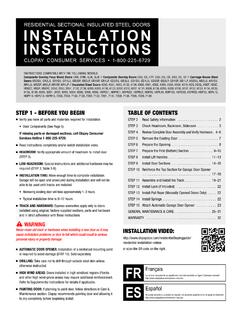
INSTALLATION INSTRUCTIONS
images.thdstatic.comINSTALLATION TIME: Allow enough time to complete installation . Garage will be open and unsecured during installation and will not be able to be used until tracks are installed . • Removing existing door will take approximately 1–3 hours . …

INSTALLATION INSTRUCTIONS FOR INTERIOR PREHUNG …
pdf.lowes.comINSTALLATION INSTRUCTIONS FOR INTERIOR PREHUNG DOORS Make sure: 1. The threshold is level 2. The hinge side of the rough opening is plumb 3. The head is square to the hinge side of the rough opening Center the prehung unit into the rough opening, bottom first. When the door opens to you, and the knob is on the left, it is a left hand door. When ...
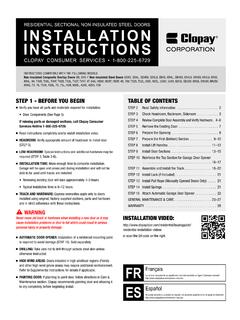
INSTALLATION INSTRUCTIONS
images.thdstatic.comRESIDENTIAL SECTIONAL NON-INSULATED STEEL DOORS CLOPAY CONSUMER SERVICES • 1-800-225-6729 ... compliance with these installation instructions or applicable state or county building codes . WHILE INSTALLING YOUR DOOR Use only the track specified and supplied with the door .
Installation instructions - Miele USA
us.mieleusa.cominstallation contact the Technical Service Department. USA 1-800-999-1360 techserv@mieleusa.com CDN 1-800-565-6435 service@miele.ca,During the installation process, please be careful of sharp edges that can cause harm. IMPORTANT SAFETY INSTRUCTIONS 3

Lap Siding Installation Instructions
www.everlastsiding.comSTARTING THE INSTALLATION • Install pocketed trim at inside and outside corners, and around all windows and doors. • Measure & chalk a level line 3-1/2” up from the lowest point of the wall. • Align the top of the Everlast starter strip on the level line, leave a 1” to 4” gap from the end of the starter strip & accessory

Mohawk® Installation Instructions - Flooring Inc
www.flooringinc.comMohawk® Laminate Installation Instructions. GENERAL. Uniclic® is a revolutionary system for installing laminate floors without using glue. The planks can be clicked together simply, thanks to the ingenious shape of the tongue and groove. Uniclic® is unique because you can install the planks in two different ways: Method A: Angle-In ...