
Installation Instructions - Maytag
Available through an authorized Maytag Parts Retailer Remove access and toe panels before beginning installation. Remove bolts from the crate base brackets, using 5/16" socket with ratchet. Remove crate base and discard base and packaging. Until dishwasher is permanently installed, beware of opening the door as the unit may tip forward.
Download Installation Instructions - Maytag

Information
Domain:
Source:
Link to this page:
Documents from same domain
Maytag Dryer Specifications
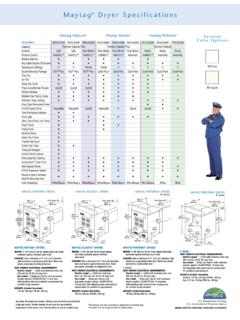
www.maytag.comMaytag® Dryer Specifications MAYTAG PERFORMA® DRYERS MOTOR: 1/4 HP, 120 volt, 60 Hz, single-phase, thermally protected against overload, auto-reset. EXHAUST: Use a minimum of 4" (10.2 cm) diameter rigid aluminum or galvanized steel duct.
Use & Care Guide - Maytag
www.maytag.comCYCLE GUIDE For best fabric care, choose the cycle that best fits the load being washed. Recommended settings for best performance are shown in Bold. Not all settings and options are available on each cycle. NOTE: If you are using fabric softener, be sure to select the Fabric Softener-On option.

Use & Care Guide - Maytag
www.maytag.comUse the Sensor Cycles to provide the most energy savings and enhanced fabric care from the dryer. During Sensor Cycles, drying air temperature and moisture level are sensed in the load.

FRONT LOAD WASHER OWNER'S MANUAL MANUEL DE …
www.maytag.comeach load. Also, this will use just the right amount of detergent required for a particular load/cycle. NOTE: Do not add single-dose laundry packets, Oxi-type boosters, color-safe bleach, or fabric softener crystals to dispensers. They will not dispense correctly. Adding HE detergent to Load & Go™ dispenser (on some models):
ELECTRIC RANGE USER INSTRUCTIONS - Maytag
www.maytag.comproperly installed anti-tip devices. to check if the devices are installed properly, slide range forward, look for anti-tip bracket securely attached to floor or wall, and slide range back so rear range foot is under anti-tip bracket. caution: do not store items of interest to children in
TOP LOAD WASHER OWNER’S MANUAL MANUEL DE …
www.maytag.comSystème de vidange. 15 Spécifications électriques 16 Installation 16 Déballage 16 Raccordement du tuyau de vidange. 17 Raccordement des tuyaux d’alimentation. 18 Établissement de l'aplomb de la laveuse. 19 Liste de vérification pour l’achèvement de l’installation. 20 Table des matières W11354659-SP
WASHER INSTALLATION & CARE INSTRUCTION MANUAL …
www.maytag.comWASHER INSTALLATION & CARE INSTRUCTION MANUAL MANUEL D’INSTRUCTION D’INSTALLATION ET D’ENTRETIEN DE LA LAVEUSE MANUAL DE INSTRUCCIONES PARA LA INSTALACIÓN Y EL CUIDADO DE LA LAVADORA ... INSTRUCCIONES DE INSTALACIÓN ..... 26 Conecte la manguera de desagote ..... 27 Conexión de las mangueras de entrada .....
Warranty - Maytag
www.maytag.comONE YEAR LIMITED WARRANTY WHAT IS COVERED WHAT IS NOT COVERED For one year from the date of purchase, when this major appliance is installed, operated and maintained according to instructions attached to or furnished with the product, Maytag brand of Whirlpool Corporation or Whirlpool Canada LP (hereafter “Maytag”) will pay for Factory

BRAVOS XL TOP-LOADING LAVEUSE HAUTE HIGH EFFICIENCY ...
www.maytag.comDESSUS GUIDE D’UTILISATION ET D’ENTRETIEN Para una version en espanol, visite www.maytag.com Certified to Sanitize Homologué pour assainir. 2 WASHER SAFETY. 3 Load garments in loose heaps evenly around the washplate. Do not load garments directly over the center of the washplate;
TOP LOAD WASHER OWNER’S MANUAL MANUEL DE …
www.maytag.comsponge to wipe away any spills. Use an affresh® Machine Cleaning Wipe or only mild soaps or cleaners when cleaning external washer surfaces. Nonuse and Vacation Care Operate your washer only when you are home. If moving, or not using your washer for a period of time, follow these steps: 1. Unplug or disconnect power to washer. 2.
Related documents
AC/VCR - Loren Cook Company
www.lorencook.comNOTICE! Follow the wiring diagram in the discon-nect switch and the wiring diagram provided with the motor. Correctly label the circuit on the main power box and always identify a closed switch to promote safety (i.e., red tape over a closed switch). 1. Remove the top cap which covers the motor assembly by unlatching the snap clips. 2.
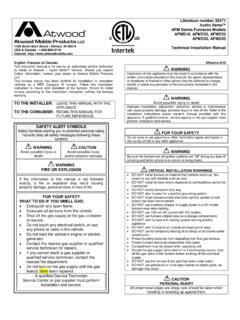
AFMD16, AFMD20, AFMD25 AFMD30, AFMD35 Technical ...
manuals.heartlandowners.orgImproper installation, adjustment, alteration, service or maintenance can cause property damage, personal injury or loss of life. Refer to the installation instructions and/or owner’s manual provided with this appliance. A qualified installer, service agency or the gas supplier must perform installation …
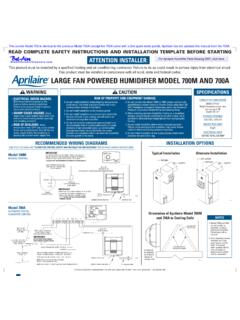
LARGE FAN POWERED HUMIDIFIER MODEL 700M AND 700A …
docs.electronicaircleaners.comINSTALLATION OPTIONS Typical Installation Alternate Installation COOLING COILS IN WARM AIR PLENUM Aprilaire to be installed as shown in relation to cooling coils. RECOMMENDED WIRING DIAGRAMS (SEE STEP 6 ON BACK AND“HUMIDIFIER CONTROL SAFETY AND INSTALLATION INSTRUCTIONS”FOR DETAILED WIRING INSTRUCTIONS) …
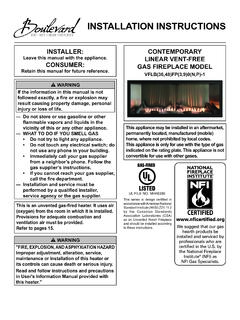
INSTALLATION INSTRUCTIONS - White Mountain Hearth
whitemountainhearth.comINSTALLATION INSTRUCTIONS CONTEMPORARY LINEAR VENT-FREE GAS FIREPLACE MOdEL VFLB(36,48)FP(3,9)0(N,P)-1 This appliance may be installed in an aftermarket, permanently located, manufactured (mobile) home, where not prohibited by local codes. This appliance is only for use with the type of gas indicated on the rating plate. This appliance is not

Troubleshooting Guide
downloads.hearthnhome.commanufacturer’s installation instructions, and use the proper parts and materials when servicing and installing gas appliances. One of the most important tools you bring to a service call is the installation manual. Communicating with the Owner Ask the owner a few simple questions prior to service: Has What are the symptoms?

MG SnowEx RD, HD & LT Straight Blade Snowplows
library.snowexproducts.comAdapted from Chain Kit Installation Instructions (Lit. No. 84788, Rev. 01). The Chain Kit (PN 84787) is used to temporarily hold the blade and A-frame in a raised position during transport to a service location. 1. Raise the A-frame against the stacking stop by driving into a snow pile. The blade will naturally
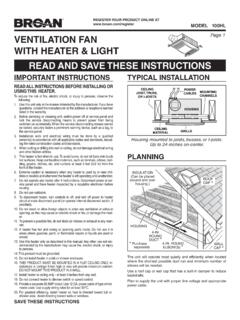
VENTILATION FAN Page 1 WITH HEATER & LIGHT READ AND …
www.broan-nutone.comparts which have been subject to misuse, negligence, accident, improper maintenance or repair (other than by Broan-NuTone), faulty installation or installation contrary to recommended installation instructions. The duration of an implied warranty is limited to the one-year period as specified for the express warranty.
1-Way System) 2-Way Paging System REMOTE START SYSTEM
www.crimestopper.comRS-00 OEM Remote Start RS1-G5, RS3-G5, RS4-G5 RS4-G5 FM (1-Way System) RS7-G5 FM (2-Way Paging System) REMOTE START SYSTEM INSTALLATION INSTRUCTIONS CONGRATULATIONS on your choice of a “Cool Start” System with Data Port Technology for direct connection to bypass module and Smart Phone.

1967-1972 Chevrolet Truck Install Instructions
www.southernrods.comDuct Installation 1) Defrost ducts- no aftermarket parts required for this step. 2) The two inch duct hose supplied with this kit will attach to the factory defrost plenums. 3) Dash vents. Dash vents require a 2 1/2” hole. Drill dash using templates in Figure 10. We recommend cutting the hole slightly smaller and filing for final fit.