
Instructions for use - Oticon
Installation Using the TV Adapter for the first time Before you can use your hearing aids with your TV, the TV Adapt-er must be connected to a power outlet, connected to the TV and paired with your hearing aids. This is a step-by-step guide on how to install the TV Adapter. All parts needed for the installation are included in the package.
Download Instructions for use - Oticon

Information
Domain:
Source:
Link to this page:
Documents from same domain

Parents’ Guide - Oticon
www.oticon.comParents’ Guide A guide for parents of children with hearing loss. Hearing is one of the things many of us take for granted. It plays an enormous role in our lives. Yet, as long as it works we tend to forget that it is there. From birth we develop language by dis-

Quick guide Re-pairing Oticon Opn with accessories after ...
www.oticon.comre-pair the instruments with relevant accessories. This short guide shows you how to re-pair Oticon Opn with different types of accessories. Remote Control 3.0 3 Clear previous pairing in remote control 3 Put the hearing aids in pairing mode 3 Pair the remote control with the hearing aids 4 TV Adapter 3.0 5 iPhone 6

Using TV Adapter 3 - Oticon
www.oticon.com4. Pairing is completed when the Power Indicator and TV Indicator lights turn steady blue for about 30 seconds. 5. Your hearing aids are now able to receive sound streaming from the TV adapter. Alternatively, you can also start TV sound and adjust volume with the optional hearing aid Remote Control 3.0 accessory. Start TV sound using your ...
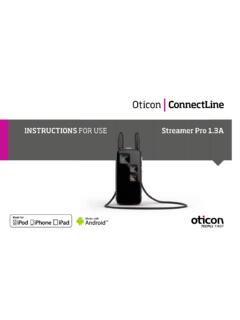
INSTRUCTIONS FOR USE Streamer Pro 1.3AStreamer Pro 1
www.oticon.comInterference and implantable devices The Streamer is designed to comply with the most stringent Standards of International Electromagnetic Compatibility. However, the Streamer might cause interference with ... loop breaks, it cannot be repaired and must be replaced immediately. Consult your Hearing Care Professional for a replacement. 17 Neck loop

Instructions for use - Oticon
www.oticon.comIf the speaker has an ear grip, place it in the ear so it follows the contour of the ear (see step 3). Put on the hearing aid Ear grip (optional) Ear grip Speaker (60 shown) Place the hearing aid behind your ear. Hold the bend of the speaker wire be-tween your thumb and index finger. The earpiece should point towards the ear canal opening.
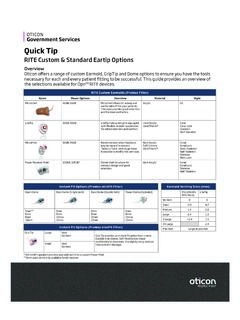
RITE Custom & Standard Eartip Options
www.oticon.comRITE Molds LiteTip No Vent 0 0 Small 0.8 0.7 Medium 1.4 0.8 Large 2.4 1.2 X Large >2.4 1.5 XX Large 2.4 Large as possible *105 miniFit speakers are only available built into a custom Power Mold **5mm open dome only available for 60 receiver
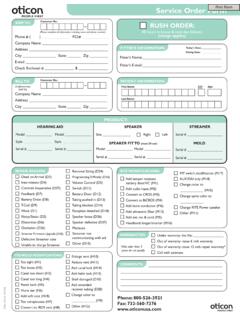
Service Order Form - Hearing aids, information on hearing ...
www.oticon.comHEARINg AID sPEAkER sTREAMER sPEAkER FIT TO (must fill out) MOLD ... Service Order Form Phone: 800-526-3921 Fax: 732-560-7376 ... Battery Door (D12) Tubing pushed in (D13) Tubing blocked (D14) Faceplate detached (D18) Speaker loose (D36) Speaker defective (D37) Moisture Streamer not

Technical data sheet - Oticon
www.oticon.comFitting Formulas VAC+, NAL-NL1 + 2, DSL v5.0 VAC+, NAL-NL1 + 2, DSL v5.0 ... Mold, Bass & Power dome Open dome Oticon OpnTM miniRITE is a discreet design with a smart single push button. Oticon Opn miniRITE-T is a discreet style based on …

PRODUCT INFORMATION OTICON RIA2 PRO OTICON RIA2
www.oticon.comBass dome, double vent 6, 8, 10, 12 mm Grip Tip, no vent S & L Grip Tip, large vent S & L BTE STYLES design RITE mini RITE & RITE RITE & BTE STYLES 6 7 Features Oticon Ria2 Pro Oticon Ria2 Fitting formulas NAL, DSL NAL, DSL Binaural Synchronisation (automatics) Yes No Binaural Coordination (PB operations) Yes Yes YouMatic Essential Personal ...

RITE & BTE Earmold Styles - Oticon
www.oticon.comRITE & BTE Earmold Styles Phone 877-310-9681 • Fax 732-764-9133 • pro.oticonusa.com Molds for 60, 85, designRITE 80, S, M & Intiga Speakers R L Hard Material acrylic (clear only) Soft
Related documents

Owner's Manual and Installation Instructions
c.searspartsdirect.comInstallation Instructions ® Two-Speed AUTOMATIC WASHERS I \ \ IMPOR'FANT: Read and follow all safety and operating instructions before first use of this product. Your washer may look different from the washer shown. Sears, Roebuck and Co., Hoffman Estates, IL 60179 U.S.A. PART NO. 3950146 Rev. B PRINTED IN U.S.A.

R1224 REGULATOR INSTALLATION INSTRUCTIONS P/N 12 …
planepower.aeroINSTRUCTIONS PRIOR TO APPLyING POWER TO UNIT. Current applications and specific regulator conversion/installation guides are available online at www.planepower.aero or www.hartzell.aero NOTE: Use appropriately sized M7928/5 splices, M7981/1, ring lugs, and MIL-W-22759/16 wire. Single Engine 1. Remove existing regulator and solid-state over ...
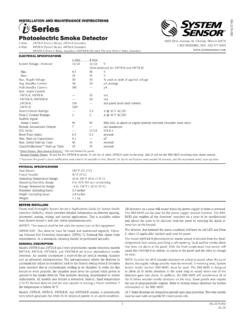
INSTALLATION AND MAINTENANCE INSTRUCTIONS Series
www.systemsensor.comproper remote maintenance signaling capabilities, do not use the 2W-MOD with i3 model numbers 2WTR-B and 2WTA-B. Installation of the 2WTR-B, 2WTA-B, 4WTR-B, 4WTA-B, 4WTAR-B, and 4WITAR-B detectors is simplified by the use of a mounting base that may be pre-wired to the system, allowing the detector to be easily installed or re - moved.

Decking Installation & Maintenance Guide
www.timbertech.comDecking Installation & Maintenance Guide ... installation instructions, care and cleaning, technical information and more. Be aware of excessive heat on the surface of AZEK products from external sources, such as but not limited to, fire, hot .