
Optiplex 760 Setup Guide - Dell
Desktop — Front View. . . . . . . . . . . . . . . . . . . 7 ... 2 cover release knob 3 security cable slot 4 back-panel connectors 5 power connector 6 air vent 1 2 4 8 7 6 5 3 9 1 6 2 3 5 4 ... with the icon shown in the following illustration. 3 Connect the network cable. NOTICE: Ensure that you connect the modem to the connector identified ...
Download Optiplex 760 Setup Guide - Dell

Information
Domain:
Source:
Link to this page:
Documents from same domain

Dell™ S2240M/S2340M Monitor
downloads.dell.comThe Dell™ S2240M/S2340M flat panel display has an active matrix, Thin-Film Transistor, Liquid Crystal Display. The monitor's features include: S2240M: 54.61 cm (21.5 inches) viewable area display. 1,920 x 1,080 resolution, plus full-screen support for lower resolutions.
Dell S3220DGF Monitor User's Guide
downloads.dell.comThe Dell S3220DGF monitor has an active matrix, Thin-Film Transistor (TFT), Liquid Crystal Display (LCD), anti-static, and LED backlight. The monitor features include: ∞ 80.01 cm (31.5 in.) viewable area display (measured diagonally). 2560 x 1440 resolution, with full-screen support for lower resolutions.
Configuring iSCSI connectivity with VMware vSphere 6 and ...
downloads.dell.comiSCSI SAN Configuration Guide (available on the VMware website), this document provides a summary of the steps specific to connecting to a PS Series SAN. It covers the steps for utilizing the software iSCSI initiator inside the ESXi host. Users connecting their vSphere environment using iSCSI HBAs, both
Dell EMC Networking S4148-ON and S4128-ON
downloads.dell.comNote: The configuration steps in this section are only recommended when the switch is used as a dedicated SAN for iSCSI traffic. 2.1 Hardware configuration 1. Power on the two switches. 2. Connect a serial cable to the serial port of the first switch. 3. Using PuTTY or another terminal utility, open a serial connection session to the switch. 4.
Dell EMC PowerVault ME4 Series and VMware vSphere
downloads.dell.combest practices presented in this paper, the vSphere ESXi® hypervisor provides an optimized experience with ME4 Series storage. These recommendations include guidelines for SAN fabric design, HBA settings, and multipath configuration. There are often various methods for accomplishing the described tasks, and this

Dell Universal Dock
downloads.dell.comDell Universal Dock D6000 Quick Setup Guide Author: Dell Inc. Subject: Setup Guide Keywords: Electronics & Accessories#Docking Stations#dell universal dock d6000#dell-universal-dock-d6000#Setup Guide#Dell Universal Dock D6000 Quick …
Dell ControlVault Installation Instructions for the ...
downloads.dell.com• Dell Data Protection | Encryption (v8.0.1 and older) • BitLocker Drive Encryption – Available in certain flavors of Windows® operating systems Specific combinations of one or more of the above mentioned products already installed in your system may prevent a smooth migration to the latest Dell Da ta Protection security offering . ...
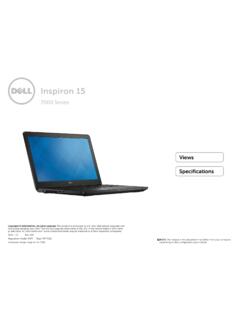
Inspiron 15-7559 Laptop Reference Guide - Dell
downloads.dell.comNOTE: The weight of your laptop varies depending on the configuration ordered and the manufacturing variability. Views Specifications System information Memory Ports and connectors Dimensions and weight Computer environment Storage Camera Touch pad Power adapter Communications Battery Video Audio Display Media‑card
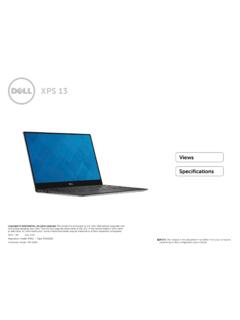
Laptop Reference Guide - Dell
downloads.dell.comall-products#esuprt_laptop#esuprt_xps_laptop#xps 13 9350 laptop#xps-13-9350-laptop#Reference Guide Created Date: 9/30/2015 12:04:09 PM ...

Dell EMC Storage Compatibility Matrix for SC, PS, and FS ...
downloads.dell.comOverview 7 Dell EMC Storage Compatibility Matrix for SC, PS, and FS Series Arrays | DSCM 1.3 Conventions used in this document Blue Text is used for all section titles. When visible in body text or tables, blue text indicates a change or addition from the previous version of the Dell Storage Compatibility Matrix (DSCM).
Related documents

Illustrated Parts List
d3qx1uccksbb2n.cloudfront.net3. Locate the desired part in the exploded illustration and note Item No. This Item No. will lead you to the part name and num-ber. 4. Refer to the related Parts Listing and locate the same Item No. and the name. If more than one part number is listed, refer to the axle model listings at top of list and select the part number

TM-T88V User's Manual
files.support.epson.compointed object in the holes in the power switch cover. To detach the cover, use a sharp-pointed object. To use this cover, install it as shown in the illustration below. WARNING: If an accident occurs with the power switch cover attached, unplug the power cord immediately. Continued use may cause fire or shock.
Front derailleur - SHIMANO
si.shimano.comFront derailleur DURA-ACE FD-R9100 ULTEGRA FD-R8000 105 ... • When the chain is in any of the positions shown in the illustration, the chain may come into contact the front chainring or front derailleur and ... Remove the link cover. (A) Link cover. 16 To be continued on next page ADJUSTMENT Connection and securing of inner cable 2 (A) (C) (D ...

Front derailleur - SHIMANO
si.shimano.comFront derailleur DURA-ACE FD-R9100 ULTEGRA FD-R8000 105 ... • When the chain is in any of the positions shown in the illustration, the chain may come into contact the front chainring or front derailleur and generate noise. If the noise is a problem, shift the chain to the second largest rear sprocket. ... Remove the link cover. (A) Link cover ...

1.WN GO 2. MASK OR RESPIRATOR 3. GOGGLES OR FACE …
www.cdc.gov• Front of mask/respirator is contaminated — DO NOT TOUCH! • If your hands get contaminated during mask/respirator removal, immediately wash your hands or use an alcohol-based hand sanitizer • Grasp bottom ties or elastics of the mask/respirator, then the ones at the top, and remove without touching the front • Discard in a waste ...

MICROWAVE HOOD COMBINATION INSTALLATION …
www.whirlpool.com1.Remove screws attaching vent cover B, C and D to top of microwave exterior. Slide out vent covers B, C and D. Keep the vent cover C for step 2 use. 2.Place the vent cover C (removed from step 1) to area A, and rotate 180 degrees. 3. Attach the vent covers located in the upper polyfoam (see item J in "Parts Supplied" section). 4.