Example: bankruptcy
Transom-Mount Transducer Installation Instructions
cutting, or sanding. Follow these instructions to properly install the Garmin transom-mount transducer. Tools needed • Drill and drill bits • 3/ 8 in. wrench or socket • Masking tape • Number 2 Phillips screwdriver • Marine sealant about the Transducer The transducer is the component of your sounder that transmits sound waves
Tags:
Information
Domain:
Source:
Link to this page:
Documents from same domain

Instructions - Garmin
static.garmin.com1 GLO™ GLONASS and GPS Sensor Instructions August 2012 190-01492-00_0B Printed in Taiwan

EDGE® 1030 Owner’s Manual - Garmin International
static.garmin.comCharging the Device NOTICE To prevent corrosion, thoroughly dry the USB port, the weather cap, and the surrounding area before charging or connecting to

Owner’s Manual - Garmin International
static.garmin.comIntroduction WARNING See the Important Safety and Product Information guide in the product box for product warnings and other important information.

Lidar Lite v3 Operation Manual 2 and Technical …
static.garmin.com1 Lidar Lite v3 Operation Manual and Technical Specifications Laser Safety WARNING This device requires no regular maintenance. In the event that the device

Printing a Mounting Template - Garmin
static.garmin.comPrinting a Mounting Template Notice It is not recommended that you print a mounting template on your own. Use the template that came in the product box.

GPSMAP 62 series - Garmin
static.garmin.comGPSMAP 62 Series Quick Start Manual 3 3. Replace the battery cover. For best results, after you install new batteries, update the battery type in the

Important Safety and Product Information 2 …
static.garmin.comIMPORTANT SAFETY AND PRODUCT INFORMATION WARNING Failure to heed the following warnings could result in an accident or collision resulting in death or

Important Safety and Product Information 2 …
static.garmin.comImportant Safety and Product Information 2 Informations importantes sur le produit et la sécurité 3 guida Informazioni importanti sulla sicurezza e sul

GNS 430(A) - Garmin International
static.garmin.com190-00140-00 Rev. P GNS 430(A) Pilot’s Guide and Reference i RECORD OF REVISIONS Revision Date of Revision Description A 12/98 Initial Release B 4/99 Update to conform to recent SW changes

GNS 530(A) - Garmin International
static.garmin.com190-00181-00 Rev. H GNS 530(A) Pilot’s Guide and Reference i RECORD OF REVISIONS Revision Date of Revision Description A 5/00 Initial Release B 5/01 Update to reflect software changes through 2.06
Related documents

Trex Enhance Railing Installation Instructions
www.trex.comCutting Railings See instructions on page 2. 4. Attaching Foot Block to Bottom Railing See instructions on page 2. NOTES: » If installing in weather below 40°F (4.5°C), leave 1/8" (3 mm) gap between deck boards. » Deck boards can overhang end of last post maximum 1/2" (13 mm). Cutting Deck Board 5. Cut deck boards to appropriate length of ...

How To Install Fog Lights Installing Wiring For Your New ...
images-na.ssl-images-amazon.comobtain specific instructions on your make and model. Cutting Holes In Your Bumper Cover To Mount New Fog Lights If you don't already own a cutting tool, a kit that includes small cutting wheels and all other bits needed to drill, grind, sharpen, and polish to perfection will be invaluable at this point - get one.
GPSMAP 400/500 Series Installation Instructions
static.garmin.comWARNING: Always wear safety goggles, ear protection, and a dust mask when drilling, cutting, or sanding. NotIce: When drilling or cutting, always check the opposite side of the drilling or cutting surface. To install and use your chartplotter: 1 Select a mounting location (page 2). 2. Mount the chartplotter (page 2). 3.
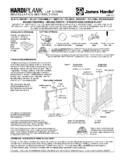
HARDIPLANK Installation Instructions
www.structuretech1.comINSTALLATION INSTRUCTIONS Always wear safety glasses and dust protection when operating power tools. For more information on avoiding inhalation refer to the MATERIAL SAFETY DATA SHEET available wherever James Hardie fiber-cement products are sold. CUTTING OPTIONS: Electric or pneumatic hand shear Carbide score and snap knife Pneumatic shear

INSTALLATION INSTRUCTIONS ASWC-1 ASWC-1 Axxess …
www.metraonline.comlink entitled “ASWC-1 Vehicle Instructions”, which is located on the right side of the screen in the middle. Once you put your vehicle information in, click the “Submit” button. This will take you to another page, where you will then click on the link under the word “Documents”. This will provide the vehicle specific instructions

Installation Instructions Soffit - CertainTeed
www.certainteed.cominstructions for open eaves. If you’re installing perforated soffit panels and the existing soffit doesn’t have openings for ventilation, cut an adequate number of openings. Then complete the installation as described for open eaves. The procedure used to install soffit over an enclosed eave is almost identical to that used for an open eave.

Cutting Options for Beef 1/2 or Standard Qtr
www.poundsturkeyfarm.comCutting Options for Beef FRONT Qtr risket:—Whole or Ground Roasts: Indicate approx. # size per roast. Other options in ( ) Arm _____ # (grind, stew)) huck ____# (grind or stew) For STEAKS listed below, please indicate desired thickness Rib ...