Search results with tag "Mounting"

1N4001, 1N4002, 1N4003, 1N4004, 1N4005, 1N4006, 1N4007 ...
www.farnell.com(R JA) for the mountings shown is to be used as typical guideline values for preliminary engineering or in case the tie point temperature cannot be measured. NOTE 1. − AMBIENT MOUNTING DATA MOUNTING METHOD 1 MOUNTING METHOD 2 MOUNTING METHOD 3 ÉÉÉÉÉÉÉÉÉÉÉ ÉÉÉÉÉÉÉÉÉÉÉ L L ÉÉÉÉÉÉÉÉÉÉÉÉ ÉÉÉÉÉÉÉÉÉÉÉÉ L L

MIC Mounting Brackets and Other Accessories
resources-boschsecurity-cdn.azureedge.netVideo | MIC Mounting Brackets and Other Accessories MIC Mounting Brackets and Other Accessories www.boschsecurity.com cameras, is also available. u Full range of mounting brackets and other accessories. u Designed to integrate seamlessly with the MIC family. u Provides a best-fit solution for virtually any application. u Easy to use and install. u …

Compact 16-point 24V dc Sink/Source High-speed Input …
literature.rockwellautomation.comFor mounting instructions, see Panel Mounting on page 6, or DIN Rail Mounting on page 8. To work with a system that is already mounted, see ... Connect the modules together by locking (fully left) the bus levers on the replacement module and the right-side adjacent module. 9. Replace the mounting screws (or snap the module onto the DIN rail).

Poly Studio Display Mounting Kit Setup Sheet
support.polycom.comVESA Mounting Options 600mm 500mm 400mm 300mm 200mm 600mm 500mm 400mm 300mm 200mm 0 Attach the Poly Studio mounting kit assembly to the display using the appropriate screws and washers for your display. Poly Studio Mounting Kit Setup Sheet I (2) M.6 External T oath Lock Washer 1602-86044-001 (2) M6 x 12 Screw 1601-68586-001 G 0 0 ) 2

Dell S3222HG Monitor User's Guide
downloads.dell.com4 VESA mounting holes (4) Four VESA mounting holes (100 mm x 100 mm) accessible behind the VESA cover used for wall mounting the monitor through a VESA-compatible wall mount kit. See Wall mounting (optional). 5 Regulatory information label Lists the regulatory approvals. 6 Stand-release button Releases the stand from the monitor.
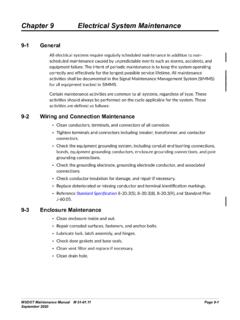
Chapter 9 Electrical System Maintenance
www.wsdot.wa.gov• Spot-paint steel mounting brackets. Aluminum or bronze mountings will not require painting. • Check mountings for wear and tightness. • Check tether cable assemblies. • Check seals on aerial junction boxes. • Check vertical clearance (16’ - 6” minimum for overhead displays).
Compact 1769-OF8C Analog Output Module Installation ...
literature.rockwellautomation.com4. Drill and tap the mounting holes for the recommended M4 or #8 screw. 5. Place the modules back on the panel, and check for proper hole alignment. 6. Attach the modules to the panel using the mounting screws. 7. Repeat steps 1 to 6 for any remaining modules. TIP If mounting more modules, mount only the last one of this group and put the ...

Throttle Cable Installation Instructions - Lokar
www.lokar.com(NOTE: If a Lokar Kickdown Kit is being used, install the kickdown mounting bracket onto the back side of the Cable Mounting Bracket first.) Then, position the rear adjuster nut so that the threaded part of the throttle cable adjuster is approximately centered in the Cable Mounting Bracket. Reinstall the front adjuster nut. Fig. 3

Illustrated Parts - Moen Incorporated
assets.moen.comMounting Bracket Screw (x3) Hose Guide Nut Electronics Box Only 177568 Control Box Only (Includes (x2) Supply Hose Assemblies) 177569 Filter & O-Ring (x2) 179639 There is more than one version of this model. Page down to identify the version you have. AC Adapter with Power Splitter (sold separately) 169031 Order by Part Number Mounting Bracket ...

The Bose Acoustimass 3 Series IV Speaker System
assets.bose.combathtub, washbowl, kitchen sink, laundry tub, in a wet basement, near a swimming pool, or any- ... duce heat. 9. Do not defeat the safety purpose of the polarized or grounding-type plug. A polar- ... Bose mounting accessories, including wall/ceiling mounting brackets, floor stands, and table ...

Front derailleur - SHIMANO
si.shimano.comMounting the backup plate Mounting the backup plate If installing the front derailleur to a brazed-on type frame, a backup plate must be attached to the seat tube. Be sure to install a backup plate in order to prevent damage to the frame from the pressure of the front derailleur support bolt. (C) (A) (B) (D) (A) Check the position where the support

Limited Protection Policy
www.tirebuyer.comk) Improper mounting or demounting.l) Alteration: such as, but not limited to, adding a white inlay on blackwall, tread regrooving, tire truing or siping, or adding sealant materials to the tire. l) Weather checking/cracking: not covered after 24 months from the date of purchase.

CAROMA PRODUCT WARRANTY & CARE - Amazon Web …
newcaroma-au-prod.s3.ap-southeast-2.amazonaws.comWall Fixings, Mounting Brackets, Metal Flex Hoses Accessories 5/1 years 5 years replacement product 1 year - Labour, Finishes**, Wall Fixings, Mounting Brackets Spare Parts 5 years 5 years replacement product or parts PVD Coating‡ 5 years 5 years replacement product or parts Commercial Warranty Electronic Tapware 2/1 years 2 years replacement ...

PSP511Ca, LCa ENGLISH (Page 1) - LUX Products Pro Solutions
pro.luxproducts.comIf you are mounting the base to soft material like plasterboard or if you are using the old mounting holes, the screws may not hold. Drill a 3/16 in. (4.8mm) hole at each screw, and insert the plastic anchors provided. 4. Hold the base against the wall. Route the wires through the hole below the terminal block.

TH400 Electric Kickdown Kit Installation Instructions
www.lokar.comStep 5:The kickdown mounting bracket mounts onto the back side of the Lokar Cable Bracket. The throttle cable adjuster will pass through the top hole in both the new kickdown mounting bracket AND the Cable Bracket. TOLL FREE 1-877-469-7440 • tech@lokar.com • www.lokar.com ® TH400 Electric Kickdown Kit Installation Instructions

Bar 2.0 ALL-IN-ONE - JBL
www.jbl.com2. Install the wall-mounting bracket. 3. Fasten the screw onto the back of the soundbar. 4. Mount the soundbar. NOTES: − Make sure that the wall can support the weight of the soundbar. − Install on a vertical wall only. − Avoid a location under high temperature or humidity. − Before wall-mounting, make sure that cables can be properly

Front derailleur - SHIMANO
si.shimano.comOperation of the levers related to gear shifting should be made only when the front chainwheel is turning. ... Wire mounting bolt Top route type (A) 5mm Allen key/8mm spanner Tightening torque 5mm Allen key/8mm spanner 6 - 7 N·m {53 - 61 in. lbs.} NOTE Route the inner cable as shown in the illustration. ...

PowerFlex DC Drive and Field Controller Specifications
literature.rockwellautomation.comPowerFlex DC Drive Catalog Number Explanation 6 ... Mounting 61 Approximate Dimensions – PowerFlex DC Drives 62 ... four quadrant (reversing) DC motor or generator field control. The PowerFlex DC Field Controller can be used for standalone DC motor field control applications, or with a PowerFlex DC Digital drive or PowerFlex DC ...

Dell Latitude E7450 Owner's Manual
downloads.dell.comHold a card by its edges or by its metal mounting bracket. Hold a component such as a processor by its edges, not by its pins. CAUTION: When you disconnect a cable, pull on its connector or on its pull-tab, not on the cable itself. Some cables have connectors with locking tabs; if you are disconnecting this type of cable,
INSTALLATION INSTRUCTIONS
images.thdstatic.comand in strict adherence with these instructions .! WARNING Never reuse old track or hardware when installing a new door as it may cause installation problems or door to fall which could result in serious personal injury or property damage. AUTOMATIC DOOR OPENER: Installation of a reinforced mounting point is required to avoid damage (STEP 10) .

WT6000 / WT6300 RS4000 / RS5000 / RS6000 RS5100
www.zebra.comRack/Wall Mounting bracket for multi-slot cradles and 20slot battery charger. PWR-BGA12V50W0WW Level VI AC/DC Power Supply AC Input: 100-240V, 2.4A DC Output: 12V, 4.16A, 50W Requires: DC line cord and Country specific grounded AC line cord. CBL-DC-388A1-01 DC Line Cord for running the single slot cradles or battery chargers from a single

EJA430E Gauge Pressure Transmitter - Yokogawa
web-material3.yokogawa.comMounting Position Effects Rotation in diaphragm plane has no effect. Tilting up to 90 degree will cause zero shift up to 0.4 kPa (1.6 inH2O) which can be corrected by the zero adjustment. Response Time (All capsules) “ ” 90 ms 150 ms for H capsule with Wetted Parts Material code H, M, T, A, D, B and W.

24 Flush Mount DeFlector Vent: sKMD24F0As - SharpUSA
files.sharpusa.com5. Slide the drawer all the way back until the mounting flanges touch the cleats mounted in the cabinet opening. 6. Open the drawer. Using the 4 holes on the drawer as a template, pre drill the cabinet using a 1/16” (1.57 mm) bit. See Figure 4. Figure 3A Figure 4 Figure 3B 2. Install deflector as shown in Figure 3A. 7.

Packing‐, Transport‐ and Storage‐ Procedure
apps.wika.comThe packing, transport and storage-procedure serve as a mandatory requirement for creating a package for optimum product protection, taking into account logistical, economic and ecological aspects. ... with mounting plug longer than 3,5 m ...

EJX510A and EJX530A Absolute and Gauge Pressure …
web-material3.yokogawa.comMounting Position Effects Rotation in diaphragm plane has no effect. Tilting up to 90 degree will cause zero shift up to 0.21 kPa (0.84 inH2O) which can be corrected by the zero adjustment. Response Time (All capsules) “ ” 90 ms When software damping is set to zero and including dead time of 45 ms (nominal) FUNCTIONAL SPECIFICATIONS Output
Installation Instructions - B&W Trailer Hitches
www.bwtrailerhitches.comTurnoverball Gooseneck Hitch Installation Instructions <THESE INSTRUCTIONS MUST BE GIVEN TO THE END USER> ... Mounting Kit Bolt Bag 1 ITEM DESCRIPTION QTY 5/8" X 4−1/2" Flange Bolt 6 ... the frame rails or in the general area where Turnoverball hitches install. Carefully examine the
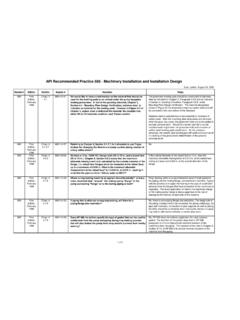
API Recommended Practice 686 - Machinery Installation and ...
mycommittees.api.orgAug 24, 2006 · used for the leveling pads to be utilized under the pump baseplate leveling jackscrews. In fact in the grouting checklist, Chapter 5, Section 4.1 - Mounting Plate Design Verification, stainless steel is indicated as material for the leveling pads. However in Figure G-1 of Chapter 5, carbon steel is indicated the material. We consider that
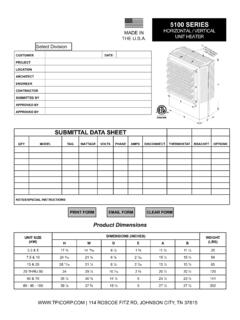
SUBMITTAL DATA SHEET - TPI Corp
www.tpicorp.comNichrome element wire • Totally enclosed fan motors • Louvers are individually adjustable for directional air flow • Optional remote and unit mounted controls include thermostats, disconnects, and fan switches • Optional accessories include mounting brackets, louvers, fan guards, and dust shields CM 60 - 100 KW 2 1/2" - 2" - 1 3/4" K.O ...

SSDNow V300 - Kingston Technology
www.kingston.com– 3.5” bracket & mounting screws – SATA data & power cables Hard drive cloning software3 and installation video (DVD) Notebook Upgrade Kit – 2.5” USB enclosure – 3Hard drive cloning software and installation video (DVD) – 7mm to 9.5mm adapter Desktop/Notebook Upgrade Kit – 2.5” USB enclosure

NIGHT VISION MOUNT ACCESSORIES - Wilcox Ind
www.wilcoxind.comWilcox is the pioneer in the field of night vision mounting technology. We are proud to offer you full system solutions that are known for the quality, ruggedness and durability that will withstand the most grueling mission requirements. If you use a …

MOTOR MOUNTING EXPLANATION - Sentridge
www.sentridge.comM12 265 230 300 M12 300 250 350 18.5 --180 215 M12 300 250 350 18.5 215 180 250 M8 265 230 300 14.5 165 130 200 M10 215 95 140 M8 130 110 160 B5 FLANGE ("D" flange) B14A FLANGE ("C" face) B14B FLANGE 165 130 200 12 115 E E Exico Electric Motors Limited 4 Stanton Close Finedon Road Industrial Estate Wellingborough NN8 4HN United Kingdom www ...

Reference Guide Molded Case Circuit Breakers - Siemens
assets.new.siemens.comPlug-In Mounting Assembly (3 Pole Only) — — ü ü ü ü ü ü Fungus Proofing ü ü ü ü ü ü ü ü Individual Enclosures Type 1 – Indoor Surface ü ü ü ü ü ü ü ü Type 1 – Indoor Flush ü ü ü ü ü ü ü ü Type 3R – Outdoor Rainproof ü ü ü ü ü ü ü ü Type …

Wall Exhaust and Supply Fans - Greenheck-USA
content.greenheck.commounting holes, formed flanges, and an insertable drop-in venturi. Drive frames and panels shall be bolted construction. Fans shall be Model AER as manufactured by Greenheck Fan Corporation, Schofield Wisconsin, U.S.A. Wall Exhaust and Supply Fan models are listed for electrical (UL/cUL 705) File no. E40001 UL is optional and must be specified

A PRACTICAL GUIDE TO WIRING THE LOAD CELL AND …
www.nakka-rocketry.netMOUNTING STRAIN GAGES ON LOAD CELL BODY Pin 2 Pin 3 Pin 4 Pin 1 SG1 SG3 SG2 SG4 View on load cell body (edge) = = Mount active gages SG1 & SG3 at midspan of edge. Mount SG2 & SG4 approximately at location shown. 3 CONNECTORS: (TYPICAL) Connected to: Gender Digikey p/n Vendor p/n Type Load cell Male CP-1040-ND SD-40 Free-handing Amp …
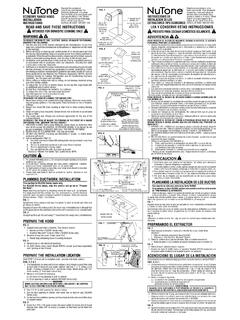
ECONOMY RANGE HOOD INSTALLATION 7” ROUND DUCT …
images.thdstatic.com1 - Plastic Bag containing loose mounting hardware FIG. 4 3. Remove top or rear electrical knockout. 4. (RL6300 Series only) Install Model BP87Q damper (purchase separately) over opening in top of hood. PREPARE THE INSTALLATION LOCATION Omit STEP 1 if hood will be installed under cabinets with flush bottom. FIGS. 5, 6 & 7 1.
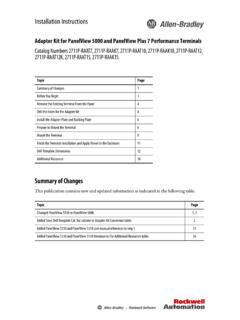
Adapter Kit for PanelView 5000 and PanelView Plus 7 ...
literature.rockwellautomation.comIf you install a PanelView Plus 7 Standard terminal into this adapter kit, you can damage the ... Drill Template for PanelView™ 5000 and PanelView Plus 7 Performance Terminals 6.5-in. Keypad with Touch Screen Adapter Kit Panel ... Mounting levers insert into the slots around the terminal bezel to secure the terminal in the

Kia Service Menu
www.kia.comMountings Condition Windshield Washer & Wiper Operation (Front/Rear) Fuel Tank, Hoses & Pipe Lines for Leak Front & Rear Brake Pads/ Shoes Thickness Electronic System Check using Kia Diagnostic System (KDS) Reset Maintenance Indicator* Road Test* Exhaust System Drive Axle Boots & CV Joints Check for any Oil/Fluid Leaks Tyre Rotation and Balancing**

MOUNTING AND HANDLING GUIDELINES FOR …
aosmd.comheat sink and a screw tightens the clip. A single clip can be designed to hold multiple devices. It is recommended that the clip pressure be applied right on the plastic body of the package for the lowest thermal resistance. (a) Mounting through a heat sink (b) Mounting on a tapped heat sink Figure 2. Mounting with different heat sink
Similar queries
Mountings, Mounting brackets and other accessories, Mounting, Levers, Poly Studio, Poly Studio Mounting, Mounting brackets, 1769, Throttle Cable Installation Instructions, Mounting bracket, The Bose Acoustimass 3 Series IV Speaker, Sink, Heat, Limited Protection Policy, Demounting, PRODUCT WARRANTY & CARE, Kit Installation Instructions, PowerFlex DC Drive and Field Controller, Explanation, Motor, Installation Instructions, INSTRUCTIONS, INSTALLATION, Gauge, Mounting flanges, Procedure, EJX530A Absolute and Gauge Pressure, Mounting Kit, General, Pump, SUBMITTAL, Wire, Guards, Shields, SSDNow V300, Kingston Technology, Bracket, NIGHT VISION MOUNT ACCESSORIES, MOTOR MOUNTING EXPLANATION, Wall, MOUNTING STRAIN GAGES, Gages, PanelView, PanelView Plus 7, PanelView Plus 7 Standard, Terminals, Mounting levers, Heat sink