Mounting Levers
Found 8 free book(s)
Compact 16-point 24V dc Sink/Source High-speed Input …
literature.rockwellautomation.comFor mounting instructions, see Panel Mounting on page 6, or DIN Rail Mounting on page 8. To work with a system that is already mounted, see ... Connect the modules together by locking (fully left) the bus levers on the replacement module and the right-side adjacent module. 9. Replace the mounting screws (or snap the module onto the DIN rail).

Front derailleur - SHIMANO
si.shimano.comOperation of the levers related to gear shifting should be made only when the front chainwheel is turning. ... Wire mounting bolt Top route type (A) 5mm Allen key/8mm spanner Tightening torque 5mm Allen key/8mm spanner 6 - 7 N·m {53 - 61 in. lbs.} NOTE Route the inner cable as shown in the illustration. ...
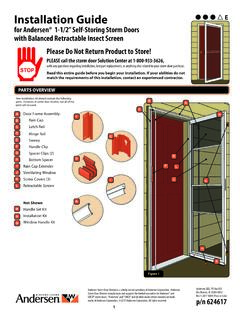
PLEASE call the storm door Solution Center at 1-800-933-3626,
images.thdstatic.com• 1” mounting surface depth. • 3/4” mounting surface front. • 2 1/2” handle clearance * * * For opening widths up to 1” wider, please call our Solution Center at 1-800-933-3626 to purchase a special kit to accommodate your situation. SAFETY FIRST: Please read and follow all Cautions and Warnings in this guide. 1 VERIFY MOUNTING ...
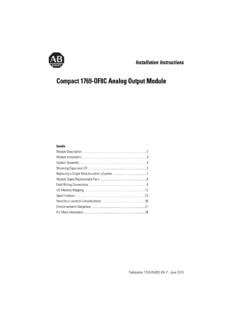
Compact 1769-OF8C Analog Output Module Installation ...
literature.rockwellautomation.com4. Drill and tap the mounting holes for the recommended M4 or #8 screw. 5. Place the modules back on the panel, and check for proper hole alignment. 6. Attach the modules to the panel using the mounting screws. 7. Repeat steps 1 to 6 for any remaining modules. TIP If mounting more modules, mount only the last one of this group and put the ...
T-CLOCSSM Inspection Checklist T-CLOCS ITEM WHAT TO …
msf-usa.orgLevers and Pedal Condition Broken, bent, cracked, mounts tight, ball ends on handlebar levers, proper adjustment. Pivots Lubricated. Cables Condition Fraying, kinks, lubrication: ends and interior. Routing No interference or pulling at steering head, suspension, no sharp angles, wire supports in place.

Front derailleur - SHIMANO
si.shimano.comMounting the backup plate Mounting the backup plate If installing the front derailleur to a brazed-on type frame, a backup plate must be attached to the seat tube. Be sure to install a backup plate in order to prevent damage to the frame from the pressure of the front derailleur support bolt. (C) (A) (B) (D) (A) Check the position where the support

MILLING MACHINE OPERATIONS - HNSA
www.hnsa.orgpermits mounting tapered-shank cutter holders and cutter arbors. Two keys, located on the face of the spindle, provide a positive drive for the cutter holder, or arbor. The holder or arbor is secured in the spindle by a drawbolt and jamnut, as shown in figure 3 on the following page. Large face mills are sometimes mounted directly to the ...

Miniature Power Relays MY - Omron
www.ia.omron.comIf Mounting Brackets are required, refer to page 33 for selection information. Ratings and Specifications Ratings Operating Coils (Standard Models) Note: 1. The rated current and coil resistance are measured at a coil temperature of 23°C with tolerances of +15%/ −20% for the AC rated current and ±15% for the DC coil resistance. 2.