Transcription of PowerView Remote Control Guide - Hunter Douglas
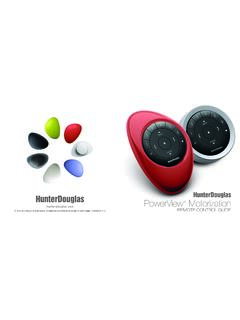
1 2017 Hunter Douglas . All rights reserved. All trademarks used herein are the property of Hunter Douglas or their respective owners. 5110540123 5/17 PowerView MotorizationREMOTE Control GUIDEYour new PowerView Pebble Remote and Surface Remote combine fashion with function for precise Control of your Hunter Douglas window coverings. Artfully designed, PowerView remotes allow you to Control natural light throughout your home with the press of a button. The following pages provide all the details on how to set up and operate both Remote styles. Table of Contents Key Components ..3 Getting Started..9 Programming .. 13 Basic Operation .. 23 Battery Replacement .. 27 Troubleshooting .. 33 Skyline Gliding Window PanelsKey Components354 PowerView SURFACE REMOTEThe sleek PowerView Surface is wall-mounted so you know your Remote is always right where you left it. KEY COMPONENTSKEY COMPONENTSPOWERVIEW PEBBLE REMOTEE rgonomically designed, the PowerView Pebble hand-held Remote is available in ten on-trend colors to complement your home d cor.
2 Remote MODULE FRONTRIGHT ARROWF unction varies with shade ARROWF unction varies with shade positionSTOPP ress and hold for program 1 GROUP 2 GROUP 3 GROUP 4 GROUP 5 GROUP 66 Remote MODULE BACKCLOSEOPENKEY COMPONENTSKEY COMPONENTSPROGRAMMING ACCESS9 Getting StartedREMOTE MODULE (BACK COVER REMOVED)BATTERY COMPARTMENT 3V CR 2032 BATTERY COMPARTMENT 3V CR 2032 PROGRAMMING8 KEY COMPONENTSIMPORTANT: The PowerView Remote will not operate a window covering until the window covering has been added to a started First, activate the Remote by pulling both plastic tabs from the back battery compartment. NOTE: If placing the Remote module into a Pewter or Clear Frost Pebble , ensure the provided color insert is seated at the bottom of the Pebble STARTEDGETTING STARTED11 Inserting the Remote module into the PowerView Pebble (hand-held): 1. Center the Hunter Douglas logo on the Remote module above the indentation on the bottom rim of the Pebble.
3 2. Align the ribs on the Remote module with the grooves on the Pebble. 3. Gently push the Remote module into the Pebble until it is snug. Ribs on Remote to be aligned with the grooves on the logoProgramming1312 GETTING STARTEDM ounting the PowerView Surface: 1. Choose a location to mount the Surface. 2. Orient the Surface mounting plate so that the Hunter Douglas logo is horizontal and level. Mark screw holes. 3. If you are mounting the Surface onto drywall, use a 7/32" drill bit to drill pilot holes. Tap drywall anchors into the pilot holes until the flange of the anchor is flush with the drywall. 4. If you are mounting the Surface onto wood, use a 3/32" drill bit to drill the screw holes. 5. Attach the Surface mounting plate using the screws provided. 6. Align the Surface ring with its mounting plate and twist the Surface ring clockwise to lock it in the Remote module in the Surface: 1. Align the ribs on the Remote module with the grooves on the Surface.
4 2. Gently push the Remote module into the Surface until it is snug. Ribs on Remote to be aligned with the grooves on the logoIMPORTANT: If you have multiple remotes, please follow the steps below to pair all remotes to the same PowerView Network. If you only have one Remote , please refer to page 19 for additional programming additional Remote (s) to the PowerView Shade NetworkFollow these steps to pair remotes to the same PowerView Shade Network. All remotes in a home should be paired to the same network. This allows for easy installation of additional Control options, such as the PowerView Hub and PowerView Repeaters. Remotes paired to the same network will be able to operate the specific window coverings they are assigned to. 1. Locate the programming access on the back cover of the Remote module. 2. Using a paper clip, press and hold the recessed P button for 6 seconds. NOTE: The Group Numbers (1 6) will flash twice on the PRESS of the reset button followed by three times at 6 seconds.
5 3. Press and hold STOP on the Remote , until the indicator buttons blink. The Remote is now in program mode. 4. Press and hold the STOP button on the new Remote while pressing and releasing STOP on the original Remote . 5. The backlit GROUP buttons on the new Remote will flash twice to indicate the Remote has been paired to the PowerView Shade Network. 6. Press and hold STOP on the Remote , until the indicator lights stop blinking to exit program PowerView Repeaters to a Remote created PowerView Shade NetworkRepeaters extend the range of the radio frequency (RF) signal emitted by the PowerView Pebble Remote , the PowerView Surface, or the PowerView Hub when used with the PowerView App. 1. PLUG the Repeater Kit into an electrical outlet. 2. Press and hold STOP on the PowerView Pebble Remote , until the indicator lights blink. The Remote is now in program mode. Hold the Remote within 3 feet of the Repeater to complete Step 3.
6 3. Press STOP on the Remote . The Repeater is now paired to the PowerView Shade Network. 4. Press and hold STOP on the Remote , until the indicator lights stop blinking to exit program PROGRAMMINGP airing Remote (s) to a PowerView Hub created PowerView Shade NetworkA Hub previously paired to an existing Remote created PowerView Shade Network or that had created its own network during setup, can have additional Pebble or Surface remotes paired to it, even if the remotes are introduced after the initial Hub setup. The repeater s green light will flash, whenever it repeats a command sent by a device on the same PowerView Shade Network. 1. Locate the programming access on the back cover of the Remote module. 2. Using a paper clip, press and hold the recessed P button for 6 seconds. NOTE: The Group Numbers (1 6) will flash twice on the PRESS of the reset button followed by three times at 6 seconds. 3. Hold the Remote module within approximately 12 inches of the Hub.
7 Complete Steps 4 and 5 at the same time. 4. Press and hold the STOP button on the Remote module. 5. Press and hold the P button on the back of the Hub for approximately three seconds. NOTE: The Group Numbers (1 6) will flash to indicate that the Remote module has been paired to the PowerView Shade a Duplicate Remote A duplicate Remote will operate the same set of window coverings and GROUPS as the original Remote . 1. Locate the programming access on the back cover of the Remote module. 2. Using a paper clip, press and hold the recessed P button for 6 seconds. NOTE: The Group Numbers (1 6) will flash twice on the PRESS of the reset button followed by three times at 6 seconds. 3. Press and hold STOP on the original Remote , until the indicator lights blink. The Remote is now in program mode. 4. While pressing and holding ALL on the new Remote , press and release STOP on the original Remote .
8 5. The backlit GROUP buttons on the duplicate Remote will flash twice to indicate all of the information from the original Remote has been copied. 6. Press and hold STOP on the original Remote , until the indicator lights stop blinking to exit program the Remote s auto-wake featureThe auto-wake feature activates the backlights on the Remote , whenever the Remote is handled. This feature is useful for immediately seeing which shade GROUP buttons were activated last, but deactivating this feature will help to conserve battery life. When the auto-wake feature is deactivated, press STOP to wake the Remote and see which group buttons are active. 1. Press and hold the GROUP 6 button on the Remote for approximately 6 seconds. 2. The GROUP numbers (1 6) will blink once to indicate the auto-wake feature has been a Remote s auto-wake feature 1. Press and hold the GROUP 6 button on the Remote for approximately 6 seconds.
9 2. The GROUP numbers (1 6) will blink twice to indicate the auto-wake feature has been enabled. 1918 NOTE: It is recommended that only similar window coverings be included in a GROUP because of differences in product features and operation. When a window covering is added to a GROUP for the first time, it is also added to the PowerView Shade Network that links window coverings and devices GROUP can be a single window covering or multiple window coverings. There are six unique assignable GROUPS to use on each Remote . A window covering may be assigned to more than one GROUP. Join a window covering to a GROUP 1. Press and hold STOP on the Remote , until the indicator lights blink. The Remote is now in program mode. 2. Press the desired GROUP number (1 6) on the Remote . The backlit GROUP number will flash to show it is selected. 3. Press and hold the manual Control button on the window covering. 4. While continuing to press the manual button, press OPEN on the Remote .
10 The window covering will move slightly to indicate it has been joined to the GROUP. Release the manual Control button. 5. Press and hold STOP on the Remote , until the indicator lights stop blinking to exit program a window covering from a GROUP 1. Press and hold STOP on the Remote , until the indicator lights blink. The Remote is now in program mode. 2. Press the desired GROUP number (1 6) on the backlit GROUP number will flash to show it is selected. 3. Press and hold the manual Control button on the window covering. 4. While continuing to press the manual button, press CLOSE on the Remote . The window covering will move slightly to indicate it has been removed from the GROUP. Release the manual Control button. 5. Press and hold STOP on the Remote , until the indicator lights stop blinking to exit program a FAVORITE position Each window covering has one FAVORITE position, which is set at 50% open by default.