Fastener Specifications
Found 7 free book(s)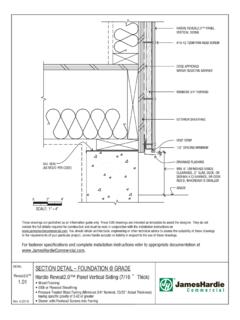
SECTION DETAIL – PANEL WITH HORIZONTAL TRIM
www.jameshardiepros.comFor fastener specifications and complete installation instructions refer to appropriate documentation at www.JamesHardieCommercial.com. 0 SCALE: 1" = 4" 2" 4" HORIZONTAL TRIM CAN ALSO BE HARDIE REVEAL2.0™ PANEL VERTICAL SIDING USED AT THE FLOOR BREAK; HOWEVER A DRAINAGE FLASHING IS REQUIRED TO BE USED EVERY OTHER …

SAE and Metric Fastener Torque Specifications
manuals.gogenielift.comFastener Torque Specifications : Service Manual Supplement July 2016 Fastener Torque Specifications 4 SAE and Metric Fastener Torque Specifications SAE Plain and Zinc Plated Hex and Socket Head Cap Screws TORQUE CHART - SAE PLAIN AND ZINC PLATED HEX HEAD AND SOCKET HEAD CAP SCREWS:
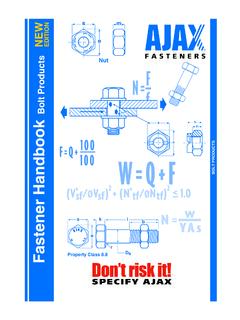
m Fastener Handbook F=Q+ 100 BOLT PRODUCTS
www.westcoastfasteners.com.auThis may lead to the specifications being changed without notice. ISSUE 99 PAGE 2 90138AjxH/bk99IndexPgs1-8•10 13/7/00 10:11 AM Page 2. INDEX - FASTENER HANDBOOK PRODUCT DESCRIPTION SECTION PAGE FORWARD 9-10 HEAD MARKING 1 11-13 Nut Marking 13 STANDARD BOLT PRODUCT RANGES 2 14-15 ISO Metric 14
MASTER SPECIFICATIONS Division 09 FINISHES
www.northwestern.edu2. Power-Actuated Anchors: Fastener system of type suitable for application indicated, fabricated from corrosionresistant materials, with allowable load capacities calculated - according to ICC-ES AC70, greater than or equal to the design load, as determined by testing per ASTM E 1190 conducted by a qualified testing agency.

MASTER SPECIFICATIONS Division 08 OPENINGS
www.northwestern.edumaster specifications: division 08 – openings . section # title 08 1113 hollow metal doors and frames . 08 1119 stainless steel doors and frammes . 08 1416 flush wood doors . 08 1433 thermal fused stile and rail wood doors . 08 3113 access doors and frames . 08 4113 aluminum-framed entrances and storefronts . 08 4413 glazed aluminum curtain walls
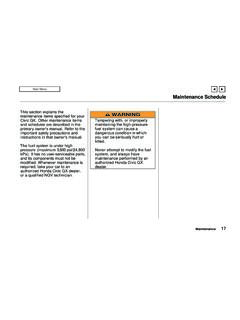
Maintenance Schedule - American Honda Motor Company
techinfo.honda.comfastener's head until it pops in. Pull the lining back. 3. Remove the socket from the light assembly by turning it one-quarter turn counterclockwise. 4. Remove the bulb by turning it one-quarter turn counterclockwise. 5. Install the new bulb in the socket. Turn it clockwise to lock it in place. 6. Reinstall the socket. Turn it clockwise until ...

Finishing Drywall 5 Systems - USG
www.usg.comother areas with pedestrian traffic. Tape and fastener heads need not be covered with joint compound. Surface shall be free of excess joint compound. Tool marks and ridges are acceptable. Level 2May be used with setting-type compound for areas where water-resistant gypsum backing board, specification ASTM C630, is used as a substrate for tile.