Transcription of 1585031437-1 AutoCAD LT 2004 MultiMedia Tutorial
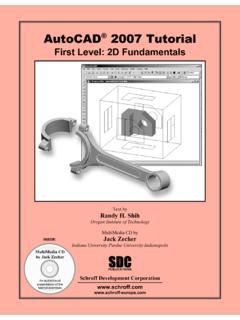
1 AutoCAD LT 2004 Tutorial MultiMedia CD. by Jack Zecher An audioi/visual presentation of the Tutorial exercises With MultiMedia CD. Text by Randy H. Shih Oregon Institute of Technology MultiMedia CD by Jack Zecher Indiana University Purdue University Indianapolis SDC. PUBLICATIONS. S chroff Development Corporation AutoCAD LT 2004 Tutorial 1-1. Lesson 1. Geometric Construction basics Create and Save AutoCAD drawing files. Use the AutoCAD LT visual reference commands. Draw, using the LINE and CIRCLE. commands. Use the ERASE command. Define Positions using the Basic Entry methods. Use the Pan Realtime option. 1-2 AutoCAD LT 2004 Tutorial Introduction Learning to use a CAD system is similar to learning a new language. We need to begin with the basic alphabet and learn how to use the basic alphabet correctly and effectively through practice. This will require learning some new concepts and skills as well as learning a different vocabulary. All CAD systems create designs using basic geometric entities.
2 Most of the constructions used in technical designs are based upon two- dimensional planar geometry. The method and number of operations that are required to accomplish the construction are different from one system to another. In order to become effective in using a CAD system, we must learn to create geometric entities quickly and accurately. In learning to use a CAD system, lines and circles are the first two, and perhaps the most important two, geometric entities that we need to master the skills in creating and modifying. Straight lines and circles are used in almost all technical designs. In examining the different types of planar geometric entities, we can see that triangles and polygons are planar figures bounded by straight lines. Ellipses and splines can be constructed by connecting arcs with different radii. As we gain some experience in creating lines and circles, similar procedures can be applied to create other geometric entities. In this lesson, we will examine the different ways of creating lines and circles in AutoCAD LT 2004.
3 Starting Up AutoCAD LT 2004. 1. Select the AutoCAD LT 2004 option on the Program menu or select the AutoCAD LT 2004 icon on the Desktop. Once the program is loaded into memory, the AutoCAD LT 2004 drawing screen will appear on the screen. Geometric Construction basics 1-3. Note that AutoCAD LT automatically assigns generic names, Drawing X, as new drawings are created. In our example, AutoCAD LT opened the graphics window using the default system units and assigned the drawing name Drawing1. Drawing Units Setup Every object we construct in a CAD system is measured in units. We should determine the value of the units within the CAD system before creating the first geometric entities. 1. In the pull-down menus, select: [Format] [Units]. 1-4 AutoCAD LT 2004 Tutorial 2. In the Drawing Units dialog box, set the Length Type to Decimal. This will set the measurement to the default English units, inches. 3. Set the Precision to two digits after the decimal point as shown in the above figure.
4 4. Pick OK to exit the Drawing Units dialog box. Drawing Area Setup Next, we will set up the Drawing Limits; setting the Drawing Limits controls the extents of the display of the grid. It also serves as a visual reference that marks the working area. It can also be used to prevent construction outside the grid limits and as a plot option that defines an area to be plotted/printed. Note that this setting does not limit the region for geometry construction. 1. In the pull-down menus, select: [Format] [Drawing Limits]. Geometric Construction basics 1-5. 2. In the command prompt area, near the bottom of the AutoCAD LT drawing screen, the message Reset Model Space Limits: Specify lower left corner or [On/Off]. < , >: is displayed. Press the Enter key once to accept the default coordinates < , >. 3. In the command prompt area, the message Specify upper right corner < , >: is displayed. Press the ENTER key once to accept the default coordinates < , >. 4. On your own, move the graphic cursor near the upper-right comer inside the drawing area and note that the drawing area is unchanged.
5 (The Drawing Limits command is used to set the drawing area; but the display will not be adjusted until a display command is used.). 5. In the pull-down menus, select: [View] [Zoom All]. The Zoom All command will adjust the display so that all objects in the drawing are displayed to be as large as possible. If no objects are constructed, the Drawing Limits are used to adjust the current viewport. 6. Move the graphic cursor near the upper right comer inside the drawing area and note that the display area is updated. 7. Close the Tool Palettes by clicking once on Close button located at the upper right corner of the window as shown. 1-6 AutoCAD LT 2004 Tutorial Using the Line command 1. Switch ON the Active Assistance option if it is not activated. 2. Move the graphics cursor to the first icon in the Draw toolbar. This icon is the Line icon. A help-tip box appears next to the cursor and a brief description of the icon is displayed at the bottom of the AutoCAD LT drawing screen: Creates Straight line segments: LINE.
6 3. Select the icon by clicking once with the left-mouse-button; this will activate the Line command. Notice a brief explanation of the selected command is displayed in the Active Assistance window. It is highly recommended that you read the explanations to gain some insights on the basic assumptions and general procedure of using AutoCAD LT. 4. In the Active Assistance window, click To draw lines to open the AutoCAD LT Help window and get a more detailed explanation on the procedure. 5. Click on Close button located at the upper right corner of the AutoCAD LT. Help window as shown. Geometric Construction basics 1-7. 6. In the command prompt area, near the bottom of the AutoCAD LT drawing screen, the message _line Specify first point: is displayed. AutoCAD LT expects us to identify the starting location of a straight line. Move the graphics cursor inside the graphics window and watch the display of the coordinates of the graphics cursor at the bottom of the AutoCAD LT drawing screen.
7 The three numbers represent the location of the cursor in the X, Y, and Z directions. We can treat the graphics window as if it were a piece of paper and we are using the graphics cursor as if it were a pencil with which to draw. Coordinates of the location of the graphics cursor. 5. We will create a freehand sketch of a five- 3 2. point star using the Line command. Create the sketch by placing the first corner of the star near the lower left corner of the drawing window. Do not be overly concerned with the actual size or the accuracy of your freehand sketch. This exercise is to give you a feel for the AutoCAD LT 2004 user interface. 1 4. 7. We will start at a location about one-third from the bottom of the graphics window. Left-click once to position the starting point of our first line. This will be point 1 of our sketch. Next move the cursor upward and toward the right side of point 1. Notice the rubber-band line that follows the graphics cursor in the graphics window. Left-click again (point 2) and we have created the first line of our sketch.
8 8. Move the cursor to the left of point 2 and create a horizontal line about the same length as the first line on the screen. 1-8 AutoCAD LT 2004 Tutorial 9. Repeat the above steps and complete the freehand sketch by adding three more lines (from point 3 to point 4, point 4 to point 5, and then connect to point 5 back to point 1). 10. Notice that the Line command remains activated even after we connected the last segment of the line to the starting point (point 1) of our sketch. Inside the graphics window, click once with the right-mouse-button and a popup menu appears on the screen. 11. Select Enter with the left-mouse-button to end the Line command. (This is equivalent to hitting the [ENTER]. key on the keyboard. The right-mouse-click brings up more options and we should get used to using the option menu.). 12. On your own, move the cursor near point 2 and point 3, and estimate the length of the horizontal line by watching the displayed coordinates for each point at the bottom of the screen.
9 Visual reference The method we just used to create the freehand sketch is known as the interactive method, where we use the cursor to specify locations on the screen. This method is perhaps the fastest way to specify locations on the screen. However, it is rather difficult to try to create a line of a specific length by watching the displayed coordinates. It would be helpful to know what one-inch or one-meter looks like on the screen while we are creating entities. AutoCAD LT 2004 provides us with many tools to aid the construction of our designs. We will use the GRID and SNAP options to get a visual reference as to the size of objects and learn to restrict the movement of the cursor to a set increment on the screen. The Status Bar area is located at the bottom of the AutoCAD LT drawing screen. The words SNAP, GRID, ORTHO, POLAR, OSNAP, LWT and MODEL appearing to the right of the coordinates are buttons that we can left-click to turn these special options ON and OFF. When the corresponding button is highlighted, the specific option is turned on.
10 These buttons act as toggle switches; each click of the button will toggle the option on or off. Using the buttons is a quick and easy way to make changes to these drawing aid options. We can toggle the options ON and OFF in the middle of another command. Option Buttons Geometric Construction basics 1-9. GRID ON. 1. Left-click the GRID button in the Status Bar to turn ON the GRID option. (Notice in the command prompt area, the message <Grid on> is also displayed.). 2. Move the cursor inside the graphics window, and estimate the distance between the grid points by watching the coordinates display at the bottom of the screen. The GRID option creates a pattern of dots that extends over an area on the screen. Using the grid is similar to placing a sheet of grid paper under a drawing. The grid helps you align objects and visualize the distance between them. The grid is not displayed in the plotted drawing. The default grid spacing, which means the distance in between two dots on the screen, is inches.