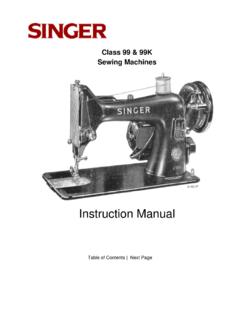
Transcription of 27 & 28 INSTRUCTIONS SINGER*
1 27 & 28 INSTRUCTIONSFOR USINGSINGER*SEWING MACHINENO. 27 & 28 VIBRATING SHUTTLE, FOR FAMILY USETHE singer MANUFACTURING requiringNeedle, Oil,Parts or Repairs,for your MachineLook for theRed "S"There are SingerShops in every City 27 & 28 WarningTo all whom it may concernSinger ServiceIt s sew easy by electricityThe Hand AttachmentStop MotionTo Operate the Hand MachineTo Ensure Perfect Action of the MachineTo Set the NeedleToThread the NeedleTo Wind the BobbinTo Remove the ShuttleToThread the ShuttleToReplace the ShuttleTo Prepare for SewingToCommence SewingTo Remove the WorkTo Regulate the TensionToAlter the Length of StitchTo Change the Pressure on MaterialToTurn a CornerTo Sew Flannel or Bias SeamsTo Oil MachineHintsNeedles BreakingThread BreakingSkipping StitchesStitches LoopingMaterial PuckeringInstructions for Using AttachmentsBias GaugeThe Binder - BindingTo Bind with Dress BraidTo Make French FoldsThe Adjustment and Operation of the
2 BinderBinding Outside CurvesBinding Inside CurvesThe QuilterThe Foot Hemmer - HemmingHemming and Sewing on Lace in One OperationThe Foot Hemmer - FellingThe Adjustable HemmerThe Adjsutable Hemmer - Wide HemmingThe Under Braider - BraidingThe Table of Contents3 27 & 28 WARNINGIt is essential that your machine should bekept well oiled, in accordance with theinstructions given on pages 13 and 14 of Oil, which is specially prepared forsewing machines, is supplied in tins whichhave the well-known singer Red "S" are stamped with the TradeMark SIMANCO* and are sold in green pack-ets which also bear the singer Red Letter"S."Needles in Containers marked" For singer Machines " are not singer made your machine require overhauling orrepair, apply only to a singer SEWINGCENTRE or singer Salesman, otherwiseyou will risk its being irretrievably description of sewing machinerepaired,To all whom it may concern.
3 The improper placing or renewal of the trade-mark " singer " or any other of the trade-marks of The singer Manufacturing Company(all of which are duly Registered Trade-marks) on any machine that has beenrepaired, rebuilt, reconditioned, or altered inany way whatsoever outside a singer facto-ry or an authorised singer agency is SERVICENow that you have purchased your newSINGER Sewing Machine we do not wantyou to feel that your relations with us havecome to an following INSTRUCTIONS are worded so thatthey may be easily understood by everyone,and we would suggest that you study themcarefully in order that you may obtain thefullest use and pleasure from your sewingmachine. If, however, you require furtherassistance we would ask you to call at thelocal singer SEWING CENTRE whereadvice will always be willingly given in theuse of any singer Machine and hope, too, that you will make the SINGERSEWING CENTRE your headquarters forsewing supplies and service.
4 Only there, orthrough singer authorized representatives,can you secure singer oil, cotton, needles,etc. all of which are so important in obtaining4 27 & 28 5 27 & 28 The Hand AttachmentWhen the cover is removed from the machine, the hand attachment will be found to be out ofworking position, as shown in Fig. operate the machine, pull the small spring stud (2, Fig. 1) and turn the handle back untilthe lever (1, Fig. 1) enters the socket (3, Fig. 1); also see that the hinged finger (4, Fig. 2) isturned back between the spokes of the wheel. The machine will then be ready for working, asshown in Fig. replacing the cover, the lever should bedisengaged, and the handle placed in the position shown in Fig. 1 FIG. 2627 & 28 Stop MotionThis device a allows the hand wheel to runfree, so that bobbins may be wound withoutoperating the mechanism.
5 To loosen thewheel hold it with the left hand and with theright hand turn the stop motion screw overtowards you, as shown in Fig. Operate the Hand MachineTighten the hand wheel (see Fig. 3) andplace a piece of material under the presserfoot (7, Fig. 5). Then lower the latter bymeans of the lifter (3, Fig. 5). Now turn thehandle over from you to work the machine,without its being threaded, until you areaccustomed to guiding the material with theleft 3727 & 28 To Ensure Perfect Action of the MachineThe hand wheel must always turn overtowards not work the machine with the presserfoot lowered or with the shuttle and the nee-dle threaded, except when sewingBoth slides over the shuttle must be Set the Needle(See Fig. 4)Raise the needle bar to its highest point andloosen the thumb screw.(A).
6 Hold the needle with the left hand and,with its flat side to the right, insert it into theneedle clamp (B) as far as it willgo. Then retighten the thumb 4. Positioning Needle in Needle 27 & 28 To Thread the Needle(See Fig. 5)Turn the hand wheel heel until the lever (2) isat its highest. Place a reel of thread on thespool pin and pass the thread through thenotch (13) down, and from right to left underand between the tension discs (12), and upthrough the eyelet in the take-up spring (4).Then pass the thread from the front throughthe hole in the lever (2), down through theguard (5), into the guide (6), and from left torightthrough the eye of the needle. Drawabout three inches of thread through the eyeof the needle with which to obtain best results it is absolutely neces-sary that the needle used be of the size stat-ed for the number of cotton, linen or silk, asshown on inside of back cover.
7 If rough oruneven thread is used, or if it passes with dif-ficulty through the eye of the needle, themachine will not function singer Needle Threader saves time,trouble and patience, and is invaluable tothose having defective 59 27 & 28 To Wind the Bobbin(See Fig. 6)Loosen the hand wheel (see Fig. 3) and pushthe top of the winder from you until its rubberring (5) just touches the ledge of the handwheel. Turn the latter over towards you untilthe thread guide (2) moves to the extremeright. Place a reel of thread on the spool pin;and pass the end of thread through the notchat top of the face plate (13, Fig. 5); thenthread the winder by passing the threadupward through the eyelet (1) and into thenotch (2). Draw the knob (3) to the left, andplace an empty bobbin between the cup atthe right (4) and the centre hole at the clamp the end of thread between thecup and the end of the bobbin, turn the handwheel towards you and wind by operating themachine as when sewing.
8 When nearly fullremove the bobbin by pulling the knob (3) tothe left, then withdraw the winder from theledge of the hand wheel and tighten the latterby turning the stop motion screw from 610 27 & 28 To Remove the ShuttleOpen the front slide of the machine and turn the hand wheel towards you until the shuttlecomes full under the opening. Press down the point of the shuttle with the thumb and lift the open end of the shuttle downward and the bobbin will drop : The shuttle should not be lifted out by the Thread the ShuttleHold the shuttle, as in Fig. 7, and insert the bobbin so that the end of the thread draws fromthe left towards the right, as shown in the 71127 & 28 To Thread the Shuttle the forefinger of the left hand on theend of the bobbin, and draw the threaddown into the slot of the shuttle, towardsthe point, as far as it will go (see Fig.)
9 8);then pull the thread tightly upwards anddown again, so that it lies across the pointin the centre of the spring, as shown in Fig. 9. FIG. 8 FIG. 81227 & 28 To Replace the threading, take the shuttle in the righthand with its point towards you, and place itin the shuttle carrier, as shown in Fig. 10,leaving a loose end of thread about threeinches long above the slide. Then close : Keep the inside of the shuttle andunder the tension spring (see Fig. 7)free from accumulation of lint 101327 & 28 To Prepare for SewingWith the left hand hold the end of the nee-dle thread, leaving it slack from the handto the needle. Turn the hand wheel overtowards you for the needle to move downand up again to its highest. Pull the threadyou are holding, and the under thread willbe brought up with it through the hole inthe throat plate, as shown in Fig.
10 Both ends of thread under and tothe back of the presser Commence SewingPlace the material to be sewn beneath thepresser foot, lower the latter, and com-mence to sew by turning the hand wheelover towards : Do not try to help the feeding ofthe work by pulling the material, asthis may deflect the needle andcause it to break. The machinefeeds without any Remove the WorkRaise the needle bar to its highest, lift the press-er foot (7, Fig. 5), at the same time pressing thetension release (10, Fig. 5) with the thumb of theright hand. Move the material back and to theleft, and sever the threads by passing them overthe thread cutter above the presser foot. Leave afew inches of thread under and at the back of thepresser 111427 & 28 To Regulate the TensionsCorrect ordinary stitching, the tension on theupper and under threads should be equal, so as to lock both threads in the centre of the work, as either tension is stronger than the other,imperfect stitching will be the result, thus:Needle Thread Tensiontoo Thread Tensiontoo the presser foot and turn the thumbnut in the direction illustrated by the arrow toincrease the tension or in the opposite direc-tion to lessen all machines are correctly adjusted beforeleaving the factory, the under tension seldomrequires to be altered, but if this becomesnecessary tighten the screw near the point ofthe shuttle (see Fig.)