Transcription of 69-1714 - TH6110D Programmable Thermostat …
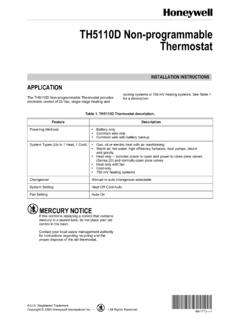
1 TH6110 DProgrammable ThermostatInstallationGuideFocusPRO TH6110D Programmable Thermostat1 Product ApplicationThis Thermostat provides electronic control of 24 VAC single-stage heating and cool-ing systems, or 750 mV heating Types Gas, oil, or electric heat with airconditioning Warm air, hot water, high-efficiencyfurnaces, heat pumps, steam, gravi-ty Heat only two-wire systems,power to open and close zonevalves (Series 20), and normally-open zone valves Heat only with fan Cool only 750 mV heating systemsPower Options Battery power only Common wire only Common wire with battery backupChangeover Options Selectable manual or auto-changeover modesSystem Settings Heat, Off, Cool,AutoFan Settings Auto, OnMust be installed by a trained, experienced technician Read these instructions carefully.
2 Failure to follow these instructions can dam-age the product or cause a hazardous condition. Check the ratings in this booklet to verify that this product is suitable for yourapplication (see page 13). Always test for proper operation after installation (see page 9).CAUTION: ELECTRICAL HAZARDCan cause electrical shock or equipment damage. Disconnect power before beginning NOTICEIf this product is replacing a control that contains mercury in a sealed tube, do notplace the old control in the trash. Contact your local waste management authority forinstructions regarding recycling and proper the Thermostat about 5 feet ( ) above the floor in an areawith good air circulation at average not installin locations where the Thermostat can be affected by: Drafts or dead spots behind doors and in corners Hot or cold air from ducts Sunlight or radiant heat from appliances Concealed pipes or chimneys Unheated/uncooled areas such as an outside wall behind the thermostatNONONO Registered Trademark.
3 Patents pending. Copyright 2005 Honeywell International Inc. All rights checklist ..2 Wallplate installation .. diagrams ..5 Power options ..7 Thermostat mounting ..7 SSeettuupp aanndd tteessttiinnggInstaller system test ..9 Explanation of features ..10 AAppppeennddiicceessQuick reference to controls ..11 Quick reference to case of difficulty ..12 Accessories/replacement parts ..13 Specifications ..13 Table of contentsInstallation tipsFocusPRO TH6110D Programmable Thermostat1 Product ApplicationThis Thermostat provides electronic control of 24 VAC single-stage heating and cool-ing systems, or 750 mV heating Types Gas, oil, or electric heat with airconditioning Warm air, hot water, high-efficiencyfurnaces, heat pumps, steam, gravi-ty Heat only two-wire systems,power to open and close zonevalves (Series 20)
4 , and normally-open zone valves Heat only with fan Cool only 750 mV heating systemsPower Options Battery power only Common wire only Common wire with battery backupChangeover Options Selectable manual or auto-changeover modesSystem Settings Heat, Off, Cool,AutoFan Settings Auto, OnMust be installed by a trained, experienced technician Read these instructions carefully. Failure to follow these instructions can dam-age the product or cause a hazardous condition. Check the ratings in this booklet to verify that this product is suitable for yourapplication (see page 13). Always test for proper operation after installation (see page 9).CAUTION: ELECTRICAL HAZARDCan cause electrical shock or equipment damage. Disconnect power before beginning NOTICEIf this product is replacing a control that contains mercury in a sealed tube, do notplace the old control in the trash.
5 Contact your local waste management authority forinstructions regarding recycling and proper the Thermostat about 5 feet ( ) above the floor in an areawith good air circulation at average not installin locations where the Thermostat can be affected by: Drafts or dead spots behind doors and in corners Hot or cold air from ducts Sunlight or radiant heat from appliances Concealed pipes or chimneys Unheated/uncooled areas such as an outside wall behind the thermostatNONONO Registered Trademark. Patents pending. Copyright 2005 Honeywell International Inc. All rights checklist ..2 Wallplate installation .. diagrams ..5 Power options ..7 Thermostat mounting ..7 SSeettuupp aanndd tteessttiinnggInstaller system test ..9 Explanation of features ..10 AAppppeennddiicceessQuick reference to controls.
6 11 Quick reference to case of difficulty ..12 Accessories/replacement parts ..13 Specifications ..13 Table of contentsInstallation tipsFocusPRO TH6110D Programmable Thermostat3 Installation Guide2 Pre-installation checklistPackage contentsCheck to make sure your package includes the following items:Operating manualWall anchors andmounting screws(2 each)AA alkaline batteries (2)FocusPRO TH6110D Programmable Thermostat (wallplate attached to back)Required tools & supplies No. 2 Phillips screwdriver Small pocket screwdriver Drill Drill bit (3/16 for drywall, 7/32 for plaster) Hammer Pencil Electrical tape Level (optional)Remove the wallplate from the ther-mostat as shown at left, then followdirections below for Insert quick reference card in slotin back of Pull wires through wire Position wallplate on wall, level andmark hole positions with Drill holes at marked positions asshown below, then tap in suppliedwall Place wallplate over anchors, insertand tighten mounting finger into wire hole and pull toremove wallplate from 3/16 holes for 7/32 holes for anchorsMounting screwsWire holeWallplate installationQuick reference cardInsert quick reference cardFocusPRO TH6110D Programmable Thermostat3 Installation Guide2 Pre-installation checklistPackage contentsCheck to make sure your package includes the following items.
7 Operating manualWall anchors andmounting screws(2 each)AA alkaline batteries (2)FocusPRO TH6110D Programmable Thermostat (wallplate attached to back)Required tools & supplies No. 2 Phillips screwdriver Small pocket screwdriver Drill Drill bit (3/16 for drywall, 7/32 for plaster) Hammer Pencil Electrical tape Level (optional)Remove the wallplate from the ther-mostat as shown at left, then followdirections below for Insert quick reference card in slotin back of Pull wires through wire Position wallplate on wall, level andmark hole positions with Drill holes at marked positions asshown below, then tap in suppliedwall Place wallplate over anchors, insertand tighten mounting finger into wire hole and pull toremove wallplate from 3/16 holes for 7/32 holes for anchorsMounting screwsWire holeWallplate installationQuick reference cardInsert quick reference cardFocusPRO TH6110D Programmable Thermostat5 Installation Guide4 Wiring1 Loosen screw terminals, insertwires into terminal block, then re-tighten Push excess wire back into thewall opening.
8 Keep wires in shadedarea as shown at Plug the wall opening with non-flammable insulation to preventdrafts from affecting DesignationsGGFan relay or changeover valveterminal for heat wire from secondary sideof cooling system power. Connect to secondary side of heating system power. Connect to secondary side of cooling system & Rc terminalsIn single-transformer system, leave metaljumper in place between R & Rc. Removemetal jumper if two-transformer terminalThe C (common wire) terminal is optionalwhen Thermostat is powered by (O/B) terminalIf Thermostat is configured for a heat pumpin the Installer Setup, configure changeovervalve for cool ( O factory setting) or heat( B ).Wire specificationsUse 18- to 22-gauge Thermostat cable is not wires in thisshaded areaCAUTION: ELECTRICAL HAZARD.
9 Can cause electrical shock or equipment power before 1H/1C system: 1 transformerTypical 1H/1C system: 2 transformersPower supply. Provide disconnect means and overload protection as jumper. Remove for 2-transformer systems 24 VAC common Installer Setup, set system type to Heat Installer Setup, set system type to Heat Pump& changeover valve to 0or jumperWiring diagramsTypical 1H/1C heat pump systemTypical heat-only systemFocusPRO TH6110D Programmable Thermostat5 Installation Guide4 Wiring1 Loosen screw terminals, insertwires into terminal block, then re-tighten Push excess wire back into thewall opening. Keep wires in shadedarea as shown at Plug the wall opening with non-flammable insulation to preventdrafts from affecting DesignationsGGFan relay or changeover valveterminal for heat wire from secondary sideof cooling system power.
10 Connect to secondary side of heating system power. Connect to secondary side of cooling system & Rc terminalsIn single-transformer system, leave metaljumper in place between R & Rc. Removemetal jumper if two-transformer terminalThe C (common wire) terminal is optionalwhen Thermostat is powered by (O/B) terminalIf Thermostat is configured for a heat pumpin the Installer Setup, configure changeovervalve for cool ( O factory setting) or heat( B ).Wire specificationsUse 18- to 22-gauge Thermostat cable is not wires in thisshaded areaCAUTION: ELECTRICAL HAZARD. Can cause electrical shock or equipment power before 1H/1C system: 1 transformerTypical 1H/1C system: 2 transformersPower supply. Provide disconnect means and overload protection as jumper. Remove for 2-transformer systems 24 VAC common Installer Setup, set system type to Heat Installer Setup, set system type to Heat Pump& changeover valve to 0or jumperWiring diagramsTypical 1H/1C heat pump systemTypical heat-only systemFocusPRO TH6110D Programmable Thermostat7 Installation Guide6AC PowerThe Thermostat can be powered by 24 VAC power, or by wire the Thermostat for AC power,connect the common side of the cooling transformer to the C terminalas shown at ::Remove R/Rc jumper for 2-transformer systems only.