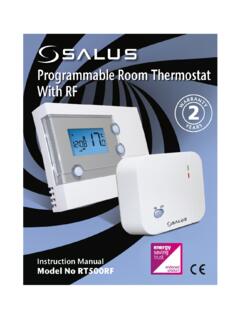
Transcription of MagicStat CT3200 Programmable Thermostat
1 MagicStat CT3200 Programmable ThermostatInstallation and Programming InstructionsWelcome to the world of comfort and energy savings with your new honeywell MagicStat Programmable Thermostat . Your new Thermostat will automatically control the temperature in your home, keeping you comfortable while saving energy. If you have any questions about using this Thermostat , visit our home expert Web site at or call honeywell Customer Relations at 1-800-468-1502. Registered TrademarkCopyright 2001 honeywell All Rights ReservedWeekday/Weekend (5-day/2-day) Programmable Heat and/or CoolLow Voltage (20 to 30 Vac)
2 Thermostat and Mounting PlateModel CT3200 Table of ContentsInstallation2 Programming11 Operation17 Change the clock for Daylight/Standard Time17 Set the Fan and System switches17 Replace the batteries18 Override the program settings19 Frequently asked questions21 Limited 1-Year Warranty2369- 0653- 62 INSTALLATION69-0653-6 Installation Verify that you have the right thermostatMake sure that the CT3200 is the right Thermostat for your heating/cooling system. Read the compatibility chart below to determine which system you have. If your system is not compatible with the CT3200 , the table recommends an alternate honeywell model.
3 If you are unsure what type of Thermostat is right for your system, visit us on the Web at or call honeywell Customer Relations at SystemCompatible with CT3200 ?Alternate modelConventional Single stage systems that include warm air furnaces and hot sElectric Baseboard Electric powered heating strips located just above the floor, usually 120 to 240 for 240 voltsSteamA steam boiler with radiator Pump Heating and cooling are produced from the same outdoor unit (compressor) with no auxiliary or backup Heat Pump Heating and cooling are produced from the same outdoor unit (compressor)
4 With auxiliary or backup ConventionalA heating or cooling system with more than one your contractorRecycling ThermostatIf you are removing an old Thermostat that contains mercury in a sealed tube (Fig. 1), do not place the old Thermostat in the trash. Contact your local waste management authority for instructions regarding recycling and the proper disposal of the old 1M3701 MERCURYSWITCH69-0653-6 INSTALLATION3 Step 1. Prepare for unpack your new Thermostat . Save your receipt and make sure you have the following the needed tools and supplies listed sure that your heating and cooling systems are working properly.
5 If there is a problem with either system, call a heating/air conditioning contractor the problem may persist after you install the new tools and suppliesOptional tools Two AA alkaline batteries. honeywell recommends Energizer batteries. Screwdriver Hand or power drill with 3/16-inch or 7/32-inch drill bit Pencil Wire cutter/stripper or sharp knife Level Electrical tapeIMPORTANT: To avoid damaging the compressor in the air conditioner, do not operate the cooling system when the temperature outdoors is below 50 F (10 C). Thermostat and mounting plate Labels Screws and anchors Installation and Programming Instructions4 INSTALLATION69-0653-6 Step 2.
6 Remove the old thermostatFig. 2 Fig. 3 Fig. 4 WIRES THROUGHWALL off power to the heating/cooling system, either at the furnace or at the fuse/circuit breaker the cover of your old Thermostat (Fig. 2). and remove the old Thermostat s mounting plate from the wall, but do not disconnect the the old Thermostat wiring. If the wiring meets any of the following conditions, see the special wiring instructions on page 9. The old Thermostat is a clock Thermostat with wires attached to the C or C1 terminals. The old Thermostat has 6 or more wires, excluding wires attached to C or C1 terminals.
7 The old Thermostat has 3 wires. There are 5 wires connected to the old Thermostat . There are extra wires that are not connected to the old the enclosed labels, mark the wires with the letter of the terminal that it is attached to on the old Thermostat (Fig. 3). Do not label the wires by the labels do not match the letters on the old Thermostat terminals, see the wiring cross reference table on page the wires from the old Thermostat and wrap the wires around a pencil to keep them from falling back into the : Remember, if your old Thermostat contains mercury, you must recycle it.
8 See page 2 for more recycling information. Check your progressYour wall should now look like Fig. Step 3. Install the mounting plateFig. 5 Fig. 6 Fig. the mounting plate from the Thermostat using a coin, as shown in Fig the mounting plate on the wall. Be sure the mounting plate sits flush against the wall and none of the wires are trapped behind the mounting plate and use a pencil to mark the center of the mounting plate s screw the mounting plate and drill holes at the locations you marked. For drywall, drill two 3/16 inch holes.
9 For plaster or wood, drill two 7/32 inch installing in drywall, gently tap the anchors that were provided into the drilled holes until they are flush with the the mounting plate over the holes, pull the wires through the wiring opening, and loosely insert the mounting screws into each of the drilled holes or anchors (Fig. 6). sure the mounting plate is level and tighten the mounting screws. Check your progressThe mounting plate is now mounted on the wall and should look like Fig. Step 4. Set the Thermostat for your type of heating the FUEL SWITCH on the back of the Thermostat to set your new Thermostat for the type of fuel that your heating system uses: F gas or oil, or E : This setting enables proper fan the A and B screws on the back of the Thermostat to set your new Thermostat for your type of heating system.
10 See the Heating System Table on the next page to find the correct : These screws are factory-set for a warm air, gas, or oil heating Thermostat is set to display the temperature in degrees Fahrenheit ( F). If you want to display the temperature in degrees Celsius ( C), adjust screw C out one can install the batteries and program your Thermostat now, or you can wait until the Thermostat is mounted on the wall. To install the batteries, see the instructions on page 8. To program the Thermostat , see the instructions that begin on page : Setting your Thermostat correctly for your type of heating system allows it to maintain accurate temperature control, minimize swings in the temperature of the room, and efficiently run the 8 RRcW Y GB DA CTHERMOSTAT BACKM20145 DISPLAY FDISPLAY CC INC OUT1 TURNFOR HIGH EFFICIENCY FURNACE (90%+ AFUE)ADJUST.