Transcription of AC1450 Smart WiFi Router Installation Guide
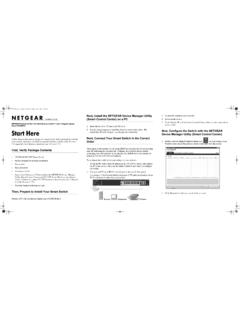
1 NETGEAR, East Plumeria DriveSan Jose, CA 95134, USAF ebruary 2013 TrademarksNETGEAR, the NETGEAR logo, and Connect with Innovation are trademarks and/or registered trademarks of NETGEAR, Inc. and/or its subsidiaries in the United States and/or other countries. Information is subject to change without notice. NETGEAR, Inc. All rights for indoor use Smart wifi RouterInstallation GuidePackage ContentsThe box should contain the following items. If any items are incorrect, missing, or damaged, contact your NETGEAR dealer. Important: Be sure to remove the plastic film from the Router before using cablePower adapterAC1450 Smart wifi Router 1. Prepare your can use this diagram to connect your Router or follow the detailed instructions in this your modem.
2 If it has a battery backup, remove the Connect your in your modem. Put the battery back in. Then cable the modem to the Router Internet Power on the Launch a or cableModemRouterWait for the wifi LED to light. 4. Connect a can use an Ethernet cable or connect genie you do not see genie, type Type admin for the user name and password as the you for selecting NETGEAR installing your device, locate the serial number on the label of your product and use it to register your product at You must register your product before you can use NETGEAR telephone support. NETGEAR recommends registering your product through the NETGEAR product updates and web support, recommends that you use only the official NETGEAR support can get the user manual online or through a link in the product s user Your Router .
3 2If NETGEAR genie Does Not Display .. 6 Preset Wireless Security .. 6 Wireless Network Settings .. 7 Join the Wireless Network.. 8 Access the Router to Make More Changes.. 9 ReadySHARE Access .. 10 ReadySHARE Printer .. 11 NETGEAR genie App .. 12 Other Features .. 122 Install Your RouterMake sure that your Internet service is active before you install the Router . To install your your your modem s the modem has a battery backup, remove its your modem was already connected to another Router , disconnect the cable between your modem and that your modem should be completely turned off, and cabled only to the wall jack for your Internet or your in, then turn on your modem.(Replace the batteries if you removed them previously.)
4 The yellow Ethernet cable that came with the Router , connect your modem to the Internet port of your on the the power adapter to the Router and plug the power adapter into an for the wifi LED on the front panel of the Router to no LEDs are lit, press the Power On/Off button on the rear panel of the On/Off Modem a can use an Ethernet cable or connect wirelessly. For a wired connection, use an Ethernet cable (not included) to connect your computer to a black Ethernet LAN port on your Router . To connect wirelessly, use the preset wireless security settings on the label on the bottom of the a first time that you connect to the Router , the genie screen displays. Follow the genie steps to connect to the Internet.
5 Modem Computer Router6If NETGEAR genie Does Not Display Close and reopen the browser. Type in the address bar, and type the user name admin and the default password (password). Make sure that the computer is connected to one of the four LAN Ethernet ports, or wirelessly to the Router . Make sure that the Router has full power, and that its wifi LED is solid blue. If the computer is set to a static or fixed IP address (this condition is uncommon), change it to obtain an IP address automatically from the Wireless SecurityThis product has a unique wifi network name (SSID) and network key (password). The default SSID and password are uniquely generated for every device, like a serial number, to protect and maximize your wireless security.
6 This information is located on the label on the bottom of the product. 7 NETGEAR recommends that you do not change the preset wifi SSID or password. If you do change the settings, the SSID and password on the label no longer apply. Wireless Network SettingsRecord the preset wireless settings on the label in the space below for easy reference. If you change the default settings, record them here for easy reference and store this booklet in a safe place: To retrieve or update your wireless in a web in using the user name (admin) and the default password (password). Wireless network name (SSID):Network key (password): wifi network name (SSID):Network key (password):8 Join the Wireless NetworkYou can use either the Wi-Fi Protected Setup (WPS) method or the manual method to join your wireless network.
7 To join the network using the WPS button on the 2 minutes, press the WPS button on your wireless computer or device, or follow the WPS instructions that came with your wireless device to complete the WPS process. Note: Some older wireless computers or devices cannot use WPS. To join the network your computer or wireless device, open the software that manages its wireless connections. This software scans for all wireless networks in your for the wifi network name (SSID) and select it. The SSID is on the label on the bottom of the you changed the name of your network during the setup process, look for that network name. the preset password (or your custom password if you changed it). the Router to Make More ChangesAfter you use NETGEAR genie to set up the Router , you can log in to the Router to view or change its settings.
8 To log in to the a web browser from a computer or wireless device that is connected to the or in the address field of the browser. A login screen admin for the user name and password for the password. The Basic Home screen displays. To change the password for the Router user in to the the ADVANCED tab, select Administration > Set your old password, and type the new password twice. the Enable Password Recovery check prompted, answer answers are To use password recovery to retrieve a forgotten password:To use this feature, you must have enabled password a web browser from a computer or wireless device that is connected to the or in the address field of the browser. the login screen displays, click are prompted to enter your saved answers so that you can log in to the AccessYou can connect a USB storage device or printer to the USB port on the Router and share it on the network.
9 To access your USB device on a Windows system, do any of the following: Select Start > Run and enter \\readyshare in the dialog box. Click OK. Open a browser and enter \\readyshare in the address bar. Open My Network Places and enter \\readyshare in the address On Mac systems, do Go > Connect to smb://readyshare as the server Printer To use ReadySHARE the USB printer to the Router USB port with a USB printer the printer driver software (available from the printer manufacturer) onto each computer that will share the and download and install the NETGEAR USB Control Center utility onto each computer that will share the ReadySHARE Printer setup, follow the Easy to Set-up Instructions that are available online just above the download links.
10 12 NETGEAR genie AppDownload the free genie app from Automatically fix common network problems and easily manage your home network FeaturesFor additional features, including Live Parental Controls, traffic metering, ReadySHARE, guest access, and more, log in to your Router at GOOD Network MapNumber of devices 16 Parental ControlsWiFi Connection STATUS ConnectedRouter SettingsClick hereReadySHAREC lick hereClick her