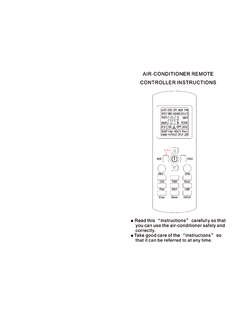
Transcription of AIR CONDITIONER REMOTE CONTROLLER ILLUSTRATION
1 AIR CONDITIONER . REMOTE CONTROLLER ILLUSTRATION . The design and specifications are subject to change without prior notice for product improvement. Consult with the sales agency or manufacturer for details. CR246-RG66B6(A1,A2)EFU1 Thank you very much for purchasing our air CONDITIONER . Please read this owner's manual carefully before using 16117000A33113 your air CONDITIONER . Make sure to save this manual for 2019116 future reference. Function Buttons CONTENTS Before you begin using your new air CONDITIONER , make sure to familiarize yourself with its REMOTE control. The following is a brief introduction to the REMOTE control itself. For instructions on how to operate your air CONDITIONER , refer to the How to Use The Basic/Advance Functions section of this manual. REMOTE CONTROLLER 1 NOTE Please do not select HEAT mode if the machine you purchased is cooling only type.
2 Heat mode is not supported by the cooling only appliance. Function buttons .. 2 FAN. ON/OFF Selects fan speeds in Turns the unit on or off the following order: Handling the REMOTE CONTROLLER .. 5 AUTOg LOW g MED g MODE HIGH. REMOTE LCD screen indicators .. 6 NOTE: Holding this button Scrolls through operation modes as follows: down for 2 seconds will How to use the basic 7 AUTO g COOL g DRY g activate Silence feature. HEAT g FAN TEMP. How to use the advanced functions .. 13 Increases temperate in Sleep 1OF(1OC) increments. Max. temperature is Saves energy during 86OF(30OC) . REMOTE CONTROLLER Specifications sleeping hours. Mode ON/OFF Fan TEMP. Decreases temperate in Model RG66B6/BGEFU1, RG66A2/BGEFU1, RG66A1/BGEFU1 1OF(1OC) increments. Min. temperature is TIMER 62OF(17OC) . Rated Voltage (Dry batteries R03/LR03 2) Sets timer to turn unit on Timer Sleep Swing and off(see How to Use NOTE: Press and hold and buttons together for Signal Receiving Range 8m Basic Functions for Follow 3 seconds will alternate the instructions) LED Direct me temperature display Environment 23OF~140OF(-5OC~60OC) LED Short Self between the OC & OF.
3 , Turbo cut clean scale. Turns indoor unit s LED. display on and off. SWING. Starts and stops horizontal NOTE: FOLLOW ME louver auto swing feature. Temperature sensing and Buttons design is based on typical model and might be slightly different from the room temperature display DIRECT. actual one you purchased, the actual shape shall prevail. button. Used to set the desired All the functions described are accomplished by the unit. If the unit has no this up/down air flow direction. feature, there is no corresponding operation happened when press the relative The louver changes 6. TURBO. button on the REMOTE CONTROLLER . degree in angle for each ,, ,, Enables unit to reach press. ,,When there are wide differences between REMOTE CONTROLLER ILLUSTRATION and ,, ,, ,, USER'S MANUAL on function description, the description of USER'S MANUAL preset temperature in shall prevail.
4 Shortest possible time SELF CLEAN. Starts and stops the unit SHORT CUT self clean feature. Sets and activates your favourite pre-settings. Model: RG66A2/BGEFU1. 1 2. FAN FAN. ON/OFF. Selects fan speeds in ON/OFF Selects fan speeds in Turns the unit on or off the following order: Turns the unit on or off the following order: AUTOg LOW g MEDg HIGH AUTOg LOW g MED g MODE HIGH. Scrolls through operation NOTE: Holding this button MODE. down for 2 seconds will Scrolls through operation NOTE: Holding this button modes as follows: activate Silence feature. modes as follows: down for 2 seconds will AUTO g COOL g DRY g AUTO g COOL g DRY g activate Silence feature. HEAT g FAN TEMP. Increases temperate in HEAT g FAN TEMP. SLEEP 1OF(1OC) increments. Max. Increases temperate in Saves energy during temperature is 86OF(30OC).
5 ECO 1OF(1OC) increments. sleeping hours. Starts and stops energy Max. temperature is TEMP efficient feature. If hold 86OF(30OC) . Decreases temperate in down this button for TIMER Mode ON/OFF Fan 1OF(1OC) increments. Min. more than 2 seconds, Mode ON/OFF Fan TEMP. Sets timer to turn unit on temperature is 62OF(17OC). the sleep feature is Decreases temperate in and off(see How to Use NOTE: Press and hold activated. 1OF(1OC) increments. Basic Functions for and buttons together for Min. temperature is instructions) 3 seconds will alternate the TIMER 62OF(17OC) . Timer Sleep temperature display between Sets timer to turn unit on Timer Swing the OC & OF scale. and off(see How to Use NOTE: Press and hold LED. , LED Follow Basic Functions for and buttons together for Turns indoor unit s LED me Swing Button Follow Direct 3 seconds will alternate the display on and off.)
6 Instructions) LED me Used to stop or start horizontal temperature display Short Self O O. Turbo cut clean louver movement or set the LED Short Self between the C & F. desired up/down air flow , Turbo cut clean scale. FOLLOW ME Turns indoor unit s LED. Temperature sensing and direction. The louver changes display on and off. 6 degree in angle for each SWING. room temperature display Starts and stops horizontal press. If keep pushing more button. than 2 seconds, the louver FOLLOW ME louver auto swing feature. will swing up and down Temperature sensing and TURBO automatically. DIRECT. room temperature display Enables unit to reach Swing Button button. Used to set the desired preset temperature in Used to stop or start vertical up/down air flow direction. shortest possible time louver movement and set the The louver changes 6.
7 TURBO. desired left/right air flow degree in angle for each Enables unit to reach press. direction. The vertical louver SHORT CUT changes 6 degree in angle preset temperature in Sets and activates your for each press. If keep shortest possible time SELF CLEAN. favourite pre-settings. pushing more than 2 seconds, Starts and stops the unit the vertical louver auto swing SHORT CUT self clean feature. feature is activated. Sets and activates your SELF CLEAN favourite pre-settings. Starts and stops the unit self clean feature. Model: RG66B6/BGEFU1. Model: RG66A1/BGEFU1. 3 4. HANDLING THE REMOTE CONTROLLER REMOTE LCD Screen Indicators TIPS FOR USING REMOTE CONTROL Information are displayed when the REMOTE CONTROLLER is powered up. NOT SURE WHAT A FUNCTION DOES? Refer to the How to Use Basic Functions The REMOTE control must be used within 8.
8 And How to Use Advanced Functions meters of the unit. sections of this manual for a detailed The unit will beep when REMOTE signal is ON/OFF display description of how to use your air CONDITIONER . received. Appears when the unit Curtains, other materials and direct is turned on, and disappears SPECIAL NOTE sunlight can interfere with the infrared when the it is turned off. signal receiver. Button designs on your unit may differ Remove batteries if the REMOTE control slightly from the example shown. will not be used more than 2 months. If the indoor unit does not have, a particular function, pressing that function s button on Transmission Indicator the REMOTE control will have no effect. Lights up when REMOTE Displays when ECO feature sends signal to indoor is activated(some units). INSERTING AND REPLACING BATTERIES unit Put two batteries(optional parts) in the REMOTE Battery display control before use: MODE display Low battery detection 1.
9 Remove the back cover from the REMOTE Displays the current Temperature/Timer display control, exposing the battery compartment. mode, including: 2. Insert the batteries, paying attention to Displays the set temperature match up the (+) and (-) ends of the batteries by default, or timer setting with the symbols inside the battery when using TIMER ON/OFF. compartment. functions TIMER ON display Temperature range: 3. Install the back cover on. ( ) 62-86oF(17-30oC). Displays when TIMER Timer setting range: INSTALLING REMOTE CONTROL HOLDER ON is set 0-24 hours TIMER OFF display This display is blank when The REMOTE CONTROLLER can be attached to a wall Remove the back cover ( ) operating in FAN mode. or stand by using a REMOTE CONTROLLER holder to install batteries (optional part, not supplied with the unit).
10 Displays when TIMER. OFF is set Fan speed display 1. Before installing the REMOTE CONTROLLER , check Displays selected fan speed: that the air CONDITIONER receives the signals properly. Low speed Silence feature 2. Install the holder with two screws. display Not available for Medium speed 3. Put the REMOTE CONTROLLER in the holder. this unit Follow me feature display Not available for High speed BATTERY NOTES this unit LOCK feature For optimum product performance: display Sleep mode display Auto fan speed Do not mix old and new batteries, or This fan speed can not be batteries of different types . adjusted in AUTO or DRY. Do not leave batteries in the REMOTE control , mode. if you don t plan on using the device for more than 2 months. Note: BATTERY DISPOSAL All indicators shown in the figure are for the purpose of clear presentation.