Transcription of AutoCAD Quick Reference Guide - Autodesk
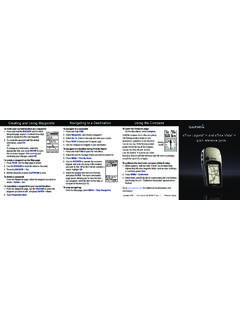
1 AutoCADP lant 3 DQuick Reference GuideAutoCAD Plant 3D is speci cation-driven software for creating 3D models of process plant components. You can route pipe, add equipment and other components, and include support AutoCAD Plant 3D, underlying data is directly exchanged between the 3D model, P&IDs, isometrics, and orthographics to ensure that information is consistent and is AutoCAD Plant 3D?Concepts & TermsAn *.dwg*.dcf*.pspx *.pspc*.pcatCustom PartCentral hub for all drawings, specs, and data; you always work within a projectTable containing all project or drawing data. You can manipulate this data directlyA component that is temporarily used in the model until the part is added to the specPiping ComponentThe project leA Plant 3D model or P&ID drawingData cache les.
2 , le (pair)Catalog leA component that is not in a piping specNavigationGet around your modelDynamic Tool PaletteView CubeChange displayWorkspace switchingProject ManagerNew drawingSpec ViewerView a spec andcreate a tool paletteRibbon tabs containcommands for major tasksHelpThe Drawing WindowUnderstand the User InterfaceUsing the Project ManagerYou can create new drawings, open existing drawings, link or copy les to the project folders, and create a projectTo create a project drawing:1. In the Project Manager, right-click Plant 3D Drawings and click New Drawing 2. In the New DWG dialog box, enter the drawing number, author, drawing title, and le name3.
3 Click OKQuick Tips - Right-click a node to see a list of useful commands- Create and organize folders to your project requirements- To work with referenced drawings, copy or link them hereUsing Tool PalettesYou can use Tool Palettes to place valves and ttings in your piping model: set the spec in the ribbon, click an item in a tool palette, and then click in the model to place itQuick Tip- In the Spec Viewer, click Insert in Model, Add to Tool Palette or Create Tool PaletteCreate OrthoGetting StartedA Quick TutorialStep 1: Open AutoCAD Plant 3D Step 2: Create a project drawing - Project Manager > Plant 3D Drawings > New Drawing - Enter info > OKStep 3: Create Structure - Ribbon > Structure tab: - Grid > Create - Settings > member info > Select - Member > place and align with grid - Repeat for stairs, ladders, 4: Create Equipment - Ribbon > Home tab > Create Equipment - Select component, specify shape and nozzle info - Create and place in modelStep 5: Route Piping - Ribbon > Home tab > drop-down lists: - Line Number - Spec - Ribbon > Route Pipe - Click points in model.
4 Press ENTER to nishStep 6: Insert a Valve or Fitting - Tool Palette or ribbon > Home tab > Spec Viewer - Select valve > Insert in Model - Place in modelStep 7: Create Isometric Drawings - Ribbon > Isos tab > Create Iso > Production Iso - Specify project line numbers, Iso type, and output settings - Create IsoStep 8: Create Orthographic Drawings - Ribbon > Home tab > Create Ortho View - Select ortho drawing > OK - Select a view, adjust the scale and view extents > OK - Place view on Ortho drawingWant More Information? AutoCAD Plant Exchange: Online Help: Consulting: 3 DQuick Reference GuideRouting PipeA general overviewThese panels contain the pipe-routing tools: Part Insertion, compass , Elevation & Routing, and Routing PipeSize and spec drop-down listsBefore routing pipe, you choose its size and spec.
5 The spec controls: - Connection types (FL, BW, SW, THD, and so on) - Flange ratings, facings (150# RF, 300#, PN10, and so on) - Default branch types (tees, stub ins, SOL, WOL, and so on) - Valve types allowed (Gate, Globe, Check, and so on)On the ribbon, click Route Pipe to start routing in the Specs and Sizes Before Routing - Pipelines are organized by line number - Line numbers are required when generating ISOs - You can set up a separate layer for each line number, and piping components are automatically placed on these layersLine NumbersIf you use the Continuation grip, the compass starts by displaying the elbows available in the current UCS plane.
6 It uses the elbows from the current pipe spec. If you have45-degree elbows in your spec, the compass displays them. Otherwise, the compass displays tick marks at 90 degrees. If you want to route straight ahead, you can pick a point or enter a the CompassRouting PipeA general overview continuedWhen you are nishing a pipe route, it s often di cult to directly line up the nal connection. A routing assistant is available. You can connect to an existing component, and then right-click and choose from multiple possible Tips: - To change the plane, press P for Plane, and toggle through the three orthogonal planes. (You can also press CTRL + right-click.)
7 - At any time, you can switch viewports to change a view direction - To undo while routing, press URouting Assistant 1. At a plantpipeadd prompt, enter i (Insert). 2. In the Part Placement dialog box, click a category icon. 3. In the Class Types list, click a component description (for example: Ball Valve). 4. In Available Piping Components, click component (for example: Ball Valve, Long Pattern, 300LB, RF). 5. Click Place. 6. If you want to specify a di erent connection port, enter n (orieNtation). 7. If you want to specify the center of the valve, enter i (Insertionpoint). 8. Specify a point to place the valve.
8 9. Click to specify a component rotation or press ENTER for zero. To place piping components while routingContinuation Starts or continues routing pipe Flip Flips a component in opposite directionSubstitution Displays a list of components that can be substituted for the originalElevation Moves pipe up/down to set elevationMove/Stretch Moves a component; stretches an existing pipeRotate Displays the compass so you can rotate the componentAdd Nozzle Adds a nozzle on a piece of equipmentEdit Nozzle Edits a nozzle on a piece of equipmentQuick Tips - Pipe & Component Grips - To remove a selected anged valve without removing connecting anges, press CTRL+Del - To change the routing plane, press and hold CTRL and right-click in the drawing area - To substitute a bolt set, hold CTRL and select the red circle of a anged connector - To orbit the 3D model.
9 Press and hold SHIFT+ mouse wheel - To change the compass plane while routing, press CTRL+ right clickQuick Tips - Routing Shortcut Keys - To reconnect piping, use Connect Component to Adjacent from the pipe s shortcut menu - When assigning a line number to piping, rst use Append to Selection > Connected Parts > All Connected Parts from the pipe s shortcut menuQuick Tips - Routing Right-Click Menus - Use object snap when connecting pipe - Use Node object snap to connect to open nozzle or piping ports - Use the From object snap to place a valve a precise distance from a ttingQuick Tips - Using Snaps While RoutingEdit Data in the Data ManagerMake changes to your model dataYou can enter, view, edit, and report on information for components and lines in a drawing.
10 The Data Manager is ideal for viewing and editing multiple rows of data at one time. You can also export items to Microsoft Excel and modify data there. Modeling EquipmentA general overviewWith equipment, you have 3 choices: - Use pre-de ned equipment types, such as pumps - Build equipment using provided shapes - Build custom equipment from AutoCAD solids or surfacesUsing the Create Equipment dialog, you can set up your equipment by class (for example: Pump > Centrifugal Pump).Once equipment has been placed, your can add or change nozzles by clicking any Add Nozzle grip.


