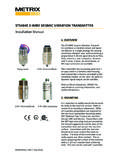
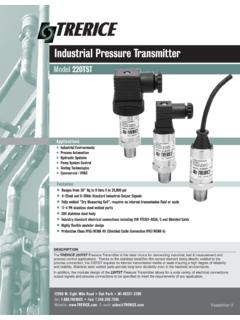
Transcription of Combination pH/ORP Two-Wire Transmitters - …
1 Model 1181 pH/ORPC ombination pH/ORP Two-Wire TransmittersInstruction ManualPN 51-1181 2003 DANGERHAZARDOUS AREA INSTALLATIONINTRINSICALLY SAFE INSTALLATIONT ransmitter/Sensor is notIntrinsically in hazardous area locations must becarefully evaluated by qualified on site safety per-sonnel. To secure and maintain an intrinsically safeinstallation, an appropriate safety barrier must beused and the installation must be performed inaccordance with the governing approval agency(FM, CSA or BASEEFA/ CENELEC) installationdrawing requirements (see Section ).
2 EXPLOSION-PROOF INSTALLATIONS ensors are not explosion-proof and must beinstalled in a non-hazardous location. If the sensormust be installed in a hazardous location an intrin-sically safe system must be implemented. To main-tain the explosion-proof rating of the transmitter ,the following conditions must be met: Discontinue power supply before removingenclosure covers. transmitter covers must be properly installedduring power on operation. Explosion proof "Y" fittings must be properlyinstalled with sealing compound prior to applyingpower to the transmitter .
3 Serial tag cover over the external Zero and Spanadjustments must be in place. See Installation Section for installation, operation and servicing of thisinstrument in a Hazardous Area Installation isentirely the responsibility of the INSTRUCTIONSREAD THIS PAGE BEFORE PROCEEDING!Rosemount Analytical designs, manufactures, and tests its products tomeet many national and international standards. Because these instru-ments are sophisticated technical products, you must properly install,use, and maintain them to ensure they continue to operate within theirnormal specifications.
4 The following instructions must be adhered toand integrated into your safety program when installing, using, andmaintaining Rosemount Analytical products. Failure to follow the prop-er instructions may cause any one of the following situations to occur:Loss of life; personal injury; property damage; damage to this instru-ment; and warranty invalidation. Read all instructions prior to installing, operating, and servicing theproduct. If this Instruction Manual is not the correct manual, tele-phone 1-800-654-7768 and the requested manual will be this Instruction Manual for future reference.
5 If you do not understand any of the instructions, contact yourRosemount representative for clarification. Follow all warnings, cautions, and instructions marked on and sup-plied with the product. Inform and educate your personnel in the proper installation, opera-tion, and maintenance of the product. Install your equipment as specified in the Installation Instructions ofthe appropriate Instruction Manual and per applicable local andnational codes. Connect all products to the proper electrical andpressure sources. To ensure proper performance, use qualified personnel to install,operate, update, program, and maintain the product.
6 When replacement parts are required, ensure that qualified peopleuse replacement parts specified by Rosemount. Unauthorized partsand procedures can affect the product s performance and place thesafe operation of your process at risk. Look alike substitutions mayresult in fire, electrical hazards, or improper operation. Ensure that all equipment doors are closed and protective coversare in place, except when maintenance is being performed by qual-ified persons, to prevent electrical shock and personal Process ManagementRosemount Analytical Barranca ParkwayIrvine, CA 92606 USATel: (949) 757-8500 Fax: (949) 474-7250 Rosemount Analytical Inc.
7 2003 About This DocumentThis manual contains instructions for installation and operation of the Model 1181 pH/ORP Two-wiretransmitter. The following list provides notes concerning all revisions of this LevelDateNotesA7/01 This is the initial release of the product manual. The manual has been reformatted to reflect the Emerson documentation style and updated to reflect any changes in the product offering and agency CE 1181 pH/ORPQUICK START-UPQUICK non-hazardous areas or bench testing, set-upthe transmitter & sensor as illustrated in Figure A. 2. For hazardous or intrinsically safe installations,set-up the transmitter & sensor as illustrated in theappropriate agency drawing (Figure 2-5 through 2-12).
8 The 1181pH Two-Wire transmitter is factory configuredto work, right out of the box, for many Settings: 0-14pH measurement range: 0pH (low range) cor-responds to 4mA output; 14pH (high range) corre-sponds to 20mA output. Automatic temperature compensation is utilized. (Optional LCD is set for 0-100% read out) If thesesettings are acceptable to your process you canutilize this quick start up ADWG. BTB2iiMODEL 1181 pH/ORPQUICK Step 2 through 7 until no further adjust-ments are required. Rinse the sensor in cleanwater prior to placing it in a different buffer DVM and connect power supply enddirectly to the Standardize to the ProcessA slight adjustment of the 1181 ZERO pot may be nec-essary to fine tune the loop to your sensor into it s final mounting position, andallow sensor to acclimate to the process temp.
9 (Wait for reading to stabilize). a grab sample of the process, close to thesensor, and have it analyzed. Note the pH the 1181 ZERO control (under serial label)until the display reads the percentages of full-scalethat corresponds to the grab sample pH Sample pH14 pHX 100 = % of full pHX 100 = % and calibration is now complete. Refer to1181pH manual for further details on 1181 Solution two buffer solutions. One should representa low range, and the other a high range buffer solution values 4pH, 7 pH & 10 the sensor in the lower range buffer solu-tion, allow the reading to adjust ZERO control (under the serial label)until the DVM reads the current output valuethat corresponds to the buffer value-Low pH rangemA =_____x 16 mA + 4mAHigh pH range-Low pH rangeExample: For 4 pH buffer solution; Range of 0-14 pH4 pH-0 16 mA + 4 mA= mA14 pH-0 pHb.
10 If a liquid crystal display is installed, adjust theLCD ZERO pot (on LCD face) until the displayindicates the proper percentage of full pH value% Reading =_____x 16 mA + 4 mAHigh pH range4 100 = the sensor from the low range buffer, andrinse it in clean the sensor in high range buffer, and allowthe reading to adjust the SPAN control (under serial label) untilDVM reads the current output value that corre-sponds to the computed buffer pH-0 16 mA + 4 mA= mA14 pH-0 pHb. If a LCD is installed, adjust the LCD SPAN pot(on LCD face), until the display indicates theproper percentage of the computed 100 = pHMODEL 1181 pH/ORPTABLE OF CONTENTSMODEL 1181pH/ORPTWO- wire TRANSMITTERSTABLE OF AND SPECIFICATIONS.