Transcription of CorelDRAW Graphics Suite 2021 Quick Start Guide
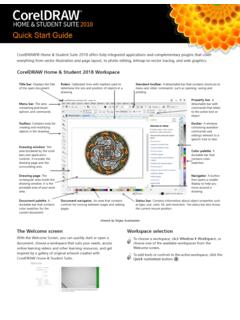
1 Quick Start GUIDEW indowsQuick Start Guide [ 1 ] CorelDRAW Graphics Suite 2021 CorelDRAW Graphics Suite 2021 offers fully-integrated applications CorelDRAW 2021, Corel PHOTO-PAINT 2021, and Corel Font Manager 2021 and complementary plugins that cover everything from vector illustration and page layout, to photo editing, bitmap-to-vector tracing, web Graphics , and font management. CorelDRAW 2021 WorkspaceTitle bar: Displays the title of the open : Calibrated lines with markers used to determine the size and position of objects in a toolbar: A detachable bar that contains shortcuts to menu and other commands, such as opening, saving and bar: The area containing pull-down options and bar: A detachable bar with commands that relate to the active tool or : Contains tools for creating and modifying objects in the : A window containing available commands and settings relevant to a specific tool or window.
2 The area bordered by the scroll bars and application controls. It includes the drawing page and the surrounding area, which is also known as palette: A dockable bar that contains color page: The rectangular area inside the drawing window. It is the printable area of your navigator: An area that lets you show, add, rename, delete, and duplicate palette: A dockable bar that contains color swatches for the current : A button that opens a smaller display to help you move around a bar: Contains information about object properties such as type, size, color, fill, and resolution.
3 The status bar also shows the current cursor Start Guide [ 2 ]With the Welcome Screen, you can quickly Start or open a document, choose a workspace that suits your needs, access online learning videos and other learning resources, and get inspired by a gallery of original artwork created with CorelDRAW Graphics Suite . Plus, discovery files can help you get started quickly with both CorelDRAW and Corel PHOTO-PAINT. Workspace selectionThe collection of specialized workspaces are designed to help you increase your productivity by making more accessible the tools that you use most often in specific workflows or tasks.
4 Available workspaces include Default, Touch, Lite, Illustration, Page Layout, and Adobe choose a workspace, click Window Workspace, or choose one of the available workspaces from the Welcome add tools or controls to the active workspace, click the Quick customize button . Quick Start Guide [ 3 ] CorelDRAW 2021 toolboxMany of the tools in the CorelDRAW toolbox are organized in flyouts. To access such tools, click the small arrow in the lower-right corner of a button. The illustration below shows the toolbox and flyouts available in the default workspace, and can help you find tools easily.
5 If you still don t see the tool you are looking for, click the Quick customize button at the bottom of the toolbox. With the help of the Quick customize button, you can also hide tools you don t use Start Guide [ 4 ]TemplatesWith the New from Template dialog box (File New from Template), you can browse and search modern, fresh templates to Start design projects such as logos, brochures, stationary, and drawing tools from the Curve flyout let you draw curved and straight lines, and lines containing both curved and straight segments. The line segments are connected by nodes, which are depicted as small Freehand and Polyline tools let you draw freehand lines as if you were sketching on a B zier and Pen tools let you draw lines one segment at a time by placing each node with precision and controlling the shape of each curved segment.
6 The B-spline tool lets you create smooth curves with fewer nodes than curves drawn by using freehand paths. The LiveSketch tool offers the simplicity and speed of freehand sketching combined with intelligent stroke adjustment and vector drawing. As you sketch, CorelDRAW analyses your strokes, adjusts them, and converts them into B zier curves. ShapesCorelDRAW offers a wide variety of tools for drawing dragging diagonally with the Rectangle tool , you can draw a rectangle or a square (when holding down Ctrl). The 3-point rectangle tool lets you quickly draw rectangles at an Start Guide [ 5 ]EllipsesYou can draw an ellipse by dragging diagonally with the Ellipse tool.
7 Hold down Ctrl to constrain the shape to a circle. The 3-point ellipse tool lets you quickly draw an ellipse at an draw an arc or a pie shape, you can click the Arc or Pie button on the property bar and then shapesYou can use the tools on the Object flyout to draw polygons, grids, spirals, and two types of stars: perfect and complex . Use the property bar to change the number of polygon sides, star points , grid columns, or spiral shapesWith the Common Shapes tool on the Object flyout, you can also draw basic shapes, arrows, flowchart shapes, banners, and callout shapes.
8 Select a preset shape on the property bar, and drag the diamond-shaped handle (glyph) to modify the appearance of some drawingCorelDRAW lets you create symmetrical objects and designs in real time. You can include both vector and bitmap objects in your symmetrical create a symmetrical design, select or draw a curve or a shape, click Object Symmetry Create New Symmetry. Add more objects, and edit the objects as needed. To add more symmetry lines, type a number in the Mirror lines box on the floating toolbar. Click Object Symmetry Finish Editing Start Guide [ 6 ]Parallel drawingCorelDRAW allows you to simultaneously draw multiple parallel curves while controlling the distance between them.
9 You can also add parallel lines to an existing line. To draw parallel lines, click a curve tool, and click the Parallel Drawing button on the property bar. On the Parallel Drawing toolbar, click the Parallel lines button , and draw in the drawing drawingUsing perspective drawing, you can draw complex sketches, patterns, and designs, creating the illusion of distance and depth. When you draw in perspective, CorelDRAW automatically creates a perspective field and lets you add lines and shapes that align with the perspective lines. The result is a perspective group comprising of the perspective field and the objects you added.
10 To draw in perspective, make sure no objects are selected by clicking an empty space in the drawing window with the Pick tool. Click Object Perspective Draw in Perspective, and choose a perspective type from the Type list box on the floating toolbar. Drag in the drawing window to set the perspective field. To choose the plane you want to draw on, click one of the following buttons: Orthographic , Top , Left (Side for one-point perspective) , or Right . Click a line or a shape tool, and draw one or more objects. Click Finish on the floating add an existing object to the perspective group, right-click the object, click Move to Plane, and choose a are two types of text you can add to drawings: paragraph text (1) and artistic text (2).