Transcription of CURRENT TRANSFORMER WIRING DIAGRAM & …
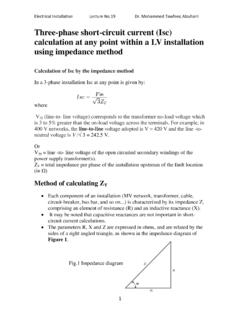
1 CURRENT TRANSFORMER WIRING DIAGRAM & INSTRUCTIONS NOTE: WE SUPPLY THESE METERS ON THE ASSUMPTION THAT THEY WILL BE INSTALLED BY A QUALIFIED ELECTRICIAN FAMILIAR WITH THE INSTALLATION OF METERING EQUIPMENT ENSURE ALL CURRENT transformers ARE INSTALLED AS PER WIRINGDIAGRAM (WHICH CAN ALSO BE FOUND UNDER THE TERMINAL COVER OF THE METER),THECORRECT POLARITY OF CURRENT transformers IS ESSENTIAL ie(P1 FACING MAINS) and(P2 FACING LOAD) Check ALL S1 and S2 connections are correct as per WIRING DIAGRAM otherwise problems will result with the REGISTER DISPLAYS For HEALTH & SAFETY reasons it should be noted that if a CURRENT TRANSFORMER is operated with the secondary (S1 and S2) open circuited, DANGEROUS VOLTAGES may be generated at the secondary terminals or leads. (NOTE: Different types of CT markings: P1 = K, P2 = L, S1 = k, S2 = l) Continued .. INSTALLATION NOTES To ensure that the meter reads correctly install as 1 Wire the meter according to above WIRING instructions (which can also be found inside the terminal cover).
2 Note the voltage inputs to the meter must be externally fused via a slyde lock fuse and terminal 11 is the neutral, tying down the three voltages 2 The CT cables should be kept as short as possible, use cable to maintain accuracy 3 CTs match the ratio of the meter being fitted (eg 200/5 amp meter = 200 amp CTs) 4 CTs must be fitted onto the cable the correct way round so that K (or P1) side is towards the MAINS and L (or P2) is facing the LOAD 5 The cables from the CTs must be connected the correct way round observing k (or S1) and l (or S2) markings on the meter and the CT 6 Always connect k (or S1) to the first terminal of the phase and l (or S2) to the third terminal. The smaller middle terminal is for a voltage connection from that phase 7 Check the RST indicator, this should be on if it is off one or more phase voltages is missing if it flashed the phases are in the wrong order, two will have to be swapped over (the CT wires will also have to be moved to keep them with the right voltage) 8 Check the meter is operating in the correct direction the arrow symbol (or disk if disk driven) should show left to right.
3 Open all the voltage fuses then try one phase on at a time and check each phase makes the meter go in the correct direction 9 Check the red light, this should flash if power is being measured



![A arXiv:2108.00154v1 [cs.CV] 31 Jul 2021](/cache/preview/5/1/4/3/3/e/9/d/thumb-51433e9dee8472b1576151350bb9b5bc.jpg)