Transcription of DRI-STEEM
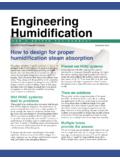
1 READ AND SAVE THESE INSTRUCTIONSDRI-STEEMSTEAM INJECTION HUMIDIFIERSI nstallation InstructionsandMaintenance OperationsManual 14/21/2010 10:58:36 AM2TO THE PURCHASER AND THE INSTALLERT hank you for purchasing our steam injection equipment. We have designed and built this equipment to give you totalsatisfaction and many years of trouble-free service. Observing the installation and operating practices described in thismanual will assure you of achieving that objective. We urge you to become familiar with the contents of this Humidifier CompanySingle-Tube HumidifierField 3 Installation ..3 Configurations .. 5 Multiple-Tube HumidifierField 6 Installation .. 7 MAXI-BANK HumidifierAssembly and Installation ..8 MINI-BANK HumidifiersInstallation .. 9 AREA-TYPE 10 Temperature SwitchesPneumatic Temperature 11 Electrical Temperature Switch.
2 11 Application NotesHumidifier 12 Elevating the Condensate from aSteam 13 Eliminating Excess Heat from 14 Trouble-Shooting 15 Replacement PartsSingle-and 18 MINI-BANK and 19 Maintenance Service 20 Two-Year Limited 22 TABLE OF 24/21/2010 10:58:55 AM3 SINGLE-TUBE HUMIDIFIERH ooks ofsilencer cageTwo-piece escutcheon plateO-ringsDispersion tubeValveseparatorassemblyTubeadapterHal f couplingSupportbracketTEFLON seal ringPipe unionFigure 3-1: Single-Tube HumidifierOM-7 Figure 3-2: Tube adaptor single dispersion tubeDispersion tubeSilencer(tubes 4 feet and shorter only)OM-14 Tube adaptorO-ringsAutomatic valveSilencer cageinto duct with sheet metal screws. Where an airtightseal is required, use a suitable caulk around duct Install steam strainer and steam trap. Connect tosteam and condensate return mains.
3 See page 5 forpiping Install control tubing (pneumatic) or wiring (electric)to valve actuator. Note: An airflow-proving deviceshould be installed to prevent valve from openingunless air is moving in High-limit (duct mounted) humidistat installed downstream and set at 80-90% is recommended when ductair is below 70 F to prevent condensation in duct.(This device should be mounted far enough downstream to assure injected steam has been completelyabsorbed.)6. A temperature switch (to prevent possible cold-startdripping) is recommended when steam pressure tothe humidifier is cycled. See page 11 for : Silencers are furnished only with model 5-60 and6-70 humidifiers having tubes equal to and shorter than 4feet (all others do not have silencers unless speciallyordered).ActuatorStrainerSteam discharge insertsSteam trapField AssemblySmall units are shipped assembled; the following appliesto larger units that are disassembled for Unpack shipment and verify receipt of allcomponents with packing list.
4 Report any shortagesat Match up dispersion tube with its proper valve-separator assembly (tubes and separators arematch-tagged). Tubelets should point toward theairstream for better steam-air mixing, except if tubeshave fiberglass insulated-jacket option (steam couldcondense on cool jacket) in which case they shoulddischarge with the Unscrew pipe union, remove elbow and nippleportion, and install in half nipple of tube. Note:Before completing step 3, determine which way(right or left) steam holes should point and install inappropriate half Install tube adapter in valve, use pipe dope andtighten leak-tight O-rings are installed inside of tube : Lubricate O-rings before Insert tube adaptor into dispersion tube. As this isbeing done, squeeze hooks of silencer cage together(see note below), and slide them into the tubeadapter, allowing them to snap over rear edge ofadapter.
5 Complete inserting adaptor into tube, beingcareful not to damage Bring union halves together, tighten union ring, andsnug up TEFLON seal ring (not too tight). The unitis ready to be installed in questions about locating your humidifier in an airhandling system, see Humidifier Placement on page Insert a support bolt in one of the three holes(upper, lower or end) of support bracket, cut holes induct for inserting dispersion tube, and support Secure unit in duct with nut and support bolt. Mounttwo-piece escutcheon plate around tube and 34/21/2010 10:58:55 AM4 Used in vertical ducts. Tubelets must always point upregardless of air flow direction (up or down). (Insulateddischarge tube cannot be used when air flow isdownward.)Used where space is at a minimum (above ceilings etc.).Turning the separator on its side saves about 4 inches ofheight.
6 (This application requires a special horizontaltype separator.)*Note: Steam should discharge against the airflow. Insulated tubesshould discharge with the airflow to prevent condensation on themetal jacket covering the insulation. A minimum duct velocity of 300 FPM with insulated dispersion tubes is 4-1: Right-hand configurationHorizontal tube and horizontal steam discharge. Thisarrangement comprises the majority of uses. Unlessordered otherwise, this is how units are shipped. Unitshown above is right-handed. To change from right toleft, see the bottom of this when there is no access to side of duct. Steamabsorption will be improved if duct is tall and narrow ratherthan shallow and HUMIDIFIERS team inletAirflow*OM-380 Opposite connectionElbow and union assembly Union ringOM-8OM-381 Figure 4-2: Vertical tubeSteaminletAirflow*DrainOM-382 Steam inletDrainAirflow*Figure 4-3: Vertical dischargeFigure 4-4: HorizontalseparatorDrainOM-383 Steam inletAirflow*Changing from right-hand to left-hand configurationIt may be necessary to change the steam dischargedirection at the job site.
7 To do so, follow thesedirections:1. Unthread union Remove elbow and nipple assembly fromdispersion tube and reinstall on opposite Rotate dispersion tube 180 in respect to Reconnect union halves and tighten union Humidifier now will discharge to opposite 44/21/2010 10:58:56 AM5 SINGLE-TUBE HUMIDIFIERF igure 5-1: Single-Tube HumidifierPiping1. Humidifier steam supply should be taken off the topof the steam main (not the side or bottom) toensure driest steam. Main should be dripped andtrapped (in accordance with ASHRAE recommendations).2. Humidifier steam trap must drain by gravity to thereturn main having little or no back pressure. Ifcondensate cannot drain by gravity (must beelevated to return main), see Elevating theCondensate from a Steam Humidifier on page : All dotted-line piping to be supplied by valveand actuatorDispersion tubeSteam trapSeparatorOM-9 Condensate returnCondensate returnTrapSteam 54/21/2010 10:58:56 AM6 MULTIPLE-TUBE HUMIDIFIERF ield Assembly1.
8 Unpack shipment and verify receipt of allcomponents with packing list. Report any shortagesat Plan the tube bank. You will need to know therequired spacing distance between tubes. If thisinformation has not been provided, see note "For X"in figure 7-1 on page 7. Arrange tubes so steam willdischarge against the airflow, unless tubes areinsulated (optional), in which case they should blowwith the air to prevent condensation on metal jacketcovering insulation. Refer to "configurations" onpage Assemble the header based on the spacingsdetermined in step 2. If the header pipe size has notbeen specified, see table 7-1 on page 7. This tableis based on a maximum steam velocity of 7,000 to10,000 feet per minute, which will result in lowernoise levels and produce uniform steam flow from alltubes. If noise level is not important or a uniformflow is not critical, a smaller header size may Install the tube adaptor fittings in the header tees.
9 (See figure 6-1.) It usually works best to lay theheader on the floor along with the tubes for steps5, 6 and Install male pipe thread end of tube adaptor into pipefitting. Dope threads and tighten leak tight O-rings are installed inside of tube adaptor. Note:Use synthetic oil to lubricate O-rings before Slide tube into adaptor being careful not to damagethe Install the tubes in the adaptor fittings, making surethe tubelets are pointing in the proper Cut to length, thread, and install the steam Make the tube support strut using angle or channeliron, and bolt each tube end in questions about locating your humidifier in an airhandling system, see Humidifier Placement on page Insert a support bolt in one of the three holes(upper, lower or end) of support brackets, cut holesin duct for inserting dispersion tube, and Secure unit in duct with nuts and support two-piece escutcheon plate around tube andsecure into duct with sheet metal screws.
10 Wherean airtight seal is required, use a suitable caulkaround duct wall Install steam strainer and steam trap. Connect tosteam and condensate return mains. See page 7for piping Install control tubing (pneumatic) or wiring (electric)to valve actuator. Note: An airflow-proving deviceshould be installed to prevent valve from openingunless air is moving in High-limit (duct mounted) humidistat installeddownstream and set at 80-90% is recommendedwhen duct air is below 70 F to prevent condensationin duct. (This device should be mounted far enoughdownstream to assure injected steam has beencompletely absorbed.)6. A temperature switch (to prevent possible cold-startdripping) is recommended when steam pressure tothe humidifier is cycled. See page 11 for : Silencers are furnished only with model 5-60 and6-70 humidifiers having tubes equal to and shorter than4 feet (all others do not have silencers unless speciallyordered).