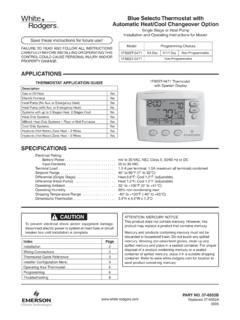
Transcription of FAILURE TO READ AND FOLLOW ALL …
1 CAUTION!To prevent electrical shock and/or equipment damage, disconnect electric power to system at main fuse or circuit breaker box until installation is thermostat is intended for use with a low voltage system; do not use this thermostat with a line voltage system. If in doubt about whether your wiring is millivolt, line, or low voltage, have it inspected by a qualified heating and air conditioning contrac-tor or not exceed the specification wiring must conform to local and national electrical codes and control is a precision instrument, and should be handled carefully.
2 Rough handling or distorting components could cause the control to TO READ AND FOLLOW ALL INSTRUCTIONS CAREFULLY BEFORE INSTALLING OR OPERATING THIS CONTROL COULD CAUSE PERSONAL INJURY AND/OR PROPERTY DAMAGE. DESCRIPTIONYour new White-Rodgers Digital Thermostat uses the technology of a solid-state microcomputer to provide precise temperature : Simultaneous heat and cool setpoint storage Setpoint storage in case of power loss Pre-set temperature control LCD continuously displays setpoint and room temperature Continuous Backlit display option F/ C convertibility Temperature range 45 to 90 F R, C, Y, W2, G, O/B, E, and L terminals for single or two-transformer systems Optional "AA" batteries to provide continuous temperature display during loss of AC power SPECIFICATIONSELECTRICAL DATAE lectrical Rating: 20 to 30 VAC 50/60 Hz.
3 Or to Amps (Load per terminal) Amps Maximum Total Load (All terminals combined)THERMAL DATAS etpoint Temperature Range: 45 F to 90 F (7 C to 32 C) Operating Ambient Temperature Range: 32 F to 105 F Operating Humidity Range: 0 to 90% RH (non-condensing) Shipping Temperature Range: -4 F to 149 FAPPLICATIONSFor use with: Standard heat pump systems with electric, gas or oil Aux heat with 24 VAC HOT and COMMON available Single-stage heat pump systems with no Aux heat with 24 VAC HOT and COMMON availableDO NOT USE WITH: Millivolt systems Systems exceeding 30 VAC and amps 3-wire zoned hydronic heating systems1F89-211 Non-programmable Electronic Digital Heat Pump ThermostatINSTALLATION ANDOPERATION INSTRUCTIONS PRECAUTIONSWARNING!
4 Do not use on circuits exceeding specified voltage. Higher voltage will damage control and could cause shock or fire not short out terminals on gas valve or primary control to test. Short or incorrect wiring will damage thermostat and could cause personal injury and/or property installation and all components of the system shall conform to Class II (current limited) circuits per the NEC code. FAILURE to do so could cause a fire : Save these instructions for future use! NO. 37- 6233 HReplaces 37-6233G1632 WARNING!
5 For California Residents: This product contains a chemical known to the state of California to cause cancer and birth defects and other reproductive REMOVE OLD THERMOSTAT1. Shut off electricity at the main fuse box until installation is complete. Ensure that electrical power is Remove the front cover of the old thermostat. With wires still attached, remove wall plate from the wall. If the old thermostat has a wall mounting plate, remove the thermostat and the wall mounting plate as an Identify each wire attached to the old thermostat using the labels enclosed with the new Disconnect the wires from old thermostat one at a time.
6 DO NOT LET WIRES FALL BACK INTO THE Install new thermostat using the following !This product does not contain mercury. However, this product may replace a unit which contains not open mercury cells. If a cell becomes damaged, do not touch any spilled mercury. Wearing nonabsorbent gloves, take up the spilled mercury and place into a container which can be sealed. If a cell becomes damaged, the unit should be must not be discarded in household trash. When the unit this product is replacing is to be discarded, place in a suitable container.
7 Refer to for location to send product containing mercury. ATTACH THERMOSTAT BASE TO WALL1. Remove the packing material from the thermostat. Gently pull the cover straight off the base. Forcing or prying on the thermostat will cause damage to the Connect wires beneath terminal screws on base using ap-propriate wiring schematic (see figs. 2 through 4).3. Place base over hole in wall and mark mounting hole loca-tions on wall using base as a Move base out of the way. Drill mounting Fasten base loosely to wall, as shown in fig.
8 1, using two mounting screws. Place a level against bottom of base, adjust until level, and then tighten screws. (Leveling is for appearance only and will not affect thermostat operation.) If you are using existing mounting holes, or if holes drilled are too large and do not allow you to tighten base snugly, use plastic screw anchors to secure Push excess wire into wall and plug hole with a fire-resistant material (such as fiberglass insulation) to prevent drafts from affecting thermostat JUMPER (Fan Option)Read the following information before clipping the nonelectric heat jumper.
9 If you are unsure of your application, contact a qualified service your emergency or auxiliary system will energize the blower, then jumper, W904, on the thermostat base must be cut (see fig. 1). If your emergency or auxiliary heat system requires that the thermostat energize the fan circuit, do not cut jumper BATTERIESWith two "AA" batteries installed, your thermostat will continu-ously display the temperature during a loss of AC TERMINAL SWITCH SELECTIONThe O/B switch on this thermostat is factory set to the O position.
10 This will accommodate the majority of heat pump ap-plications, which require the changeover relay to be energized in COOL. If the thermostat you are replacing or the heat pump being installed with this thermostat requires a B terminal, to energize the changeover relay in HEAT, the O/B switch must be moved to the B position. Figure 1. Thermostat BaseMountingholeMountingholeElectric/Gas jumper(W904)O/BswitchScrew anchorsW9043 WIRINGLRE24 VAC120 VACHotSYSTEMMONITORSWITCHN eutralTHERMOSTATSYSTEMGW2 Figure 2. Typical wiring diagram for single transformer systemsTRANSFORMER(Class II current limiting)ChangeoverRelay*CYO/BCompressor Contactor* Changeover Relay is energized in COOL when O/B switch is in the O positionChangeover Relay is energized in HEAT when O/B switch is in the B positionAuxRelay(Stage 2)FanRelayEmergencyRelaySee Note ** Jumper required to use a single Aux Heat for both Second Stage Heat and EmergencyLRE24 VAC120 VACHotSYSTEMMONITORSWITCHN eutralTHERMOSTATSYSTEMGW2 Figure 3.