Transcription of Frequently Asked Questions - BB&T
1 Low Volume RDC Frequently Asked Questions I. Hardware How do I turn on the scanner? The scanners do not have on/off switches. They automatically activate at the point of scanning checks. What Windows updates do I need to have installed? The PC should be up to date with installed Microsoft Windows updates. I have connected a scanner to the PC, but it isn't working? Make sure the scanner is plugged in, as well as attached to the PC in a USB2 port. It may be necessary to reboot your computer for the system to recognize the scanner. No Scanner (The scanner was not found while attempting to initialize the scanner)? The status LED must be Red' for the application to acquire the unit. Check the USB cable connections or try a different cable. Try a different USB port. Verify that the PC has the proper drivers and the scanner firmware file is installed.
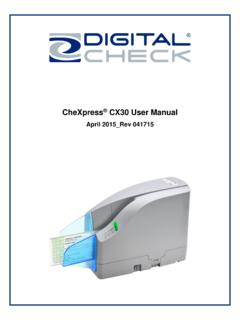
2 Look in Device Manager for TS DeviceCX30. What are the features of the Digital Check CX30 scanner? Refer to User Guide for information about the scanner. What are the technical requirements for WebCapture for my computer? Refer to the User Guide. How many items per minute should my CX30 scan? The CX30 is a manual feed scanner and its performance depends on the operator. The CX30 has a rated speed of approximately 30 documents per minute (DPM) in scan and return mode. Actual throughput will vary depending on the PC configuration, physical size of the items scanned, mode of operation, Pass Thru, Scan & Return, or Scan- Park & Return and ultimately the operator's proficiency. For a typical operator, the expected speed range is 10- 20 DPM. What is the proper sequence of the LED lights when the scanner is powered on?
3 The proper LED sequence is for the LED to come on red' when it is attached to power and to the PC. This is followed by the LED turning green' once the application has been launched. If the LED does not come on red', check the USB cable connection and the power. If the LED is red', but will not turn green', contact customer support for assistance with checking firmware and reloading the drivers. How do I load items into the scanner? Remove all rubber bands, staples, paper clips, pins, etc. Hold the item with the front of the item facing out and away from the scanner. Select the "Scan" option then insert the item into the entry tray and slide forward until it is pulled into the scanner. ** You may need to nudge the check if it is placed in the scanner prior to selecting the Scan option to get get it to scan.
4 **. The status LED should momentarily turn Orange' and the motor should start and take the item into the path. Depending upon the scan mode selected by the open or closed position of the exit door, the document will either scan through the unit and stop in the exit door or scan and return back to the entry tray for easy removal. Why am I getting skewed or short images? If you notice that the images are skewing or coming up short, pay attention to inserting the documents flat into the entry tray and sliding them into the path. Documents inserted with a tilt or skew can be pulled into the scanner tilted and can cause image quality issues. Mis-Feed (The document failed to enter the path on time). Remove the document and re-insert it. Check for bent or excessively curled leading edges and straighten as needed.
5 If they continue to get errors, this might indicate that; the entry drive rollers may be dirty or something may be lodged in the path. Document stopped in the path or did not exit on time. Remove the top center cover and open the access doors to remove the document. Check the leading edges and corners of the document and straighten as needed. How often should the CX30 check scanner be cleaned? The recommended cleaning cycle is only as needed. A typical cycle may be once every six to twelve months. Please reference the cleaning instructions section for specific instructions on how to properly clean the CX30. What is a safe distance to keep the power supply from the CX30 check scanner to prevent electromagnetic interference with the MICR read head in the scanner? Keep power supplies and other electromagnetic devices 10-12 inches away from the scanner to keep them from interfering with the magnetic read head.
6 Clearing Jams In case the document does not exit the document track, you can follow these steps: Remove the top-center cover to access the track. Clear the path of any jammed document and make sure that the rollers are free of paper and debris. The front camera and internal path have access doors for easy removal. Replace the top-center cover. Scanner Maintenance (Helpful Hints). Do not use stickers to cover up previously sprayed numbers on documents. The backing from the stickers can rub off onto the rollers and cause documents to jam. Do not use White Out on scanned documents; the White Out can rub off the documents onto the scanner path and walls. Watch for loose debris getting into the scanner such as staples and rubber bands. There are no user available adjustments within the CX30.
7 Periodic and scheduled cleaning should be performed before determining if any further problem determination is needed. CheXpress CX30 Operator Maintenance Over time, ink, dirt and dust particles will collect on the scanner rollers and document track. Therefore, it is necessary to clean these areas on a regular basis to assure reliable performance. Tips for performing preventative maintenance by the user on the CheXpress CX30 include: A periodic inspection of the document track area can be done. You can open the outer scanhead door to look at each scanhead. Have a can of compressed air available to blow out the document track on a regular basis. The area below the outer scanhead is a dust collection bin. Be sure to blow out this area when doing periodic cleaning. Purchase the CheXpress cleaning cards to have on hand for regular cleaning maintenance.
8 Run several scan cycles, flipping the card between cycles. Allow the card to scan through the entire path with the exit door open and run this through several times while flipping the card end to end and top to bottom. Inspect the quality of the captured images on a regular basis. If the image quality decreases, inspect and clean the scanheads following the procedure to open the out scanhead door and wipe down the camera surfaces. Cleaning The CheXpress CX30 using DC CX30 Demo The DC CX30 Demo program, which is located on your computer Desktop, is an excellent utility to run while performing the cleaning procedures recommended. The DC. CX30 Demo provides an easy way to initiate the scan cycles in order to feed the cleaning cards properly through the scanner. Disconnecting the USB and/or Power Cables When removing or disconnecting the USB or Power Supply Cable from the CheXpress CX30, be sure to pull straight back on the cable and remove.
9 DO NOT remove the cable by pulling up, vertically or at an angle. Doing so can damage the connector. The cables must be removed by gently pulling straight back on the cable from the connector. Should I shut down my computer every night? Yes, it is recommended for optimum performance of your hardware and software. II. Installation How long will it take to receive my equipment once I am signed up? The service level agreement is 5 days. Do I connect the scanner to the PC before downloading the installation software? No, download and install the installation software first. Doing so will allow the Operating System to properly configure the check scanner. An error is received when attempting to install the software about Administrative Privileges and the install is aborted. You must be logged on as a local administrator to the PC to install the software.
10 Installing the Low Volume RDC (LVRDC) Software Download the LVRDC software file from the web site link provided and follow the instructions. Double click on the downloaded LVRDC software icon to initiate the installation. Attach power to the power supply to turn ON the scanner. The status LED on the scanner should now be showing red'. Windows detects a new hardware device. For first time installations, you should not have to do anything. If the wizard will not finish, go to Device Manager and select to Update Driver for the USB device and point to (C:\Program Files\TellerScan\Drivers) and the file. The USB controller will install as a TSDevice. The CX30 device will install as a Tellerscan, once acquired by the application. The LED on the scanner will turn green' when the application launches and acquires the scanner.


