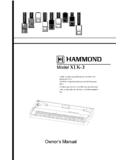
Transcription of Hammond XPK-100 Quick Features Guide
1 HA<O>XPK-10 0 MIDI PEDALBOARDQ uick Features GuideHAMMOND SUZUKI, , JapanHammond XPK-100 Quick Features GuideIMPORTANT - READ THIS FIRSTYour Hammond XPK-100 MIDI Pedalboard is designed to interface with a great variety of keyboards, synthesizers and soundmodules to further enhance your playing and real-time performance. This Guide is designed to explain the operating featuresof your Hammond XPK-100 as simply and graphically as we want to make this manual, as well as the XPK-100 itself, as easy to understand as possible, each feature is treatedas an explanation unto itself, and does not require you to already have prior working knowledge of some other feature . Theexplanations are presented such that, if you follow the steps outlined, the message you see in the Information Center Displayscreen will be identical to that shown in the manual at that stage of the not be daunted by the number of steps required to perform each operation.
2 Each step is simple. Simply bear these thingsin each step 't skip any of the 't perform the steps out of these guidelines, you are well on your way to mastering all of the many Features of your Hammond Table of Contents -INTRODUCTION1 Basic Word About the XPK-100 to a Hammond Drawbar the XPK-100 to another keyboard Merge - Connecting the XPK-100 to the Hammond XM-1 Drawbar the XPK-100 to a Hammond Drawbar Keyboard and another keyboard a Sequencer with the XPK-100 and MIDI a Sequencer with the XPK-100 and the Hammond NUMBER Center FEATURES8 Advanced feature - E00 PK MIDI feature - E01 feature - E02 feature - E03 Poly/Mono feature - E04 PK Hold feature - E05 PK feature - E06 Fixed Vel. feature - E07 Control feature - E08 CONTROL Sw. feature - E09 CONTROL Sw. feature - E10 Program feature - E11 Bank No.
3 feature - E12 Bank No. feature - LOCK a to a A - EDIT Parameter B - Default Preset C - MIDI Implementation Hammond XPK-100 Quick Features Guide INTRODUCTIONB asic Hook-UpAll connections are found on the Accessory Panel on the back of the XPK-100 . PowerTo connect the XPK-100 to the Power Supply that came with your the female end of the Power Cord into the receptacle on the XPK-100 marked, DC IN. the other end of the Power Supply into an power the XPK-100 has no Power Switch, power will be applied as soon as the unit isconnected to an : The XPK-100 is also outfitted with a clip next to the AC receptacle. This is used to secure the AC cord so thatit will not accidentally come unplugged. MIDI ConnectionsIn order to use the XPK-100 , the unit must be connected via MIDI to a keyboard or other MIDI-compatible Word About MIDIThe letters MIDI stand for Musical Instrument Digital Interface.
4 MIDI is an international standard forallowing electronic musical instruments equipped with MIDI capability to exchange performanceinformation. For example, a synthesizer can be used to communicate with a drum machine, anelectronic piano can interface with a computer, and so forth. Additionally, since MIDI is an internationalstandard recognized and implemented by all musical instrument manufacturers worldwide, instrumentsmade by different manufacturers can communicate with each other via IntroductionHammond XPK-100 Quick Features GuideConnecting the XPK-100 to a Hammond Drawbar KeyboardThe XPK-100 is designed to interface directly with any current single-manual Hammond DrawbarKeyboard. Simply connect the MIDI OUT of the XPK-100 into the MIDI IN of the Hammond the XPK-100 to another keyboard instrumentThe XPK-100 can also interface with other keyboard instruments - simply connect the MIDI OUT of theXPK-100 into the MIDI IN of the other : Since there are a wide variety of MIDI-compatible keyboard instruments available, please consult thedocumentation that came with your instrument to insure maximum compatibility.
5 You may need to set certainparameters such as MIDI Channel, etc., before the XPK-100 will function with your particular Hammond XPK-100 Quick Features GuideMIDI Merge - Connecting the XPK-100 to the Hammond XM-1 Drawbar ModuleYour XPK-100 is equipped with MIDI Merge technology, thereby making it easier to connect multiplekeyboards to it in order to play organ style : , two manuals and pedals. Below is an example of howto connect multiple keyboards and the XPK-100 together with the Hammond XM-1 Drawbar Module tocreate a virtual B-3":Channel 1 - Upper ManualChannel 2 -Lower Manual Hammond XM-1 Channel 3 -PedalsConnecting the XPK-100 to a Hammond Drawbar Keyboard and another keyboard instrumentThe bottom diagram shows how your XPK-100 can be connected to two keyboards, one of them beinga Hammond Drawbar IntroductionHammond XPK-100 Quick Features GuideUsing a Sequencer with the XPK-100 and MIDI KeyboardsThe bottom diagram shows you how to connect a Sequencer to two manuals and the XPK-100 .
6 Channel 1 - Upper Manual ( Hammond Keyboard) Channel 2 - Lower Manual Channel 3 - PedalsUse the above settings for recording your Sequence. Also, be sure to enable your Hammond DrawbarKeyboard s MIDI SOFT THRU function so that all the parts can be recorded. When you are ready to playback your Sequence, be sure MIDI SOFT THRU OFF on your Hammond Drawbar the MIDI cable going out from your Hammond Drawbar Keyboard into the MIDI OUT from your Sequencer into the MIDI IN 1 of your a Sequencer with the XPK-100 and the Hammond XM-1 The diagram below shows how to connect a Sequencer to a set of MIDI instruments including theHammond XM-1.
7 No reconnecting of cables is necessary between the Record and Play Hammond XPK-100 Quick Features Guide Basic ControlsThe basic controls on your Hammond XPK-100 include the Switches and an Information Center Display. SwitchesSwitches are the large buttons on either side of the Information Center Display. The basic functions ofthese Switches something "ON" or "OFF. of parameters - increasing or among multiple - YES, NO or SwitchYour Hammond XPK-100 has two modes - PLAY Mode and EDIT Mode. This Switch allowsyou to switch between the two : More information about Modes is covered in the section, *Information Center Display starting onpage NUMBER SwitchesThese two Switches are located to the left of the Information CenterDisplay.
8 They function in two ways:PLAY Mode - The two Switches allow you to scroll through andselect the Preset number you Mode - The two Switches allow you to scroll through and select the Advanced feature : More information about Modes & Advanced Features is covered later in this SwitchThis Switch allows you to change the key in which the XPK-100 will sound, as well asto lock the control panel so that you will not accidentally change a setting : The LOCK feature is explained in detail starting on page SwitchThis Switch allows you to add different effects, such Leslie Slow/Fast, Pedal Sustain, etc.,during performance. Its function can be determined via the Advanced feature : The CONTROL Sw. Function Advanced feature is explained in detail starting on page Information Center DisplayHammond XPK-100 Quick Features Guide Information Center DisplayThe Information Center Display is an LED (Light-Emitting Diode) display located in the center of thefront Information Center Display has two modes: (1) the PLAY Mode, and (2) the EDIT Mode.
9 The PLAYMode allows you to see which Preset is selected and is the normal mode used in live performance. TheEDIT Mode allows you to change and edit the XPK-100 's software parameters such as MIDI Channel,Volume, etc. The PLAY/EDIT Switch allows you to switch between the two ModeWhen you first connect the XPK-100 to AC power, the PLAY Mode will display. The Information CenterDisplay should look similar to this:The designation, P01 indicates that Preset 1 is active. Presets are predefined combinations of thevarious parameters on the XPK-100 that can be modified using the Advanced Features . There are 15 Presets in : The Advanced Features are explained in detail starting on page the above screen, touch the PRESET/EDIT Switch once. The Information Center Displayshould now show the following:You have now selected the next Preset, or Preset the above screen, touch the PRESET/EDIT Switch two times.
10 The Information Center Displayshould now show the following:You have now selected Preset 15, or the last Preset. By using the PRESET/EDIT and Switches,you can scroll forward as well as backward through the Preset selections until you find the one you Center Display Hammond XPK-100 Quick Features GuideCurrent ParameterCurrent ValueEDIT ModeIf you touch the PLAY/EDIT Switch once from any of the PLAY screens, the Information Center Displaywill alternate between two messages as shown below:You are now in EDIT can now use the PRESET/EDIT Switches to select from among the different Advanced the Switch to scroll up through the Advanced feature the Switch to scroll down through the Advanced feature Advanced Features are explained in full starting on page 8.