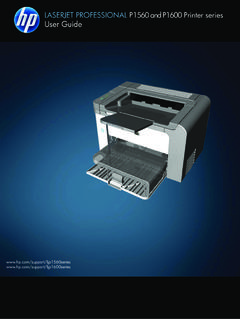
Transcription of HP LCD8500 1U Console User Guide - CNET Content
1 HP LCD 8500 1u console user Guide Abstract This Guide provides operational guidance for the HP LCD 8500 1u console . Part Number: 741492-001 November 2014 Edition: 1 Copyright 2014, Hewlett -Packard Development Company, The information contained herein is su bject to ch ange without notice . The only warranties for HP products and services are set forth in the express warranty st atements acc ompanyi ng such products and services. Nothing herein sh ould be construed as constitut ing an additional warranty. HP sh all not be liable for technical or editorial errors or omiss ions contained herein. Hewlett-Packard is a registered trademark of Hewlett-Packard Development Company, Bluetooth is a trademark owned by its proprietor and used by Hewlett- Packard Company under license.
2 ENERGY STAR logo is a registered mark. Table of Contents Introduction .. 5 Main components ..5 Rear components .. 6 ENERGY STAR compliant .. 6 Installation .. 7 Kit contents .. 7 Installing the HP LCD8500 1U 7 Connecting and ro uti ng cables .. 11 Installing the LH/RH Rail Caps Assemblies .. 13 LDS Option Kit Installing LDS Option Kit Accessing the HP LCD8500 1u console .. 18 Removing the HP 1u console Rails ..19 Operational overview .. 20 On-screen display .. 20 Launching OSD menu .. 20 Navigating OSD .. 21 OSD menu ..21 Auto Config uration .. 21 Brightness/Contrast .. 21 Image control .. 22 Advanced .. 23 Factory settings .. 23 Language .. 24 Information ..24 Maintenance .. 25 Maintenance guidelines ..25 Cleaning the monitor.
3 25 Shipping instructions .. 26 Moving a rack with the HP LCD8500 1 UConsole installed .. 26 Regulatory compliance notices .. 27 Regulatory compliance id entification numbers .. 27 Federal Communications Commission notice ..27 FCC rating label ..27 FCC Notice, Class A Equipment ..27 FCC Notice, Class B Equipment ..27 Declaration of conformity for products marked with the FCC logo, United States only ..28 Modifications ..28 Cables ..28 Canadian n otice (A vis Canadien) ..29 European Union regulatory notice ..29 Japanese notice ..30 BSMI notice ..30 Korean notice ..30 Contents 3 Chinese notice ..31 China energy regulations ..31 Disposal of waste equipment by users in private households in the European Union ..32 Power cord requirement ..32 Power cord statement for Japan.
4 32 Electrostatic discharge .. 33 Preventing electrostatic discharge .. 33 Grounding meth ods to prevent electrostatic discharge .. 33 Support and other resources .. 34 HP contact information .. 34 Acronyms and abbreviations .. 35 Documentation feedback .. 36 Index .. 37 Contents 4 Int roduction Main components Callout Component Function 1 Blue LED Turns on when the display is closed Helps identify the HP LCD8500 1u console in a rack 2 OSD activation button Launches OSD menus Selects menu options Exits menus and OSD 3 OSD scroll up and down button Used to scroll in the OSD menu and adjust functions 4 Number lock LED Lights when Number lock is on 5 Cap lock LED Lights when Cap lock is on 6 Scroll lock LED Lights when Scroll lock is on 7 USB connections Pass-through to the rear USB ports 8 Scroll bar Used to scroll on the monitor 9 Right pick button Used to select the option on the right 10 Middle pick button Used to select the option in the middle 11 Left pick button Used to select the
5 Option on the left 12 Touchpad Used to move the mouse on the monitor Introduction 5 Rear components Callout Component 1 USB pass-through 2 USB pass-through 3 Display Port 4 VGA input port 5 Power connection port 6 USB keyboard and mouse port 7 Serial firmware port 8 Location Discovery Service ENERGY STAR compliant The HP LCD8500 1u console is ENERGY STAR qualified. For more information about the ENERGY STAR qualifications, see the HP website ( ). Introduction 6 Installation Kit contents Item Quantity HP LCD8500 1u console 1 M6 screws 2 6-32 screws 5 HP 1 UConsole Rails LH/RH 2 Cable management arm, power adapter with brace rail 1 CTO Brackets 2 USB cables 3 Video cable 1 Power cords 2 USB cable labels 3 Rail Cap Assembly LH/RH 2 Documentation 2 This kit might contain extra hardware.
6 Installing the HP LCD8500 1u console 1. Align the HP 1u console Rail s with the holes marked on the rack, and snap them into place. a. Snap rear end of the HP 1u console Rail s into the re tma rails. b. Extend the front half of the HP 1u console Rails to meet the appropriate rack depth, and snap into place. NOTE: If the HP 1u console Rails do not snap into place, make sure that they align with the holes marked on the rack. The holes marked on the rack must be in the same location for the front and rear of the rack. Installation 7 2. Extend the inner slides until they lock into place. 3. Align the unit with the extended inner slides, and then insert the unit into the rack. Installation 8 4. From the rear of the rack, slide the brace rail assembly in between the HP 1u console Rails.
7 5. Align the screw holes on the brace rail with the screw holes on the HP 1u console Rail s. 6. Using two 6-32 screws, secure the brace rail to the HP 1u console Rail s. Installation 9 7. Remove the two screws from the rear of the unit. 8. Attach the cable management arm to the rear of the unit with same two screws. Installation 10 9. Connect and ro ute the cables through the cable management arm and unit opening. Installation is complete. Connecting and routing cables When connecting and ro uting the cables through the cable management arm and cable tray to the HP LCD8500 1u console , use the following cable-ro uting method to ensure that the cables fit into the tray. IMPORTANT: Use the USB keyboard/mouse cable when connecting the unit to a device.
8 Note: Display Port Cable Option Kit P/N G7T29A can be used as replacement for VGA Cable. To connect and route the cables: 1. Connect and route the USB pass-through cable (1). 2. Connect and ro ute the USB pass-through cable (2). 3. Connect and route the VGA cable (3). 4. Connect and ro ute the Power cable (4). 5. Connect and route the USB keyboard/mouse cable (5) Installation 11 The following fig ure ill ustrates where the cables connect and how to route the cables in the tray. Item Description 1 USB keyboard/mouse cable 2 Power cable 3 VGA cable 4 Display Port 5 USB pass-through cable 6 USB pass-through cable Installation 12 Installing LH/RH Rail Cap Assemblies To install LH/RH Rail Caps: 1. Place the Rail Cap onto the rail standoffs.
9 2. Insert one 6-32 screw into the hole on the rail cap, repeat step with second 6-32 screw securing the assembly to the rack. 3. Repeat steps 1 and 2 to install the other Rail Cap. 4. Do not remove Orange label until rack is at final destination. Note: For Installation of CTO Brackets refer to page 26. Installation 13 Location Discovery Services (LDS) Option Kit TL052A The LDS Option Kit is a Rack U location discovery solution for HP Intelligent Series Racks that will provide Rack Information to an HP iPDU (AF520A-AF538A, AF900A-AF902A) provided the Console is connected to a Location Discovery Services and Power Discovery Services enabled KVM switch (AF651A-AF653A). An overview video describing the Location and Discovery Services technology is available at or This solution provides the ability for the Console to read its rack and U position from an HP Intelligent Rack and relay the information to an HP KVM switch to provide location data to an HP iPDU when their equipment is installed in an HP Intelligent rack with an Location Discovery Services option kit (BW945A, BW946A, BW947A) installed.
10 The data objects sent from the Console to the KVM are: Unique Identifier (UUID) Product Name HP Part Number Firmware Version IPMI Version Intelligent Rack ID Intelligent Rack LDS Module Kit Part Number Intelligent Rack LDS Module Kit Product Name Console Rack U Height Console U Position Console U location The data objects sent from the KVM to the iPDU are: Console and KVM Unique Identifiers (UUID) Console and KVM Product Names Console and KVM HP Part Numbers KVM Device Name (Hostname) KVM power Supply Slot Number KVM Management Processor IP Address KVM Management Processor IP Port Installation 14 Console and KVM Firmware Versions Console and KVM IPMI Versions Intelligent Rack ID Intelligent Rack LDS Module Kit Part Number Intelligent Rack LDS Module Kit Product Name Console U Height Console U Position Console U location Installing LDS Option Kit TL052A To install LDS kit: 1.