Transcription of INSTALLATION INSTRUCTIONS AND OWNER'S …
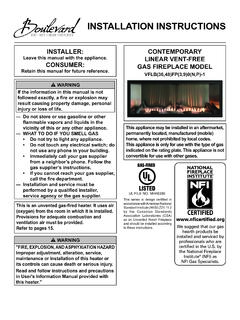
1 INSTALLATION INSTRUCTIONS . AND OWNER'S MANUAL. INSTALLER: CONTEMPORARY LINEAR. Leave this manual with the appliance. VENT-FREE GAS FIREPLACE. CONSUMER: ModELS. Retain this manual for future reference. VFLL60fp90l(n,p)-1. VFLL72FP90L(N,P)-1. WARNING. If the information in this manual is not followed exactly, a fire or explosion may result causing property damage, personal injury or loss of life. Do not store or use gasoline or other flammable vapors and liquids in the vicinity of this or any other appliance. WHAT TO DO IF YOU SMELL GAS. Do not try to light any appliance. Do not touch any electrical switch; do This appliance may be installed in an not use any phone in your building. aftermarket, permanently located, manufactured Immediately call your gas supplier from (mobile) home, where not prohibited by local codes. a neighbor's phone. Follow the gas supplier's INSTRUCTIONS .
2 This appliance is only for use with the type of gas If you cannot reach your gas supplier, indicated on the rating plate. This appliance is not call the fire department. convertible for use with other gases. INSTALLATION and service must be performed by a qualified installer, service agency or the gas supplier. This is an unvented gas-fired heater. It uses air (oxygen) from the room in which it is installed. Provisions for adequate combustion and ventilation air must be provided. Refer to pages 15. GAS-FIRED. ul file no. mh46389. This series is design certified in accordance with American National Standard Institute (ANSI) by the Canadian Standards Association Laboratories (CSA) as an Unvented Room Fireplace and should be installed according to these INSTRUCTIONS . Page 1. TABLE OF CONTENTS. SECTION PAGE. Before You Carton Hardware Important Soot Prevention Product Homeowner Reference Important Important Safety Safety Information for Users of Important INSTALLATION Water Vapor.
3 A By-Product of Unvented Room Provisions for Adequate Combustion & Ventilation Fireplace Junction Box Wiring Gas INSTALLATION Option 1 - Clean Framing - Clean Nailing Flanges & Mounting Brackets - Clean Fireplace & Non-Combustible Board INSTALLATION - Clean INSTALLATION Option 2 - Flush Framing - Flush Nailing Flanges & Mounting Brackets - Flush Fireplace & Non-Combustible Board INSTALLATION - Flush Completing INSTALLATION - Clean Face & Flush Fireplace LED Decorative Glass Lighting Pilot Flame Flame Proflame - IP Control Operating Cleaning and Testing the Gas Supply Exploded Parts Master Parts Distributor How To Order Repair For The Important Removing & Replacing the Glass Decorative Glass & Rock Lighting Operating LED & Fireplace Wall Using the Remote Page 2 36776-3-1016. BEFORE YOU START. Unpacking the fireplace 5. Carefully remove the bundle from inside the fireplace.
4 This 1. Remove the four screws securing the plywood top to the bundle contains two center glass supports and the burner corner supports. Remove the plywood top and discard. deflector glass. Put the bundle in an out of the way place to 2. Remove the two screws securing each corner support to avoid damaging the components. the pallet. Remove the corner supports and discard. 6. Lift the fireplace off the pallet and place it near the 3. Cut the banding securing the fireplace to the pallet. INSTALLATION site. If the fireplace must be placed on end so Discard the banding. that a hand truck may be used for transportation, remove all loose components from inside the fireplace. Truck from the left end (when facing the fireplace opening) only. 7. Remove the top cardboard bundle and the non-combustible board from the pallet. 8. Carefully open the cardboard bundle remaining on the pallet.
5 This bundle contains the optional inner top deflector and the front glass barrier. Put the components in an out of the CE. TI T. way place to avoid damaging them. NO HEE. S. HAND. LE WIT. GLA. SS. NON-COMBUSTIBLE. GLA H CA. RE LABE. L. SS FRAG. ILE LA. BEL PANEL. CART. ON LA. BEL. HAND. LE WIT. GLA H CA. RE. SS. Figure 1. 4. Remove the plastic wrap securing the instruction packet and the hardware box to the fireplace. FRONT GLASS. Figure 3. HAND. LE WIT. GLA H CA. RE. SS. HAND. LE WIT. GLA H CA. RE. SS. HARDWARE. INSTRUCTION. PACKAGE. Figure 2. 36776-3-1016 Page 3. BEFORE YOU START. Sample Warnings and Definitions: If the fireplace is installed directly on carpeting, tile or other combustible material other than wood flooring, it must be installed DANGER on a metal or wood panel extending the full width and depth of Indicates a hazardous situation which, if not avoided, will result the fireplace.
6 In death or serious injury. This fireplace is designed to be installed in a zero-clearance enclosure. This means combustible material such as framing WARNING lumber can come in contact with the top and side standoff spacers, and secured to combustible framing using the framing Indicates a hazardous situation which, if not avoided, could brackets provided. result in death or serious injury. An optional inner top deflector is included with the fireplace. This can be used to help distribute the heat of the fireplace more CAUTION evenly across the fireplace opening. This does not change the Indicates a hazardous situation which, if not avoided, could requirements for non-combustible material above the fireplace result in minor or moderate injury. opening. Notice: Addresses practices not related to personal injury. This fireplace requires an easily accessible gas shutoff valve be installed in the gas supply line prior to its entry to the fireplace.
7 Determine the following before INSTALLATION : INSTALLATION Information Any desired accessories 1. Read the soot prevention information on page 7. Gas supply piping (left side entrance). 2. Read the safety information on pages 12 - 13. Electrical connections 3. Frame the opening. See page 17 and 26. Electrical supply requirements for lights. 4. Install the gas lines. See page 18. (120V, 60Hz, 1 Amp) (left side entrance). 5. Install the wiring. See pages 31 - 32. A selection of a shutoff valve containing a flange and key is 6. Install the remote system. See page 37. recommended. 7. Light the fireplace and troubleshoot. Finishing Options See pages 35 and 41 - 43. Choose the finishing option. 8 For detailed INSTRUCTIONS on operating the Proflame - IP Option 1 - Clean Face: This type of INSTALLATION (page 22) will Control System see pages 53 - 57. allow for finishing around the fireplace opening with high 9.
8 For detailed INSTRUCTIONS for the LED Controls, see page 52. temperature paint. 10. Show the homeowner how to operate the fireplace, Option 2 - Flush Mount: This type of INSTALLATION will allow see page 51 - 57. you to apply tile, marble, stone or other non-combustible material 11. Show the homeowner how to do the basic maintenance. over the face of the fireplace cabinet, up to the fireplace (See page 39) opening flange. INSTALLATION Considerations - Fireplace INSTALLATION Guidelines Determine where to install the fireplace. The fireplace can be mounted on any of these surfaces: 1. A flat hard combustible or non-combustible surface. 2. A raised platform of combustible or non-combustible material. Page 4 36776-3-1016. CARTON CONTENTS. CARTON CONTENTS Items not shown to scale. Index Quantity Description Number Supplied 1 Fireplace 1. 2 Non-combustible Board - Top 1.
9 3 Non-combustible Board - Side 2. 4 Front Glass 1. 5 Burner Glass 1. 1 6 Bushing 3. 7 Standoff Bracket 3. 19. 8 Receptical 2. 9 Remote 1. 10 AA Battery 4. 8 4. 11 AAA Battery 3. 7 12 Hardware Pack 1. 13 AC Adaptor 1. 5. 14 Wall Mounted Control Box 1. 2. 15 Remote Receiver 1. 9 16 Button Switch 2. 17 Mounting Bracket 1. 18 Wall Plate 1. Inner Top Deflector 19 1. BAG (Optional INSTALLATION ). 11 10. For hardware pack contents, see page 6. 3. 12. See Parts Lists on pages 46 - 47 for ordering replacement parts. 17. 13 6 Do not order batteries, bolts, screws, washers or nuts. They are 16 standard hardware items and can be purchased at any local hardware store. 18. 14. 15. 16. 36776-3-1016 Page 5. HARDWARE PACK. HARDWARE PACK CONTENTS. #4 X STAINLESS PHILLIPS HEAD SCREW. #10 X HEX HEAD SCREW. 1 PHILLIPS SELF-DRILLING SCREW. NAILING FLANGES. (Not to scale). Quantity Description Supplied 4 x 1/2 Phillips Pan Head Screw 4.
10 10 X 1/2 Phillips Hex Head Screw 14. #8 x 1 inch Self-Drilling Drywall Screw 9. Nailing Flange 4. See Parts Lists on page 46 - 47 for ordering replacement parts. Do not order batteries, bolts, screws, washers or nuts. They are standard hardware items and can be purchased at any local hardware store. Page 6 36776-3-1016. IMPORTANT SOOT PREVENTION STEPS. IMPORTANT NOTICE. INSTALLER - SERVICE PERSON - HOMEOWNER. SOOT MAY BE CREATED IF THE FOLLOWING DIRECTIONS ARE NOT FOLLOWED. A vent-free fireplace or burner draws room air to support Verify the air shutter for the correct setting. Refer to Tables 1 and combustion. Lightweight particles suspended in the air 2 on page 8 for specific air shutter settings for each model. including dust, carpet fibers, candle or tobacco smoke, and pet hair will be drawn toward the fireplace. These can lead to soot LP Gas Models - The air shutter setting must be 1/4-inch.