Transcription of INSTALLATION INSTRUCTIONS for Bi-Fold Doors …
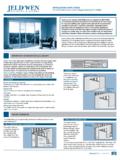
1 INSTALLATION INSTRUCTIONS . for Bi-Fold Doors (JII103). Thank you for selecting JELD-WEN products. Attached are JELD-WEN's recommended INSTALLATION INSTRUCTIONS for hollow and solid core Bi-Fold Doors . Bi-folds are designed for fast and easy INSTALLATION and adjustment using common tools. read these INSTALLATION INSTRUCTIONS thoroughly before beginning. they are designed to work in most existing applications. however, existing conditions may require changes to these INSTRUCTIONS . If changes are needed, they are made at the installer's risk. For installations other than indicated in these INSTRUCTIONS , contact a building professional. Important InFormatIon & glossary Note to Installer: Provide a copy of these INSTRUCTIONS to the building Do not subject interior Doors to extremes of heat and/or humidity.
2 Owner. By installing this product, you acknowledge the terms and prolonged exposure may cause damage. Buildings where humidity conditions of the limited warranty as part of the terms of the sale. and temperature are controlled provide the best storage facilities (recommended conditions 25%-55% rh and 50 F to 90 F). GLOSSARY. Do not install Doors in buildings that have wet plaster or cement Finished Opening unless they have been properly finished. Do not store Doors in the resulting opening after any trim work is completed. measure these buildings with excessive moisture content - hvac systems should be dimensions for proper door fitting. operating and balanced. avoid sudden changes such as forced heat Lead Door to dry out a building.
3 Doors should not be delivered to the job site the panel or section without the pivoting hardware. on four panel or installed until concrete floors, foundation, plaster or drywall are assemblies, these are the two that meet in the middle. cured. Pivot Door Doors should always be handled with clean hands or while wearing the panel or section that contains the pivoting hardware and supports clean gloves. the weight of the door assembly. Doors should be lifted and carried when being moved, not dragged SAFETY & HANDLING across one another. read and fully understand all manufacturers' INSTRUCTIONS before In addition to finishing both door surfaces, all ends and edges must beginning. be sealed with an effective coating before INSTALLATION , to prevent undue moisture absorption.
4 Additional coats of the finish materials Use safe lifting techniques. will increase resistance to moisture absorption. Wear protective gear ( safety glasses, gloves, ear protection, etc.). IF INJURY OCCURS, IMMEDIATELY SEEK MEDICAL ATTENTION! operate hand/power tools safely and follow manufacturer's operating INSTRUCTIONS . heed material manufacturers' handling and application INSTRUCTIONS . Estimated Install First Time: 1 hr 10. 11 12 1. 2. Time 9 3. store Doors in a dry, well-ventilated building and on a flat and level Experienced: hr 8. 7 5. 4. 6. surface. neeDeD materIals & tools FINISHING MATERIALS TOOLS. Note! Follow all material manufacturers' INSTRUCTIONS for proper use hammer (applies only to certain hardware).
5 And compatibility. Drill with bits rubber gloves paint (and primer for raw screwdrivers paint brush wood Doors ) or stain and wood conditioner safety glasses sandpaper Wood putty Drop cloth INSTALLATION INSTRUCTIONS . for Bi-Fold Doors (JII103). remove packaging, inspect door & finished opening REMOVE PACKAGING Measure height and Remove shipping materials such as corner covers, shipping blocks or width of finished pads. wall opening. Width must be 1/2" larger INSPECT DOOR than the Bi-Fold Cosmetic damage size. Height must be approximately Correct product (size, color, design, etc.) 1 1/2" taller. If shorter, the Bi-Fold Doors cannot be installed. If higher, shorten by nailing a wood strip at the top of the opening.
6 Doors may be trimmed 3/16". on each side if necessary. 2. INSTALLATION INSTRUCTIONS . for Bi-Fold Doors (JII103). 2 IDentIFy harDWare type open the hardware pack and compare the contents to the images on this page. they do not show everything in the hardware pack, but only what is necessary to properly identify a specific type of hardware. go to the page number for the pictured hardware type that matches the contents of the hardware pack that came with the door and follow the INSTALLATION INSTRUCTIONS . Type A1 - Page 5 Type B - Page 6. Type A2 - Page 5 Type C - Page 7. Type A3 - Page 5 Type D - Page 8. Type A4 - Page 5 Type E - Page 9. 3. INSTALLATION INSTRUCTIONS . for Bi-Fold Doors (JII103).
7 3 INSTALLATION For type a1 - a4. PARTS INCLUDED 3. position the lower bracket on the floor a. Upper pivot pin g. knob in line with overhead lower B. guide for track h. aligner track. the bottom of bracket c. snugger or slide guide I. track the bracket must rest D. lower pivot pin J. track bracket securely on the floor or carpet. Fasten to e. lower bracket screws (not shown). the jamb and floor F. track slide (optional) with a long flat head screw through each hole. a B. 4. place the upper pivot pin in the hole in the bracket and the or or or guide in the track (or in the middle of the slide guide between the springs). lift the door assembly slightly and drop the Bracket c lower pin into the 1/4".
8 Pin lower bracket slot. D 5. verify there is a 1/4". e clearance between the pivot door and the jamb. Four panel or assemblies should be snug at the middle. If adjustments are necessary, door panels should h be folded, in some cases removed, to gain access to the adjustment screws. to adjust horizontally: F 6. at the top, loosen g the screw in the top pivot bracket and J move toward or away from the jamb until there is 1/4". or clearance. retighten. I 7. at the bottom, lift horizontal assembly and move adjustment the adjusting wheel screw toward or away from the jamb until Doors are plumb with jamb, then lower into 1. Using a hammer, bracket. gently tap pivot pins to adjust vertically: and guide into the guide pre-drilled holes in 8.
9 Lift assembly slightly the locations shown. until the adjustment Upper wheel clears the 2. position overhead pivot pin track in the opening slot in the lower with the open side bracket. rotate the Jamb down and the bracket side adjustment wheel to end toward the jamb. the left to raise Doors center the track in or to the right to lower the finished opening, pivot pin lower them. Be sure adjusting or allow at least 3/4" the teeth lock firmly wheel between the track into bracket when and the front of the finished. finished opening. secure the track with 9. snap the snugger the long pan head into the lead door end of the track, or between guides in a four door screws through the pre-drilled holes until snug.
10 If installing four panels INSTALLATION . with two tracks, use a track bracket between the two ends in the center. SKIP to Section 8, COMPLETE INSTALLATION .. 4. INSTALLATION INSTRUCTIONS . for Bi-Fold Doors (JII103). 4 INSTALLATION for type B. PARTS INCLUDED on the floor in line with overhead track. Fasten to the jamb with a 1 1/4" flat head screw through only the middle of the top slotted A. Upper pivot pin F. Lower bracket hole. B. Guide for track G. Aligner 5. Unlock the track C. Snugger H. Track pivot latch by D. Knob I. Adjustment wrench pulling the latch E. Lower pivot pin Screws (not shown) away from the jamb. With the door assembly folded, Track Track pivot pivot latch A D place the guide in C unlocked B the track and then position the upper pivot pin next to the track pivot.