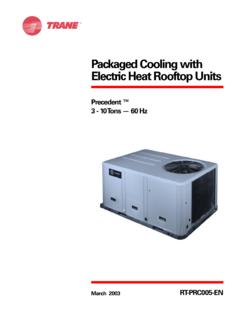
Transcription of Installation RTAA-IOM-3 Operation Maintenance
1 LibraryService LiteratureProduct SectionRefrigerationProductRotary liquid Chillers Air-CooledModelRTAAL iterature TypeInstallation, Operation , MaintenanceSequence3 DateDecember 1991 File The Trane Company has a policy of continuous product improvement, it reserves the right to changespecifications and design without notice. The Installation and servicing of the equipment referred in this bookletshould be done by qualified, experienced R Rotary LiquidChillers CO and Later Design SequencePackaged Air-Cooled Chiller,RTAA 130-400 Remote Evaporator Air-Cooled Chiller,RTAA 130-200 ModelsRTAA-130 RTAA-170 RTAA-240 RTAA-340 RTAA-140 RTAA-185 RTAA-270 RTAA-370 RTAA-155 RTAA-200 RTAA-300 RTAA-400 Part No. X39560468-01 American Standard Inc. 19913 RTAA-IOM-39 General Information9 Literature Change History9 Unit Identification9 Unit Inspection9 Inspection Checklist9 Loose Parts Inventory10 Unit Description10 Commonly Used Acronyms20 Warnings and Cautions20 Installation Responsibilities21 Nameplates21 Outdoor Unit Nameplate21 Compressor Nameplate21 Remote Evaporator Nameplate23 Storage25 Installation - Mechanical.
2 PackagedUnit with Remote Evaporator25 General25 Pre-installation25 Location Requirements25 Noise Considerations25 Foundation25 Clearances31 Additional LocationRequirements for RemoteEvaporator Only31 Drainage32 Rigging32 Lifting Procedures36 Unit Isolation and Leveling36 Evaporator Water Piping41 Evaporator Piping42 Evaporator Piping Components42 Entering Chilled Water Piping42 Leaving Chilled Water Piping42 Evaporator Drain42 Evaporator Flow Switch44 Water Treatment44 Water Pressure Gauges44 Water Pressure Relief Valves44 Freeze Protection45 Domestic Water Heater Piping45 Domestic Water Heater Piping Components45 Entering Water Piping45 Leaving Water Piping45 Water Pressure Relief Valves45 Freeze Protection47 Installation - Mechanical,Remote EvaporatorInterconnecting RefrigerantPiping47 General51 Line Sizing51 Equivalent Line Length51 Liquid Line Sizing53 Suction Line Sizing54 Piping Installation Procedures54 Refrigerant Sensors56 Leak Test and Evacuation56 Refrigerant and Additional OilCharge56 Refrigerant Charge Determination56 Oil Charge Determination57 Installation - Electrical57 General Recommendations68 Installer-Supplied Components68 Remote Evaporator Only68 Power Supply Wiring68 General68 Control Power Supply68 Heat Tape Power Supply (Packaged Units Only)
3 68 Water Pump Power Supply68 Auxiliary Heat Tape Power Supply69 Interconnecting Wiring69 Chilled Water Pump Interlockand External Auto/Stop69 Chilled Water Pump Interlock69 External Auto/Stop Wiring70 Alarm/Running/MaximumCapacity Outputs71 Alarm/Running/MaximumCapacity Indicator Wiring71 Low Voltage Wiring71 Emergency Stop (Normal Trip)71 External Circuit Lockout -Circuit #171 External Circuit Lockout -Circuit #271 Ice Making Option72 External Chilled Water Setpoint(CWS) Remote Resistor/Potentiometer, Voltage Source2-10 VDC or Current Source4-20 mA73 External Current Limit Setpoint(CLS) Remote Resistor/Potentiometer, Voltage Source2-10 VDC or Current Source4-20 mA74 Optional BidirectionalCommunication Link (BCL)74 General74 Communication LinkConnection Procedure75 Installation Check ListTable ofContentsWorld environmental scientists haveconcluded, based on the best currentlyavailable evidence, that ozone in ourupper atmosphere is being reduceddue to release of CFC fully to Installation , Operation , serviceor Maintenance on this equipment,refer to Refrigerant Emission Control in the Periodic Maintenance Operating Principles -Mechanical77 General77 Refrigeration (Cooling)
4 Cycle77 Cycle Description77 Compressor Description77 Compressor Motor77 Compressor Rotors77 Compressor Loading Sequence82 Oil System Operation82 Overview82 Domestic Water Heater83 Oil Separator83 Compressor Bearing Oil Supply83 Compressor Rotor Oil Supply84 Slide Valve Movement84 Oil Filter84 Condenser Fans87 Operating Principles -AdaptiveControl Microprocessor Logic87 General87 Digital Display93 Menus99 Chiller Switch100 Menu Function Descriptions andSelection100 Selecting Variables and Options100 Menu 0 - Operating Display100 Menu 1 - Service #1 Display101 Menu 2 - Service #2 Display101 Menu 3 - Auxiliary Options102 Menu 4 - Factory Display #1104 Menu 5 - Factory Display #2105 Operational Features105 Entering Evaporator WaterTemperature105 Current Limit Setpoint105 Low Ambient Lockout105 Electronic Expansion Valve(EXV) Test105 Current Overload Protection105 Leaving Chilled WaterTemperature Control106 Chilled Water Reset (CWR)107 Leaving Water TemperatureCutout107 Low Refrigerant TemperatureCutout107 Low Ambient Temperature Start107 Low Refrigerant TemperatureCutout Retry108 Auto Lead/Lag108 Phase Imbalance Protection108 Reverse Rotation Protection108 DIP Switch Settings108 Compressor Overload DIPS witches108 IPC Address108 2-10 VDC/4-20 mA Input for(CWS) and (CLS)
5 109 Diagnostics and Troubleshooting109 Mechanical Control Settings121 Pre-Start Check-out121 General122 Unit Voltage Power Supply122 Unit Voltage Imbalance123 Unit Voltage Phasing124 Water System Flow Rates124 Water System Pressure Drop124 UCM Set-up125 Start-up Procedures125 General125 System Superheat125 System Subcooling129 Unit Shutdown Procedures129 Temporary Shutdown and Restart129 Extended Shutdown Procedure130 System Restart After ExtendedShutdown131 Periodic Maintenance131 General133 Refrigerant Emission Control133 Weekly Maintenance134 Monthly Maintenance134 Annual Maintenance135 Maintenance135 General135 Coil Cleaning135 Chemically Cleaning theEvaporator135 Domestic Water Heater Tube Cleaning136 Water Treatment136 Oil Separator Level Check5 RTAA-IOM-337 Figure 18 Spring Isolator Placement forTypical RTAA Packaged Unit- 130 to 200 Tons38 Figure 19 Spring Isolator Placement forTypical RTAA Packaged Unit -240 to 400 Tons39 Figure 20 Spring Isolator Placement forTypical RTAA Outdoor Unit withRemote Evaporator Option 40 Figure 21 Spring Isolator Placement forTypical RTAA Unit with HeatRecovery Domestic Water Heater41 Figure 22 Suggested Piping for Typical RTAAE vaporator43 Figure 23 RTAA 130 thru 400 EvaporatorWater Pressure Drop46 Figure 24 Typical Domestic Water HeaterPiping46 Figure 25 RTAA 130 thru 400 DomesticWater Heater Water Pressure Drop47 Figure 26 Remote Evaporator Installation -No Elevation Difference48 Figure 27 Remote Evaporator Installation -Condenser and Compressor aboveEvaporator49 Figure 28 Restricted Installation -Evaporatoris More Than 1 8" Above Base ofOutdoor Figure 29 Restricted Installation -SuctionLine is on a
6 Higher Plane than theOutdoor Figure 30 Refrigerant Circuit Identification52 Figure 31 Remote Evaporator PipingExample55 Figure 32 Customer Interconnect Wiring forRTAA Outdoor Unit with RemoteEvaporator -130 to 200 Tons57 Figure 33 Warning Label58 Figure 34 Typical Field Wiring for RTAAP ackaged Unit - 130 to 200 Tons61 Figure 35 Typical Field Wiring for RTAAP ackaged Unit - 240 to 400 TonsList ofIllustrations11 Figure 1 Typical RTAA Packaged Unit -130 to 200 Tons (Front/sideExterior View)12 Figure 2 Typical RTAA Packaged Unit -130 to 200 Tons (Rear/side ExteriorView)13 Figure 3 Typical RTAA Packaged Unit -240 to 400 Tons (Front/sideExterior View)14 Figure 4 Typical RTAA Unit (Rear ExteriorView)15 Figure 5 Typical RTAA Unit with RemoteEvaporator Option (Rear ExteriorView)18 Figure 6 Remote Evaporator21 Figure 7 Nameplates22 Figure 8 Model Number Coding System26 Figure 9 Dimensions and Clearances forRTAA Packaged Unit - 130 to 200 Tons27 Figure 10 Dimensions and Clearances forRTAA Packaged Unit - 240 to 300 Tons28 Figure 11 Dimensions and Clearances forRTAA Packaged Unit - 340 to 400 Tons29 Figure 12 Dimensions and Clearances forRTAA Outdoor Unit with RemoteEvaporator Option30 Figure 13 Dimensions and Weights forRemote Evaporator33 Figure 14 Rigging and Lifting Weights forRTAA Packaged Unit- 130 to 200 Tons IncludingDomestic Water Heater34 Figure 15 Rigging and Lifting Weights forRTAA Packaged Unit- 240 to 300 Tons34 Figure 16 Rigging and Lifting Weights forRTAA Packaged Unit- 340 to 400 Tons35 Figure 17 Rigging and Lifting Weights forRTAA Outdoor Unit with RemoteEvaporator Option6
7 RTAA-IOM-364 Figure 36 Typical Field Wiring for OutdoorUnit with Remote EvaporatorOption70 Figure 37 Alarm/Running/MaximumCapacity Contact Outputs72 Figure 38 Resistor and PotentiometerArrangement for External ChilledWater Setpoint73 Figure 39 Resistor and PotentiometerArrangement for External CurrentLimit Setpoint78 Figure 40 Refrigeration System and ControlComponents - Single Circuit80 Figure 41 Refrigeration System and ControlComponents - Duplex Circuit81 Figure 42 Typical RTAA Compressor82 Figure 43 RTAA Compressor Oil SystemSchematic83 Figure 44 Oil Separator85 Figure 45 Fan Configurations - RTAA 130 to200 Ton 15 F Minimum Ambient86 Figure 46 Fan Configurations - RTAA 130 to400 Ton 0 F Minimum Ambient88 Figure 47 RTAA Control Panel- 130 to 200 Tons89 Figure 48 RTAA Control Panel- 240 to 300 Tons90 Figure 49 RTAA Control Panel- 340 to 400 Tons91 Figure 50 RTAA Control Panel -130 to 200 Tons with RemoteEvaporator Option92 Figure 51 Operator Interface Controls93 Figure 52 Menu Formats98 Figure 53 Condition/Diagnostic Codes107 Figure 54 Low Refrigerant TemperatureCutout Ignore Time123 Figure 55 Associated Research Model 45 Phase Sequence Indicator126 Figure 56 Unit Sequence of Operation - 240 to 400 Tons128 Figure 57 Unit Sequence of Operation -130 to 200 Tons132 Figure 58 Operator s Log135 Figure 59 Chemical Cleaning Configuration137 Figure 60 System Oil Level Specification7 RTAA-IOM-316 Table 1 General RTAA MechanicalSpecifications17 Table 2 RTAA Refrigerant CircuitDesignations and Capacities51 Table 3 RTAA Circuit Capacities51 Table 4 Liquid Line Size for Horizontal and/or Downflow Lines51 Table 5 Equivalent Lengths of
8 Non-FerrousValves and Fittings53 Table 6 Suction Line Size for Horizontaland/or Upflow Lines53 Table 7 Suction Line Size for Horizontaland/or Downflow Lines56 Table 8 System Refrigerant Charge56 Table 9 Field-installed Piping Charge67 Table 10 Electrical Data70 Table 11 Alarm/Running/MaximumCapacity Relay OutputConfigurations70 Table 12 Alarm/Running/MaximumCapacity Menu Settings72 Table 13 Input Values vs Extended ChilledWater Setpoint Inputs (Ohms)73 Table 14 Input Values vs External CurrentUnit Setpoint102 Table 15 Leaving Fluid TemperatureSetpoints104 Table 16 Compressor Overload DIP SwitchSettings105 Table 17 Compressor(s) Current LimitSetpoint vs. Chiller Current LimitSetpoint (CLS)110 Table 18 Diagnostic and TroubleshootingChartList ofTables8 RTAA-IOM-39 RTAA-IOM-3 Literature Change HistoryRTAA-IOM-3 (October 1991)Original manual.
9 Covers Installation , Operation , and Maintenance of CO design sequence RTAA-130 thruRTAA-400 IdentificationWhen the unit arrives, compare allnameplate data with ordering andshipping InspectionWhen the unit is delivered, verify that itis the correct unit and that it is propertyequipped. Compare the informationwhich appears on the unit nameplatewith the ordering and submittalinformation. Refer to Nameplates .Note: If the Remote Evaporator Optionis ordered, the remote evaporator willbe shipped in a separate crate. Theserial number on the evaporatornameplate must match the serialnumber on the outdoor : If the serial numbers onthe remote evaporator and theoutdoor unit do not match, do notproceed with the the appropriate Trane all exterior components forvisible damage. Report any apparentdamage or material shortage to thecarrier and make a unit damage notation on the carrier s deliveryreceipt.
10 Specify the extent and type ofdamage found and notify theappropriate Trane Sales not proceed with Installation of adamaged unit without sales off ChecklistTo protect against loss due to damageincurred in transit, complete thefollowing checklist upon receipt of theunit.[ ] Inspect the individual pieces of theshipment before accepting the for obvious damage to theunit or packing material.[ ] Inspect the unit for concealeddamage as soon as possible afterdelivery and before it is damage must bereported within 15 days.[ ] If concealed damage is discovered,stop unpacking the shipment. Donot remove damaged material fromthe receiving location. Take photosof the damage, if possible. Theowner must provide reasonableevidence that the damage did notoccur after delivery.[ ] Notify the carrier s terminal of thedamage immediately, by phone andby mail. Request an immediate,joint inspection of the damage withthe carrier and the consignee.