Transcription of INSTRUCTION BOOK - Janome
1 INSTRUCTION BOOKIMPORTANT SAFETY INSTRUCTIONSThis appliance is not intended for use by persons (including children) with reduced physical, sensory or mental capabilities,or lack of experience and knowledge, unless they have been given supervision or INSTRUCTION concerning use of theappliance by a person responsible for their should be supervised to ensure that they do not play with the using an electrical appliance, basic safety precautions should always be followed, including thefollowing:This sewing machine is designed and manufactured for household use all instructions before using this sewing note that on disposal, this product must be safely recycled in accordance with relevant National legislation relating toelectrical/electronic products. If in doubt please contact your retailer for guidance.
2 (European Union only)DANGER To reduce the risk of electric shock:An appliance should never be left unattended when plugged in. Always unplug this sewing machine from theelectric outlet immediately after using and before To reduce the risk of burns, fire, electric shock, or injury to persons:1. Do not allow to be used as a toy. Close attention is necessary when this sewing machine is used by or Use this appliance only for its intended use as described in this owner s only attachments recommended by the manufacturer as contained in this owner s Never operate this sewing machine if it has a damaged cord or plug, if it is not working properly, if it has beendropped or damaged, or dropped into this sewing machine to the nearest authorized dealer or service center for examination, repair, electrical ormechanical Never operate the appliance with any air opening blocked.
3 Keep ventilation openings of this sewing machine andfoot controller free from accumulation of lint, dust and loose Never drop or insert any object into any Do not use Do not operate where aerosol (spray) products are being used or where oxygen is being To disconnect, turn all controls to the off ( O ) position, then remove plug from Do not unplug by pulling on cord. To unplug, grasp the plug, not the Keep fingers away from all moving parts. Special care is required around the sewing machine Always use the proper needle plate. The wrong plate can cause the needle to Do not use bent Do not pull or push fabric while stitching. It may deflect the needle causing it to Switch this sewing machine off ( O ) when making any adjustment in the needle area, such as threading theneedle, changing the needle, threading the bobbin or changing the presser foot, and the Always unplug this sewing machine from the electrical outlet when removing covers, lubricating, orwhen making any other adjustments mentioned in this owner s THESE INSTRUCTIONS1 SECTION I.
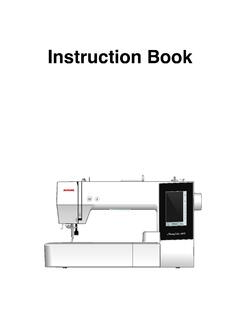
4 NAMES OF PARTSN ames of 2 Standard 3 Extension Table .. 3 SECTION II. GETTING READY TO SEWC onnecting the Power Supply .. 4 Before Using Your Sewing 4 Speed Control 5 Controlling Sewing 5 Machine Operating Buttons .. 6-7 Removing and Attaching the Foot 8 Changing the Presser Foot .. 8 Presser Foot 8 Dropping or Raising the Feed 9 Changing the 9 Selecting Thread and 9 Bobbin the 13 Needle 14 Drawing up the Bobbin 15 LCD 16 Stitch Patterns .. 16 Adjusting the Needle Thread Tension for a Straight 17 Adjusting the Needle Thread Tension for a Zigzag 18 SECTION III. BASIC SEWINGS traight Stitch Sewing ..19 Needle 20 Straight 21 Lock-a-Matic 21 Locking 21 Stretch 21 Triple Stretch 22 Sculpture 22 Saddle 22 Zigzag 23 Overcasting with Zigzag 24 Multiple 24 Knit 24 Overedge 25 Various Kinds of Buttonholes and Their Uses.
5 25 Square the Stitch Width and Density for 28 Round-End 28 Keyhole 28 Corded 29 Darning 30 Tacking .. 31 Zipper 34 Button 35 Shelltuck 36 SECTION IV. DECORATIVE STITCHINGS callop 37 Patchwork 38 Satin 38 Cross 39 Decorative 39 Decorative Stitch 40 Correcting Distorted Stitch 40 SECTION V. CARE OF YOUR MACHINEC leaning the Hook Race and Feed 41 Installing the Bobbin 41 Problems and Warning 43 TABLE OF INSTRUCTION2qwertyuio!0!1!2!3!4!6!7!8!9! 5@0@1@2@3@4@5@6@7@8@9#0#1#3#4#5#6 Names of PartsqExtension table (Accessory box)wNeedle plateeNeedle threaderrThread cuttertFace coveryThread take-up leveruThread tension dialiSpool pinoLarge spool holder!0 Bobbin winder spindle!1 Bobbin winder stopper!2 Hole for additional spool pin!3 Value set buttons!4 Cursor buttons!5 LCD display!
6 6 Speed control slider!7 Needle up/down button!8 Auto-lock button!9 Reverse stitch button@0 Start/stop button@1 Hook cover plate@2 Presser foot (Zigzag foot A)@3 Foot holder@4 Needle clamp screw@5 Needle@6 Hook cover release button@7 Power inlet@8 Foot control jack@9 Power switch#0 Handwheel#1 Carrying handle#2 Upper thread guide#3 Presser foot lifter#4 Buttonhole lever#5 Free-arm#6 Drop feed lever#7 Foot control#8 Power supply cordSECTION I. NAMES OF PARTS#2#7#83qwertyu io!0!1!2!3 Standard AccessoriesqBobbinwSpool pin felteNeedle setrAdditional spool pintSatin stitch foot FyZipper foot EuAutomatic buttonhole foot RiSeam ripper (Buttonhole opener)oScrewdriver key!0 Lint brush!1 Small spool holder!2 Large spool holder!333 Spool standExtension TableThe extension table q provides an extended sewing areaand can be easily removed for free arm tablewTa beSlot Detaching the tablePull the table away from the machine, as illustrated.
7 Attaching the tablePush the extension table, inserting the tab w into the slote until the table snaps into the machine. Free-arm sewingFree-arm sewing is useful for darning socks or mendingknees, cuffs or areas of wear in children s II. GETTING READY TO SEWC onnecting the Power Supply Using the foot controlTu rn off the power switch the foot control plug w into the foot control jack the machine plug r into the power inlet the power supply plug y into the wall outlet rn on the power switch foot control sign i will be displayed when thefoot control is connected to the switchwFoot control plugeFoot control jackrMachine plugtPower inletyPower supply pluguWall outletiFoot control signqewrutqwter Using the start/stop buttonTu rn off the power switch the machine plug w into the power inlet the power supply plug r into the wall outlet rn on the power switch switchwMachine plugePower inletrPower supply plugtWall outletNOTE:The start/stop button does not work when the footcontrol is.
8 While in operation, always keep your eyes on the sewingarea, and do not touch any moving parts such as thethread take-up lever, handwheel or turn off the power switch and unplug from thepower supply:- when leaving the machine when attaching or removing when cleaning the not place anything on the foot control, otherwise themachine will run Using Your Sewing MachineBefore using your sewing machine for the first time,place a scrap of fabric under the presser foot and runthe machine without thread for a few minutes. Wipe awayany oil which may Instructions:The symbol O on a switch indicates the off position ofa appliances with a polarized plug (one blade widerthan the other): To reduce the risk of electric shock, thisplug is intended to fit in a polarized outlet only one it still does not fit, contact a qualified electrician toinstall the proper outlet.
9 Do not modify the plug in anyway ( and Canada only).*Foot control model YC-485EC-1 is used with thissewing Control SliderSewing speed can be varied by the speed control slideraccording to your sewing increase sewing speed, slide the slider to the decrease sewing speed, slide the slider to the Sewing SpeedDepress the foot control to start the further down you press on the foot control, the fasterthe machine maximum sewing speed can be varied by the speedcontrol ButtonLower the presser foot the start/stop button q to start the machine starts running slowly for the first fewstitches; it then runs at the speed set by the speed the start/stop button q again to stop the : The machine runs slowly as long as you press and holdthe start/stop button q. The start/stop button q cannot be used when the footcontrol is connected to the Stitch ButtonWhen stitches (00, 01, 10, 11) are selected, themachine will sew in reverse while the reverse stitch buttonis you press the reverse stitch button when sewing anyother stitches, the machine will immediately sew lockingstitches and automatically you press the reverse stitch button when stitch pattern00, 01, 10 or 11 is selected and the foot control is notconnected, the machine will sew in reverse as long as thebutton is pressed, and the machine will stop when thebutton is ButtonWhen stitches (00, 01, 10, 11)
10 Are selected, themachine will immediately sew locking stitches andautomatically stop when the auto-lock button is you press the auto-lock button when sewing any otherstitches, the machine will sew locking stitches at the endof the current pattern and automatically Needle Position ButtonPress this button to bring the needle up or machine will stop with the needle up or downdepending on the needle position determined by Operating Buttonsqq7tttttCursor ButtonsUse these buttons to move the cursor button to move the cursor to button to move the cursor to Set ButtonsUse these buttons to change the set the cursor under the digit you would like to button to increase the button to decrease the Foot LifterThe presser foot lifter q raises and lowers the can raise the foot about 1/4 ( cm)