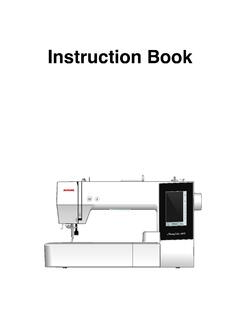
Transcription of INSTRUCTION MANUAL - Janome
1 INSTRUCTION MANUALIMPORTANT SAFETY INSTRUCTIONSThis sewing machine is not a toy. Do not allow children to play with this machine is not intended for use by children or mentally infirm persons without sewing machine is designed and manufactured for household use all INSTRUCTION before using this sewing To reduce the risk of electric shock:1. An appliance should never be left unattended when plugged in. Always unplug this sewingmachine from the electric outlet immediately after using and before Always unplug before replacing a sewing machine bulb. Replace bulb with same type rated 15 watts. 3. Do not reach for the appliance that has fallen into water. Unplug immediately. 4. Do not place or store appliance where it can fall or be pulled into a tub or sink. Do not place in or drop intowater or other To reduce the risk of burns, fire, electric shock, or injury to persons:1. Do not allow children to play with the machine. The machine is not intended for use by children or infirmepersons without proper not allow to be used as a toy.
2 Close attention is necessary when this sewing machine is used by or Use this appliance only for its intended use as described in this owner s only attachments recommended by the manufacturer as contained in this owner s Never operate this sewing machine if it has a damaged cord or plug, if it is not working properly, if it has beendropped or damaged, or dropped into Never operate the appliance with any air opening blocked. Keep ventilation opening of this sewing machine andfoot controller free from accumulation of lint, dust and loosen Never drop or insert any object into any Do not use Do not operate where aerosol (spray) products are being used or where oxygen is being To disconnect, turn all controls to the off ( O ) position, then remove plug from Do not unplug by pulling on cord. To unplug, grasp the plug, not the Keep fingers away from all moving parts. Special care is required around the sewing machine Always use the proper needle plate.
3 The wrong plate can cause the needle to Do not use bent Do not pull or push fabric while stitching. It may deflect the needle causing it to Switch this sewing machine off ( O ) when making any adjustment in the needle area, such as threading theneedle, changing the needle, threading the bobbin or changing the presser foot, and the Always unplug this sewing machine from the electrical outlet when removing covers, lubricating, or whenmaking any other adjustments mentioned in this owner s THESE INSTRUCTIONSThe design and specifications are subject to change without a prior note that on disposal, this product must be safely recycled in accordance with relevant Nationallegistlation relating to electrical/electronic products. If in doubt please contact your retailer for guidance.(European Union only.)1 TABLE OF CONTENTSSECTION 1. KNOW YOUR MACHINEName of 2 Standard 3 Accessory 3 Extension 3 Free-arm 4 SECTION 2. GETTING READY TO SEWC onnecting the Power 4 Controlling the Sewing 5 Reverse Stitch 5 Dropping the Feed 5 Raising and Lowering the Presser 6 Changing the Presser 6 Removing and Attaching the Foot 6 Changing 7 Needle and Thread 7 Winding the 8 Setting the 8 Removing the 8 Winding the 9 Inserting the 10 Threading the 11 Drawing up the Bobbin 12 Selecting the Stitch 13 Pattern selector 13 Stitch Length 13 Adjusting stretch stitch 14 Stitch Width 14 Variable needle 14 Balancing Needle Thread 15 SECTION 3.
4 BASIC SEWINGS traight Stitch 16 Starting to 16 Changing the sewing direcition Finishing 16 Seam guides on the needle 17 Truning a square 17 SECTION 4. UTILITY STITCHESB asic 18 Knit 19 Tricot Stitch (Multiple Zigzag Stitch).. 19 Straight Stretch 20 Zigzag Stretch 20 Button 214-Step 22 To adjust buttonhole stitch 22 Corded 23 Zipper 24 Blind 27 SECTION 5. DECORATIVE STITCHESD ecorative Satin 28 Decorative Stretch 29 Pin 30 Shell 31 SECTION 6. CARE AND MAINTENANCEC leaning the Hook Race and Feed 32 Replacing the Bobbin 33 Replacing the Light 342!9@0@1@2@3@4@5@6@7@8@9#0qwerty!1!2!3! 4!5!6!7!8uio!0 Names of PartsqBobbin winder stopperwBobbin winder spindleeHole for additional spool pinrSpool holdertSpool pinyBobbin winder thread guideuThread take-up leveriFace plateoThread cutter!0 Needle plate!1 Extension table (Accessory storage)!2 Hook cover plate!3 Hook cover plate release button!4 Thread tension dial!
5 5 Reverse stitch lever!6 Stitch length dial!7 Pattern selector dial!8 Stitch width dial!9 Presser foot@0 Needle@1 Needle clamp screw@2 Foot holder@3 Setscrew@4 Carrying handle@5 Handwheel@6 Power switch@7 Machine socket@8 Drop feed lever@9 Free-arm#0 Foot lifterSECTION 1. KNOW YOUR MACHINE3qwertyuio!0!1!2 Standard AccessoriesqZipper foot EwBlind hemming stitch foot GeSliding buttonhole foot JrNeedlestBobbinsyScrewdriveruLint brushiSeam ripper (buttonhole opener)oSpool holder (large)!0 Spool holder (small)!1 Additional spool pin!2 Felt cushionqqwAccessory storageThe standard accessories can be stored in theaccessory storage box under the extension out the storage box from the table storage boxExtension TableTo detach:Pull the extension table to the attach:Insert the pin into the hole and push the extensiontable to snap it in sewingFree-arm sewing is used for stitching sleeves,waistbands, pant legs or any other is also useful for darning socks or mending kneesor the Power SupplyzTurn the power switch the machine plug into the the power supply plug into the the power switch switchwMachine plugeMachine socketrPower supply plugtWall outletNOTE:Before connecting to the power supply, makesure the voltage shown on the machineconforms to your electrical 2.
6 GETTING READY TO SEWWARNING:While in operation, always keep your eyes onthe sewing area, and do not touch any movingparts such as the thread take-up lever,handwheel or turn off the power switch and unplugfrom the power supply:- when leaving the machine when attaching or removing when cleaning the not place anything on the foot control,otherwise the machine will run Instructions:The symbol "O" of a switch indicates the "off"position of a an appliance with a polarized plug (one bladewider than the other):To reduce the risk of electrical shock, this plug isintended to fit in a polarized outlet only one it does not fit fully in the outlet, reverse theplug. If it still does not fit, contact a qualifiedelectrician to install the proper outlet. Do notmodify the plug in any foot controller Model YC-482J or TJC-150 isused with the sewing machine Model 7318 (USAmarket only).5qweDropping the Feed DogThe drop feed lever is located underneath thefree-arm bed on the backside of the drop the feed dog, push the lever in thedirection of the arrow, as raise the feed dog, push the lever in thedirection of the arrow, as illustrated, and turn thehandwheel toward feed dog must be up for regular feed leverwRaised positioneLowered positionControlling the Sewing SpeedFoot controlSewing speed can be varied by the foot harder you depress the foot control, thefaster the machine Stitch LeverPush the reverse stitch lever down to sew machine will sew in reverse while the lever and Lowering the Presser FootThe presser foot lifter raises and lowers thepresser can raise the foot about 1/4" ( cm) higherthan the normal up position for easy removal ofthe presser foot, or to help you place heavy fabricunder the positionwNormal up positioneExtra up positionChanging the Presser FootTo remove.
7 Raise the needle to its highest position by turningthe handwheel counterclockwise. Raise thepresser foot, and press the lever on the back ofthe foot :Turn OFF the power switch before changing thefoot. Always use the proper foot for the selectedpattern. The wrong foot can cause the needle tobreak. Do not push the lever down to prevent itfrom being attach:Place the desired presser foot, so that the pin onthe foot lies just under the groove on the footholder. Lower the presser foot lifter to lock thefoot in and Attaching the Foot HolderWARNING: Turn OFF the power switch before detaching or attaching the foot remove:Remove the setscrew by turning itcounterclockwise with a screwdriver and removethe foot attach:Match the hole in the foot holder with thethreaded hole in the presser bar. Fit the setscrewinto the hole. Tighten the screw by turning itclockwise with a holdereHolerThreaded hole7 Changing NeedlesCAUTION:Always make sure to turn the power switch offand disconnect the machine from power supplybefore changing the the needle by turning the handwheel andlower the presser off the power the needle clamp screw by turning the needle from the clamp screwxInsert a new needle into the needle clamp withthe flat side of the needle to the inserting the needle into the needleclamp, push it up against the stopper pin andtighten the needle clamp screw pineFlat sideTo check needle straightness, place the flat sideof the needle onto something flat (a needle plate,glass etc.)
8 The gap between the needle and theflat surface should be use a blunt , Georgette, Fine Lace, OrgandyNet, TulleBatiste, Voile, Lawn, Pure Silk, Crepe de Chine,Sheer Crepe, Chambray, Handkerchief Linen,Gingham, Challis, Percale, Wool Crepe, Peau de Soie,Taffeta, Satin, Silk Surah, Satin-backedCrepe, QianaSingle Knits, Jersey, Swimwear, and TricotLeather, SuedeFlannel, Velour, Velvet, Muslin, Velveteen,Poplin, Corduroy, Broadcloth, Linen, Chintz,Gabardine, Felt, Terry, Burlap, Quilted FabricsDouble Knits, (synthetic and natural) StretchVelour, Stretch Terry, Sweater KnitsLeather, Vinyl, SuedeDenim, Sailcloth, TickingDouble Faced Wool, Heavy Coating, Fake Fur,Drapery FabricsLeather, SuedeCanvas, Duck, Upholstery FabricsTopstitching for Special FinishesTYPE of NEEDLEU niversalBall PointBlue Tipped NeedleUniversalBlue Tipped NeedleBall PointWedge PointLeather NeedleUniversalBall PointWedge PointLeather NeedleDenim NeedleUniversalWedge PointLeather NeedleUniversalTopstitching NeedleWEIGHTVery LightLightMediumHeavyVer y HeavyNEEDLE SIZE9 (65)9 (65)11 (75)11 (75)12 (80)11 (75)11 (75)11 (75)14 (90)14 (90)14 (90)16 (100)16 (100)16 (100)18 (110)16 (100)14 (90)Needle and Thread Chart8qwertqwe(A)(B)Winding the BobbinSetting the spoolPlace a spool of thread on the spool pin with thethread coming off the spool as :Press the large spool holder firmly against thespool of spool holderB.
9 For a small spool, use the small spool spool holderAdditional spool pinThe additional spool pin is for bobbin windingwithout unthreading the the additional spool pin into the the felt and a spool on the spool pinrSpool pin felttSpool pin holeRemoving the bobbinzPush the hook cover plate release button tothe right and remove the cover cover plate release buttonwHook cover platex Lift out the the bobbinzPull out the handwheel to disengage the thread from the spool. Guide thethread around the bobbin winder thread winder thread guidecThread through the hole in the bobbin fromthe inside to the the bobbin on the bobbin winder spindlewith the free end of the thread coming out atthe winder spindlevPush the bobbin to the :Do not move the bobbin winder spindle while themachine is the free end of the thread held in yourhand, depress the foot control. Stop themachine when the bobbin has been wound afew layers, and cut the thread close to the foot control again.
10 When thebobbin is fully wound, it will stop the bobbin winder to its originalposition by moving the spindle to the left, andcut the thread as in the handwheel to engage the the bobbinzPlace the bobbin in the bobbin holder with thethread running off as the thread into the front notch on thefront side of the bobbin holder. Draw thethread to the left, sliding it between thetension spring notcheTension spring bladecContinue to draw the thread lightly until thethread slips into the side notchvPull out about 4 (10 cm) of thread. Attach thehook cover plate. Check the threading byreferring to the chart shown on the hook cover plate11bzxcvzxcbvqwertyThreading the MachineTo set the needle thread:Raise the thread take-up lever to the highestposition by turning the the presser the thread from the spool and pass itunder the thread guide. Then draw it downalong the right guidewRight channelxDraw the thread up around the bottom of thethread guide the thread up along the left channeleThread guide platerLeft channelcFirmly draw the thread from right to left overthe thread take-up lever and down into thetake-up lever take-up levervDraw the thread down along the left channeland slip the thread behind the needle barthread guide from the bar thread guidebPass the thread through the needle eye fromthe front or use the needle threader (refer tothe next page).