Transcription of Instructions for Adding Date and Digital Signature Fields ...
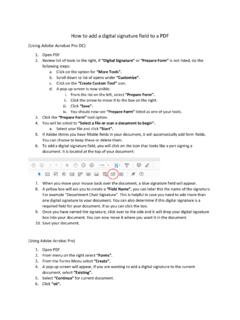
1 1 How to Add Date and Digital Signature Fields to a Portable Document Format (PDF) File Date Field In Adobe Acrobat Pro DC, open the PDF. Click the Tools tab and under Prepare Form, click Open. At the screen stating: Select a file or scan a document to begin Adobe should already display the file you have opened in Step 1. If you need to change the file, then click on Change File and browse to the correct file. a. Do not check the box next to: This document requires signatures (it changes which Signature field options are available). b. Recommendation: Change the Form Field auto detection to OFF by clicking Change and unchecking the last box in General for: Automatically detect form Fields , especially if the files you are Adding the Digital Signature field to are not forms.
2 If you choose to keep the Form field auto detection is ON you may get form Fields detected in error. If this happens, click on the Fields you do not need and delete them. Do not leave Fields that you do not need in the file because this will affect accessibility and compliance with Section 508. c. You may get a message: No form Fields detected. This is fine, especially if the document is correspondence or the file is not a form. Click Start. On the Prepare Form ribbon over the top of the document, click the icon for Add a date field. 2 Your mouse will turn into a light blue box for you to Left mouse click (and hold) > Drag a box > Release mouse button (This is where you want the date stamp field in your document).
3 Using the leader lines Release the date field under the letterhead even and centered on OFFICE OF THE SECRETARY. You will standardize the placement and size of box you create in Step 11. Within the Field Name properties box, enter Date Signed and check the box next to: Required field. In the bottom, right corner, click on the blue hyperlink All Properties. 3 In the Text Field Properties dialog box, click on the General Tab and in the Tooltip Field, add Click to Date Stamp. Click on the Appearance Tab and ensure the text font and font size matches your document. a. Note: Most DOI documents will be in Times New Roman and 12-point.
4 4 Click on the Position Tab and ensure the Position Width is 2 inches and the Position Height is inches. Click the box Do not change height and width when changing the position. This grays out the Width and Height Fields . You may click and drag the box to center it under the Office of the Secretary, Washington, DC 20240 on the electronic letterhead, as necessary. Click on the Options Tab and change the Alignment Field to Center by clicking on the drop-down menu arrow. 5 Click on the Format Tab and scroll down to highlight mmm d, yyyy . Your date will appear in the Example of current format: field. Click Close. Close the Prepare Form Tool by clicking Close in the upper-right corner.
5 Your date field appears as a light blue box. Hover your cursor in the blue date field box and the Tooltip appears, Click to date stamp. Again, you may click and drag to adjust placement of the field, as necessary. If you are date stamping the document, please continue to Steps 16 and 17. Otherwise, you are done creating the Date Stamp field. Proceed to How to Add a Signature Field to a PDF . 6 Click in the date field and a drop-down menu arrow appears. Click on the drop-down arrow for a calendar to choose your date. Congratulations! You have date stamped your document. Now, proceed to Adding a Digital Signature field to your PDF file.
6 Digital Signature Field On the Prepare Form ribbon over the top of the document, click the icon for Add a Digital Signature field. Your mouse will turn into a light blue box for you to Left mouse click > Drag a box > Release. (This is where you want the Digital Signature in your file). Release the Signature field box so the bottom of the box aligns with the bottom of the From: [Name] text line. You will standardize the placement and size of box you create in Step 7. 7 Within the Field Name properties box, enter [Person s Name] Signature and check the box next to: Required field. Click on the All Properties blue hyperlink.
7 In the Digital Signature Properties, dialog box, click on the General Tab enter Click to sign, check box to lock document in the Tooltip field. Click on the Appearance Tab, leave the font size default to Auto. The font defaults to Helvitica. You can scroll down to change the font to Times New Roman. 8 If you just added the Date Field, Adobe Uncheck the box Do not change height and width when changing the position. On the Position Tab ensure the Position Width is 3 inches and the Position Height is inches. Recheck the box Do not change height and width when changing the position. This grays out the Width and Height Fields .
8 Click Close. a. NOTE: If you have more than one Signature in your file ( , a Through line), you must give each Digital Signature field a unique name. Repeat Steps 5-11 for each Signature required. Click Close after Adding each Signature field. 8. Close the Prepare Form Tool by clicking Close in the upper-right corner. Your Signature field appears as a light blue box with the red Sign here flag. Hover your cursor in the blue date field box and the Tool Tip appears, Click to sign, check box to lock document (Click to sign) . Again, you may click and drag to adjust placement of the field, as necessary. Congratulations! You have added a Digital Signature field.
9 Save your document, adjusting the file name by Adding ready for Signature . This assists with version control. 9 Run the Accessibility Checker To check the accessibility of your document, click on the Accessibility Tool Menu, select Full Check. Click Start Checking. 10 The Accessibility Checker Menu appears on the left side of the document. Open all the arrows next to headings in bold, which indicates accessibility issues. You must address all issues marked with a question mark and red X . 11 To correct the Title Failed , right click on it and click Fix In the Description Window, uncheck Leave As Is and enter the document Title.
10 You can repeat for Subject, Author and Keywords if you wish. Click OK. The Title Failed changes to Title Passed. 12 To correct the Tagged annotations Failed, click on the Tag panel, highlight the main Tags at the top, right-click and select Find In the Find Element dialog box, click on the dropdown menu, select Unmarked Annotations, then select the radio button next to Search Document, and click Find. 13 The date field you added is highlighted. Click Tag Element, select Form in the Type field, and click OK. The next, if any, unmarked annotated field is automatically highlighted. As you can see, the Digital Signature field you added is now highlighted.